
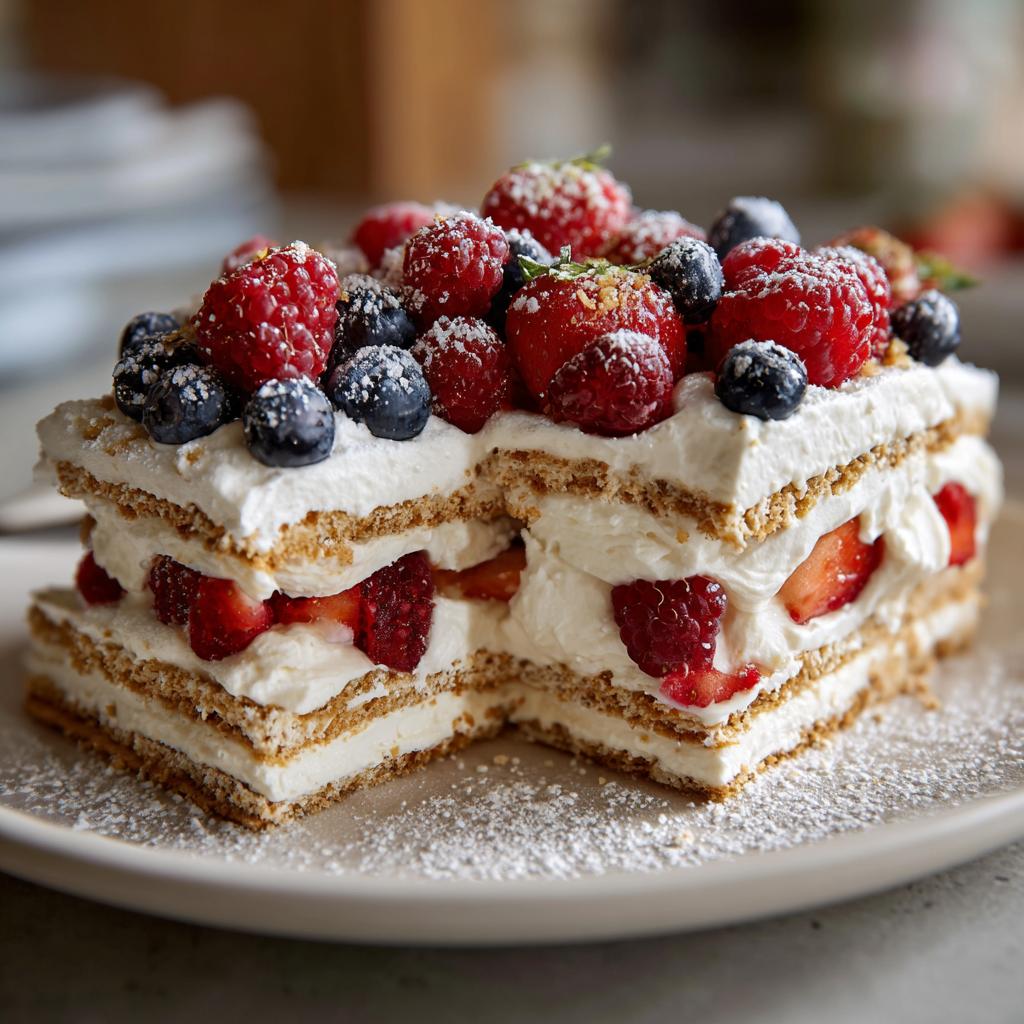
When summer temperatures hit their peak and the thought of turning on the oven makes you break into a sweat, this summer berry icebox cake becomes my go-to lifesaver. I first made this magical no-bake dessert during a heatwave last July when my book club ladies were coming over – and wow, did it become an instant hit! The beauty of this recipe is how it transforms simple ingredients (graham crackers, whipped cream, and fresh berries) into something spectacular without ever needing to preheat your oven.
What I love most is how refreshing it tastes – that cool, creamy texture with bursts of juicy berries just screams summer. And talk about easy! The first time I made it, my niece (who claims she can’t cook) impressed everyone by putting it together herself. Now it’s our family’s signature potluck dish for every summer gathering from backyard barbecues to Fourth of July celebrations. Plus, that gorgeous layered look makes it seem way fancier than the 20 minutes of actual work it requires.
Why You’ll Love This Summer Berry Icebox Cake
Listen, I get it – when the weather’s scorching, the last thing you want is to sweat over a hot oven. That’s exactly why this summer berry icebox cake has become my absolute lifesaver. Let me count the ways you’ll adore it:
- No-bake bliss: Zero oven time means you stay cool while making it – perfect for those sweltering summer days.
- Fast & fabulous: Twenty minutes prep (I timed it!) and you’re done. It practically makes itself while you lounge in the AC.
- Cool as a cucumber: That creamy, chilled texture with fresh juicy berries is like eating summer from a spoon.
- Berry delicious options: Use whatever berries are ripe or on sale – my combo of strawberries, blueberries and raspberries is just the start. Try blackberries for a fun twist!
- Party superstar: It looks so impressive layered in the dish, but shhh – it’s secretly one of the simplest no-bake desserts you’ll ever make.
Trust me, once you try this once, you’ll be making it all season. It’s even easier than my no-bake peach dessert cups – and that’s saying something!
Ingredients for Summer Berry Icebox Cake
Okay, let’s gather our goodies! This summer berry icebox cake keeps things wonderfully simple, but I’ve learned a few tricks about getting the best results from each ingredient. Here’s what you’ll need:
For the Cake
- 2 cups heavy cream – chilled (trust me, cold cream whips up SO much better)
- 1/4 cup powdered sugar – sifted if you’re feeling fancy
- 1 tsp vanilla extract – the real stuff makes all the difference
- 14 oz graham crackers – about 2 sleeves (I always buy extra because someone inevitably snacks on them!)
For the Topping
- 2 cups mixed berries – I use strawberries (sliced), blueberries and raspberries, but make it your own
- 1/4 cup powdered sugar – for that pretty dusting on top
Ingredient Notes & Substitutions
Here’s where we can get creative! If heavy cream isn’t your thing, coconut cream works beautifully – just make sure it’s the thick kind from a can. For my gluten-free friends, gluten-free graham crackers or even gluten-free vanilla wafers make a great swap.
The berries are totally flexible too – last week I used peaches when my blueberries looked sad. Frozen berries? Sure! Just thaw and pat them dry first so they don’t make the cake soggy. And if you’re feeling extra, a splash of almond extract in the whipped cream adds this amazing depth of flavor.
The key is keeping that creamy layer light but stable – which is why I’m such a stickler about chilled cream and powdered sugar (it dissolves better than granulated). But otherwise? Make it yours!
How to Make Summer Berry Icebox Cake
Alright, let’s dive into making this dreamy summer berry icebox cake! I promise it’s easier than you think – just follow these simple steps and you’ll have a showstopper dessert that’ll have everyone begging for the recipe.
- Whip it good: In your trusty mixing bowl, combine the chilled heavy cream, powdered sugar, and vanilla. Whip on medium-high until you get those glorious stiff peaks – you’ll know they’re ready when the cream holds its shape when you lift the beaters. Pro tip: chill your bowl first for even better results!
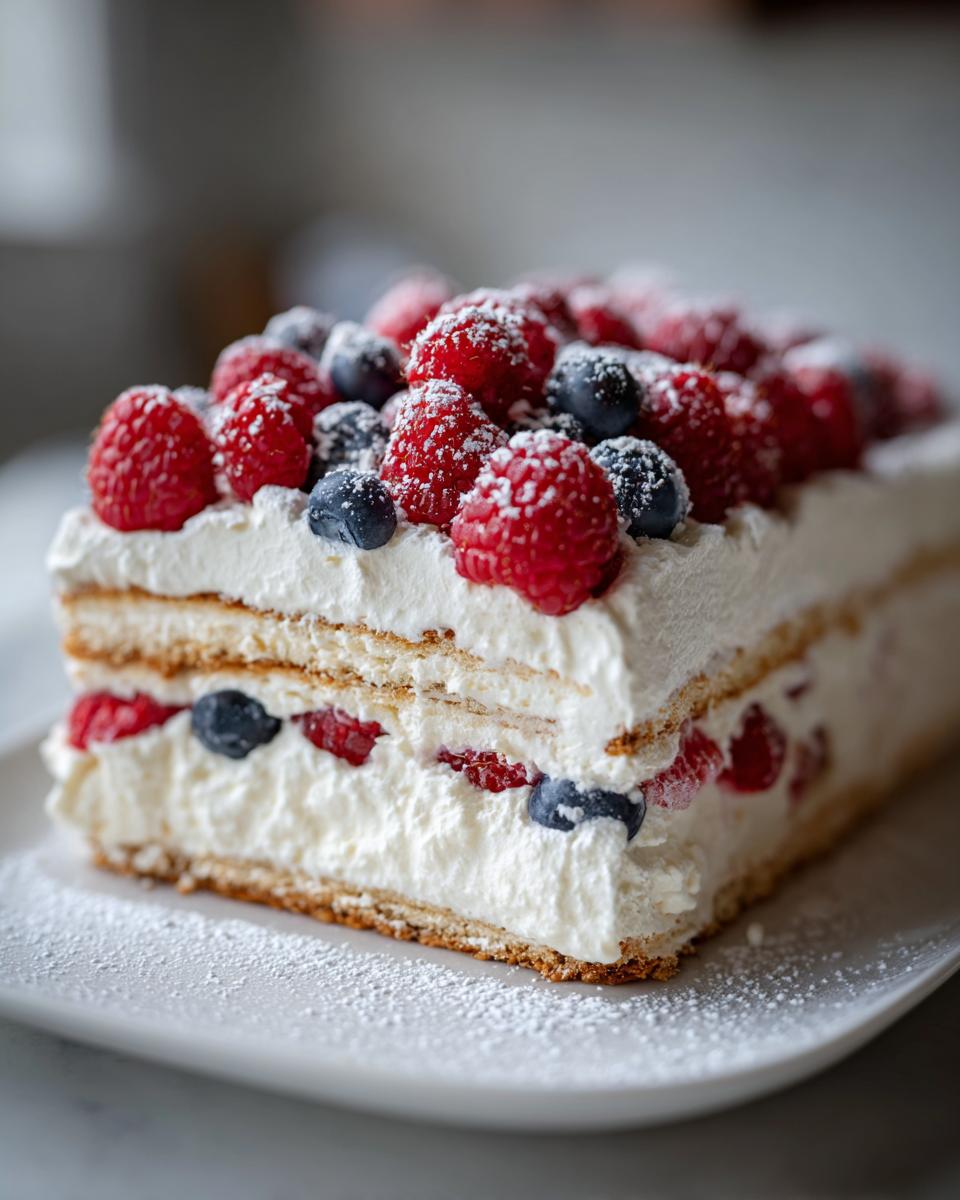
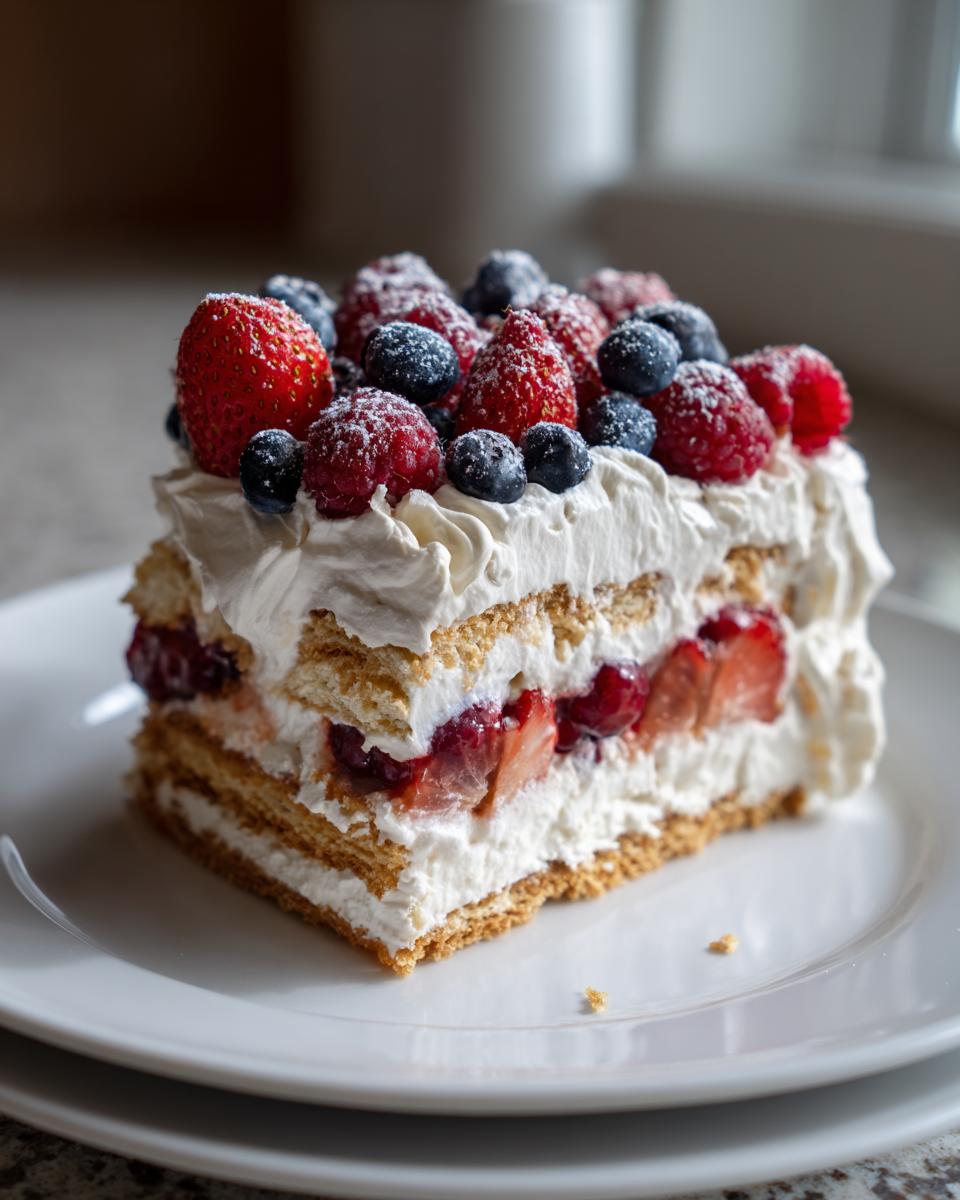
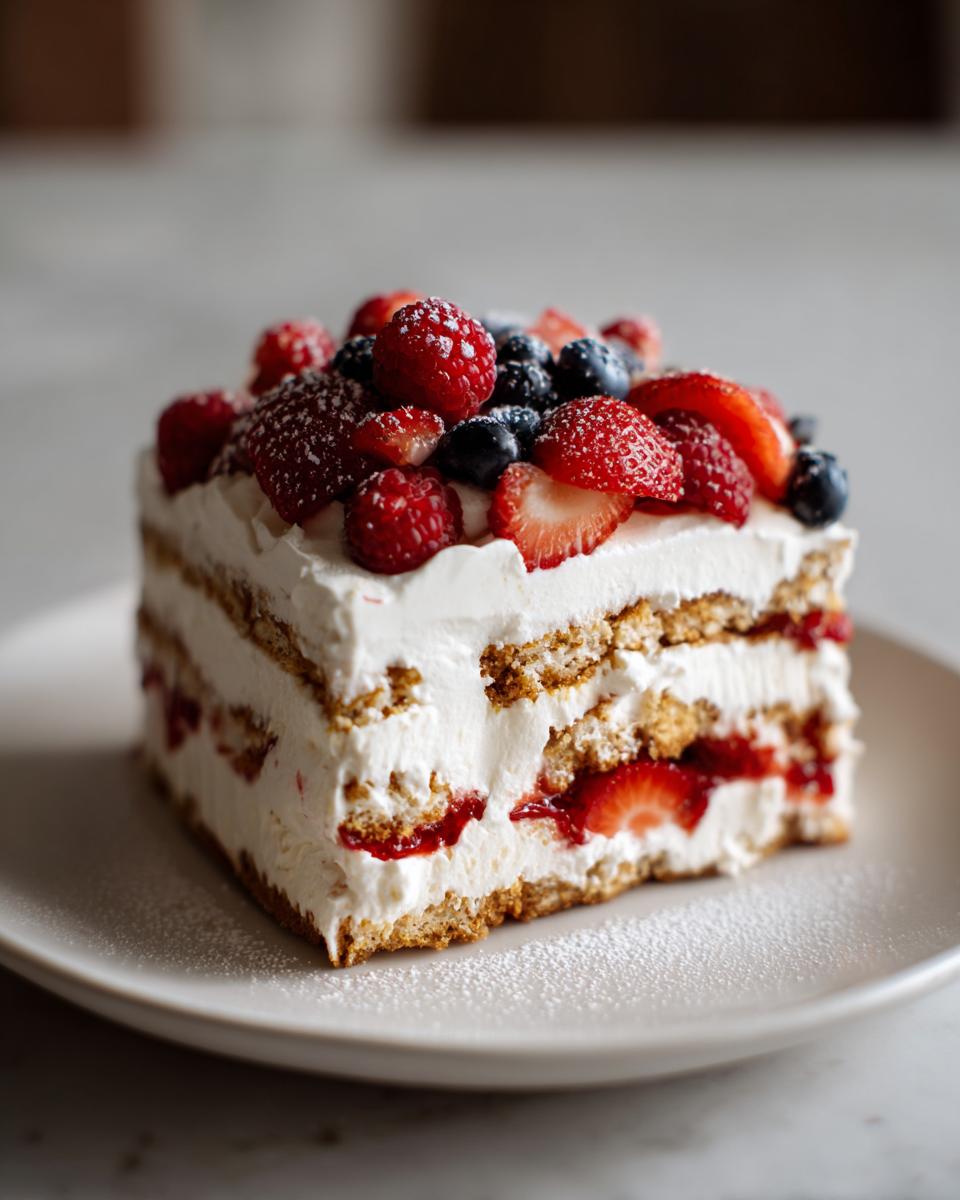
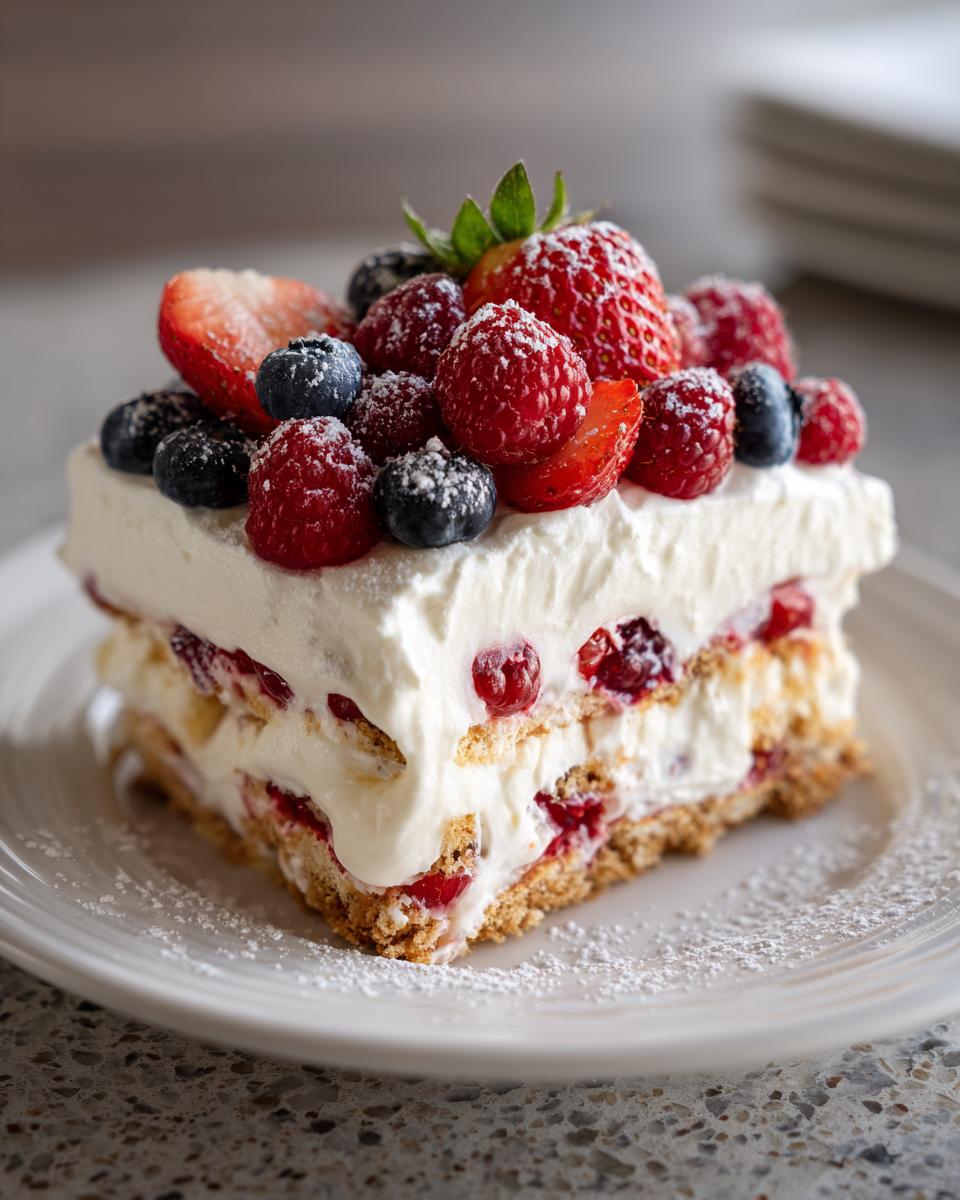
- Layer like a pro: Line the bottom of your 9×13 dish with graham crackers. You might need to break some to fill gaps – think of it like edible puzzle pieces!
- Creamy goodness: Spread half the whipped cream over the crackers. I use an offset spatula for this, but the back of a spoon works just fine. Just be gentle so you don’t crush the crackers.
- Repeat the magic: Add another layer of graham crackers, then the rest of the whipped cream. Smooth it out nice and even – this is your canvas for those beautiful berries!
- Berry beautiful finish: Artfully arrange your mixed berries on top. I like to press some into the cream slightly so they stay put. Dust with powdered sugar through a fine mesh sieve for that bakery-worthy finish.
- The waiting game: Cover and refrigerate for at least 4 hours (overnight is even better!). This lets the magic happen – the crackers soften into cake-like layers while the cream sets up perfectly.
See? Told you it was easy! If you love this layering technique, you might want to try my mascarpone berry dessert next – it’s another no-bake winner!
Tips for Perfect Layers
After making this summer berry icebox cake more times than I can count, I’ve learned a few tricks for flawless layers every time:
First, make sure your whipped cream is stiff enough – if it’s too soft, it’ll soak into the crackers too quickly. Spread it gently in an even layer, working from the center out. Leave about a half-inch border around the edges – the cream will spread as it chills. And here’s my secret: lightly press down each graham cracker layer before adding cream to help them stay put. If you’re worried about soggy crackers, you can give them a quick brush with melted butter first – but honestly, I never bother and it still turns out perfect!
Serving and Storing Summer Berry Icebox Cake
Oh, serving this summer berry icebox cake is half the fun! After its beauty sleep in the fridge (at least 4 hours, remember?), I like to pull it out about 10 minutes before serving – just enough to take the chill off so you can really taste those berry flavors. A fresh dusting of powdered sugar right before slicing makes it look extra special – I use a little sieve and pretend I’m on a cooking show!
Now, storage is easy peasy – just cover the dish tightly with plastic wrap or foil and pop it back in the fridge. It’ll keep beautifully for about 2 days, though let’s be honest – mine never lasts that long! One word of warning: don’t freeze it. The whipped cream gets weirdly grainy and the berries turn to mush – learned that the hard way last summer. But hey, that just means you’ve got the perfect excuse to eat it all fresh!
Nutritional Information
Now, I’m no nutritionist, but I do believe in keeping things real about desserts! The nutritional info for this summer berry icebox cake will vary depending on your specific ingredients – like whether you use full-fat cream or go for lower-sugar berries. All I know is it’s packed with fresh fruit goodness and made with love – and that counts for something, right? Just remember these numbers are estimates, so enjoy responsibly!
Frequently Asked Questions
Can I use frozen berries for the summer berry icebox cake?
Absolutely! Frozen berries work just fine – just thaw them completely and pat them dry with paper towels first. My trick? I let them sit on a wire rack for about 20 minutes after thawing to get rid of any excess juices. You don’t want that extra water making your cake layers soggy. I’ve even used frozen berry mixes when fresh were crazy expensive – turns out great!
How long does this no-bake dessert really need to chill?
Patience is key here! While 4 hours is the minimum, overnight chilling is magic. That’s when the graham crackers transform into these soft, cake-like layers that melt in your mouth. If you’re in a pinch (been there!), 4 hours will work, but trust me – waiting pays off. The first time I rushed it after 2 hours? Still tasty, but the layers weren’t quite right.
Can I make this summer berry icebox cake ahead of time?
One of the BEST things about this dessert is how well it works for make-ahead magic. I regularly assemble it the night before parties – the flavors just get better! Just wait to add the fresh berry topping until a few hours before serving so they stay perky. Cover tightly with plastic wrap and you’re golden. It’s perfect for when you need one less thing to worry about before guests arrive.
What’s the best way to serve this icebox cake?
I love serving it right from the dish with a big spoon – so homey! But for fancier occasions, I’ll cut neat squares using a hot knife (just dip it in&Away hot water between slices). If you’re feeling adamant, try layering individual portions in drinking glasses for a cute layered dessert presentation. Either way, dust that powdered sugar on top right before serving – it’s like edible fairy dust!
More No-Bake Summer Desserts to Try
Now that you’ve fallen in love with this summer berry icebox cake (I knew you would!), let me share a couple more of my favorite no-bake summer treats. These are perfect for when you want variety – or when you’ve eaten all the icebox cake (no judgment here!).
First up are my tropical pineapple dessert jars – they’re like sunshine in a glass with layers of pineapple, coconut cream, and crushed vanilla wafers. And for something completely different but equally addictive, try my no-bake energy bites – perfect little protein-packed treats for poolside snacking. Both take less than 15 minutes to throw together, because honestly, who wants to cook when it’s hot out?
Happy no-baking, my friends! May your summer be sweet and your kitchen stay cool.
No Bake Summer Berry Icebox Cake
Ingredients
Equipment
Method
- In a mixing bowl, whip the heavy cream, powdered sugar, and vanilla extract until stiff peaks form.
- Layer graham crackers in the bottom of a 9×13 inch baking dish.
- Spread half of the whipped cream over the graham crackers.
- Add another layer of graham crackers, followed by the remaining whipped cream.
- Top with mixed berries and dust with powdered sugar.
- Refrigerate for at least 4 hours before serving.