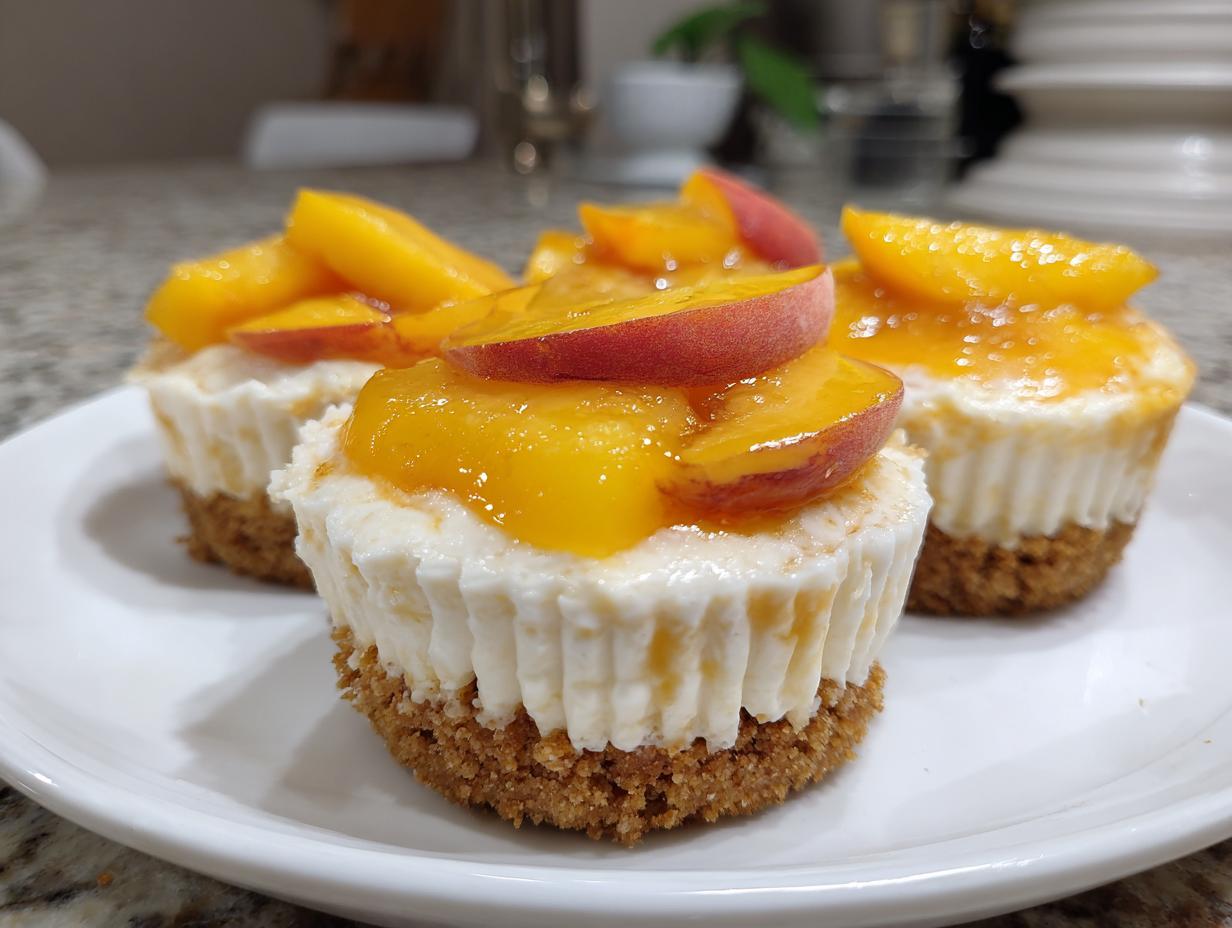
You know those sweltering summer afternoons when turning on the oven feels like a crime? That’s exactly when I discovered these magical no bake cheesecake cups. Last July, during my niece’s pool party, I was scrambling for a dessert that wouldn’t melt in the heat or require me to sweat over a hot stove. These little beauties saved the day! They’re creamy, dreamy, and require zero oven time – just mix, chill, and top with juicy peaches. Now they’re my go-to for every family gathering, backyard barbecue, and yes, especially pool parties where everyone wants something cool and sweet without the fuss.

Why You’ll Love These No Bake Cheesecake Cups
Honestly, what’s not to love? These little cups are my summer lifesavers, and once you try them, they’ll be yours too. Here’s why everyone at my last barbecue went nuts over them:
- Zero oven time – Because who wants to sweat over baking when it’s 90 degrees out? Not me!
- Ready in just 20 minutes (plus chilling) – Perfect for when you forgot to make dessert (hey, we’ve all been there)
- Dreamy creamy texture – Like biting into a cloud, but better because it’s cheesecake
- Change up the toppings – Love peaches? Great! Prefer berries? Go for it! I’ve even used crushed cookies for the kids
- Summer perfection – Cool, light, and refreshing, just what you want when it’s hot out
Last week, my neighbor Sarah begged me for the recipe after trying my peach version at our block party. That’s when I knew I had to share this gem with everyone!
Ingredients for No Bake Cheesecake Cups
Gathering ingredients for these little cups of joy is half the fun! I always make sure everything’s ready before I start – it makes the process so much smoother. Here’s exactly what you’ll need, broken down by component. Trust me, using the right amounts makes all the difference between good cheesecake cups and great ones.
For the Crust
The crust is where it all begins – that perfect buttery crunch that makes your teeth sink in happily. You’ll need:
- 1.5 cups graham cracker crumbs – I sometimes crush mine fresh for extra texture
- 6 tbsp melted butter – The glue that holds it all together
- 2 tbsp sugar – Just enough sweetness to complement the tangy filling
Pro tip: Really pack that crust mixture into the cups firmly with the back of a spoon. You want it to hold together when you take that first glorious bite!
For the Filling
This creamy dream is what makes everyone ask for seconds. Gather:
- 8 oz cream cheese – Softened! This is crucial for smooth mixing
- 1 cup heavy cream – Cold straight from the fridge whips up best
- ½ cup powdered sugar – Dissolves perfectly without graininess
- 1 tsp vanilla extract – The flavor booster
When whipping, don’t stop until you get stiff peaks – that’s when you know it’s perfectly fluffy and ready to spoon into those waiting crusts.
For the Topping
The crowning glory! My favorite part because you can get creative:
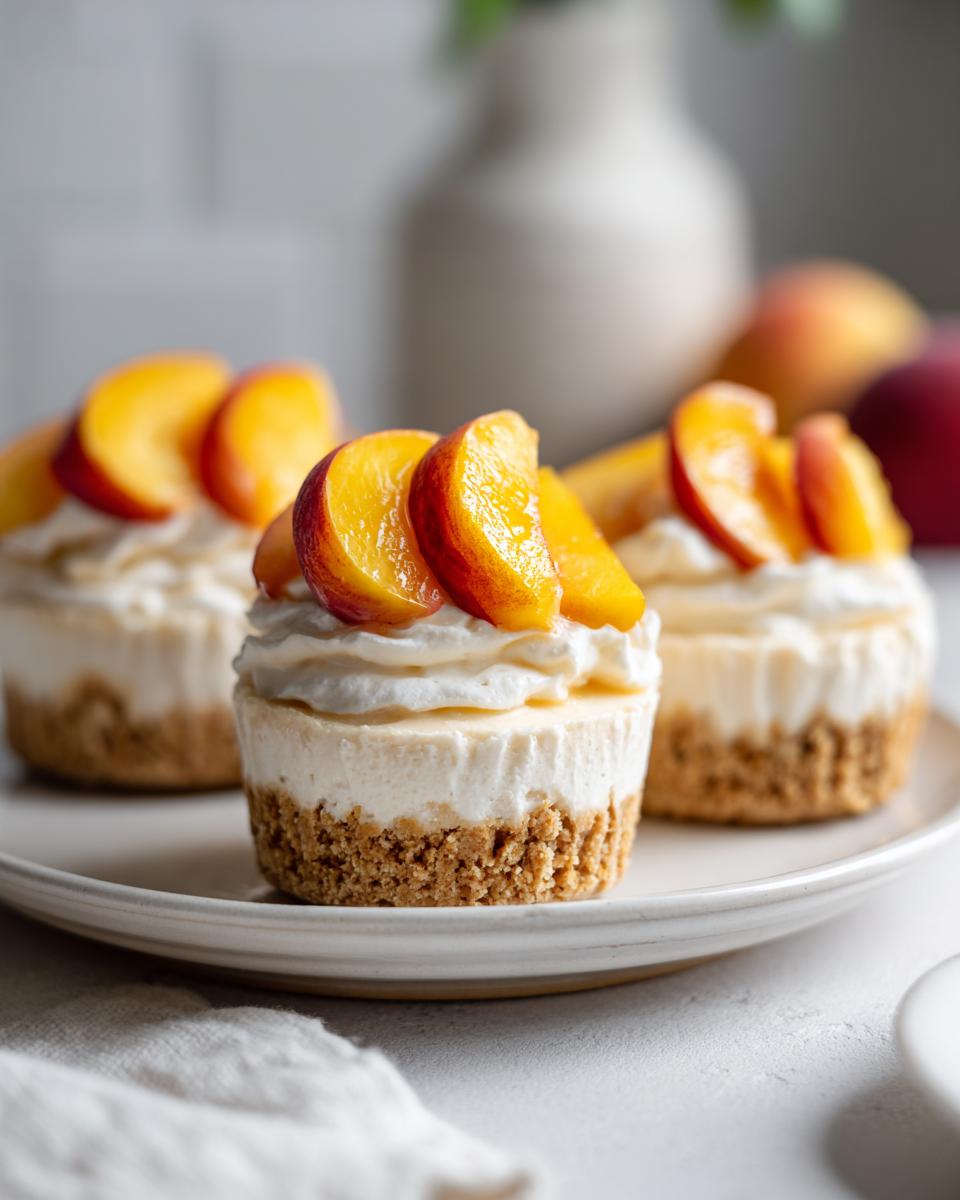
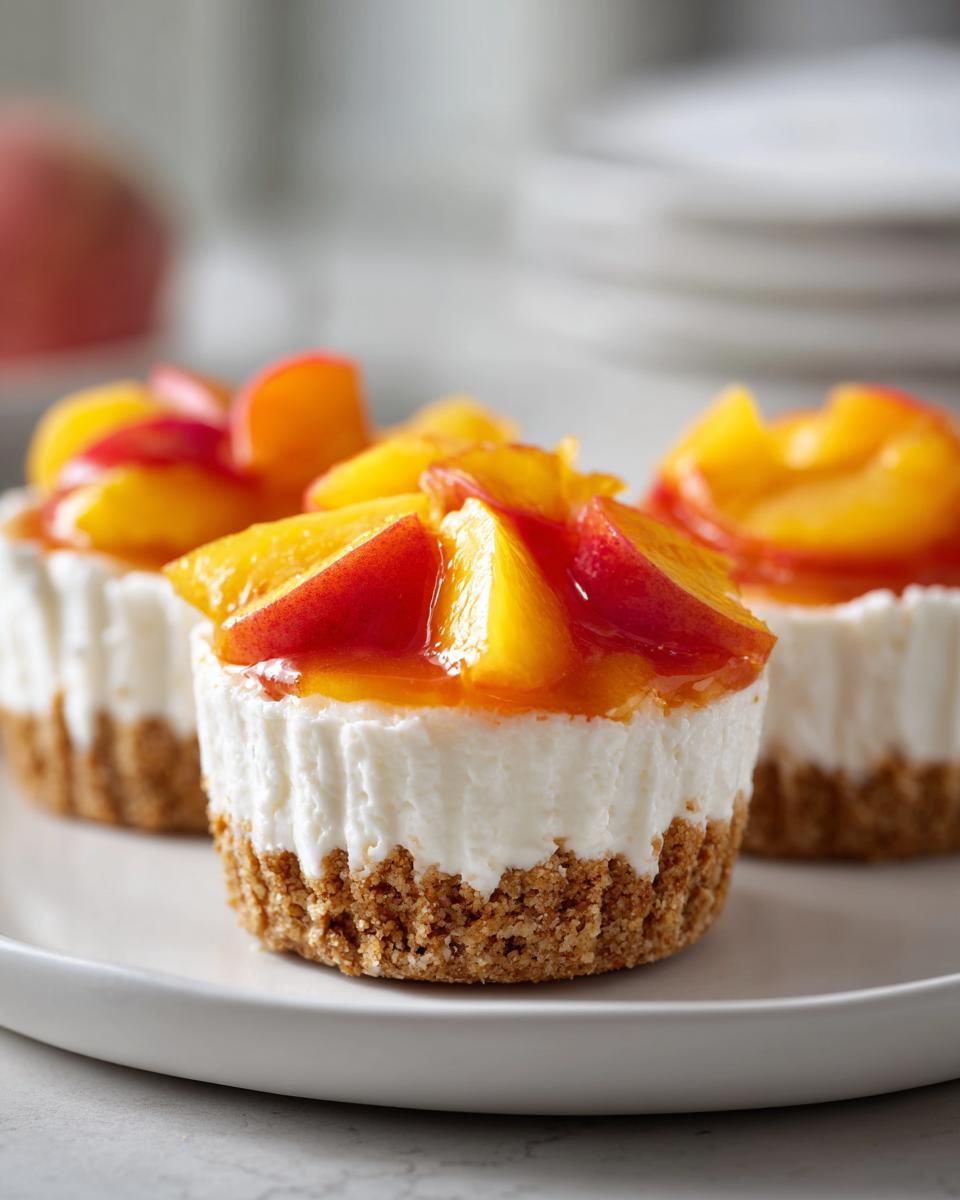
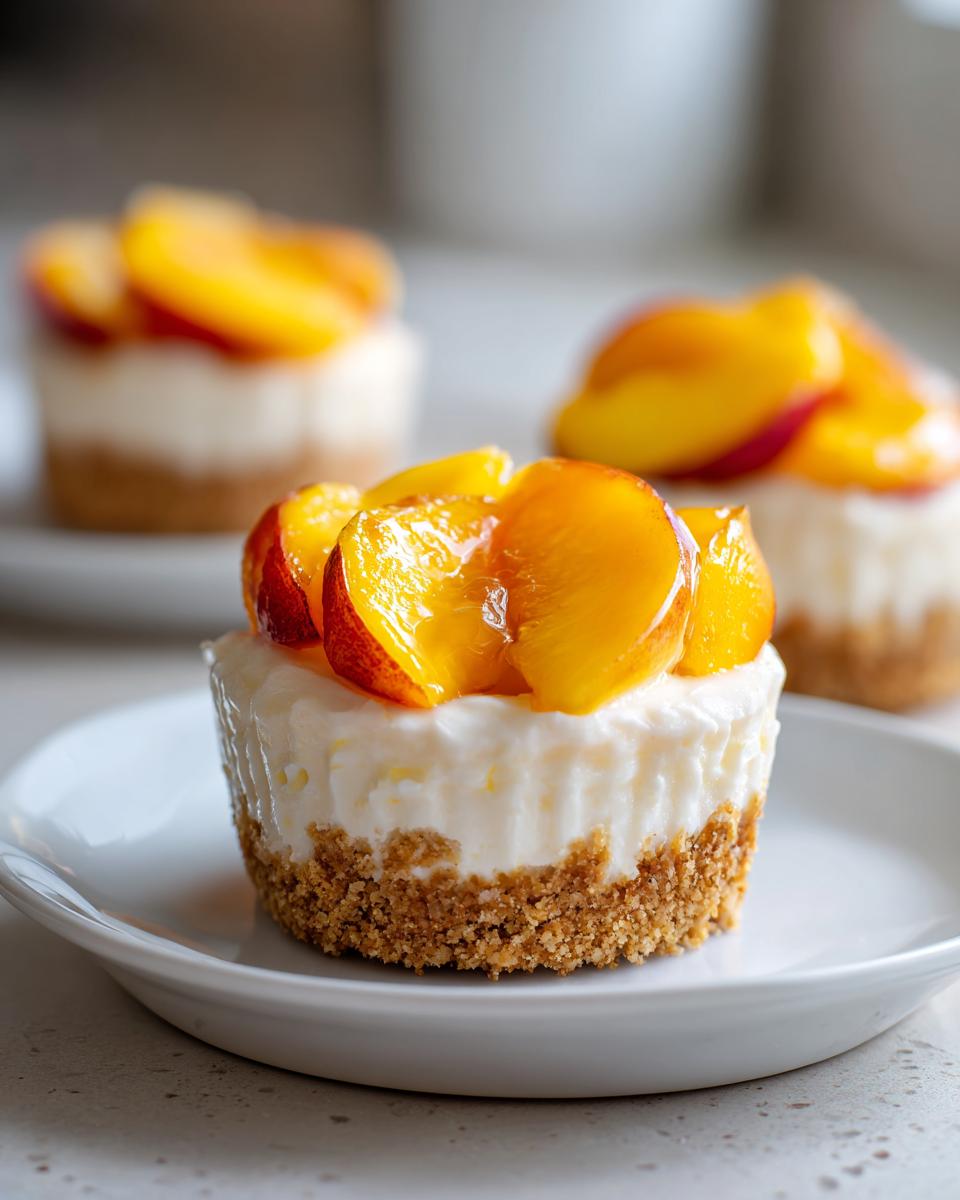
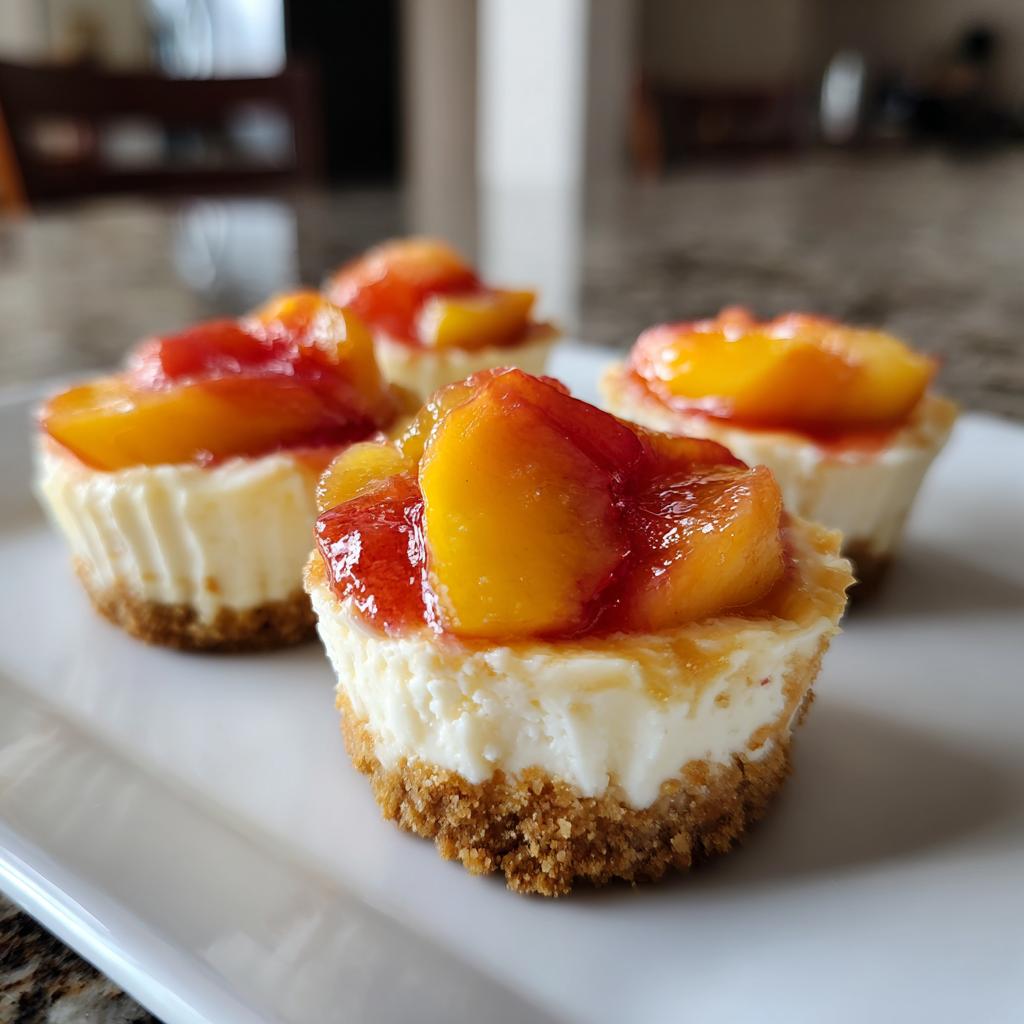
- 1 cup peach slices – Fresh summer peaches are amazing, but canned work great too
Not feeling peaches? Try berries, mango, or even a drizzle of caramel – it’s your cheesecake adventure!
How to Make No Bake Cheesecake Cups
Okay friends, let’s get mixing! These no bake cheesecake cups come together faster than you can say “pool party,” but I’ll walk you through each step like I’m right there in your kitchen with you. Don’t worry if you’re new to this – my first batch was a hilarious mess, but now I’ve got it down to a science!
Step 1: Prepare the Crust
First things first – grab that muffin tin and line it with paper liners. I learned the hard way that skipping this step leads to crumbly disasters! Mix your graham cracker crumbs, melted butter, and sugar in a bowl until it looks like wet sand. Now here’s my trick: use a shot glass or small measuring cup to really press about 1-2 tablespoons of this mixture firmly into each liner. You want it packed tight enough that it holds together when you lift it.
Step 2: Whip the Filling
Time for the magic! Beat your softened cream cheese first – I mean really beat it until it’s smooth as silk with no lumps. Then gradually add the heavy cream, powdered sugar, and vanilla. Now whip it good until you get stiff peaks that hold their shape when you lift the beaters. Pro tip: if your filling looks runny, pop the bowl in the fridge for 10 minutes then whip again. Works like a charm!
Step 3: Assemble and Chill
Spoon or pipe that creamy goodness over your crusts – I like using a piping bag for neat little swirls, but a spoon works just fine too. Here’s the hardest part: walk away! These babies need at least 2 hours in the fridge to set properly. I know it’s tempting, but trust me, waiting makes all the difference between a perfect bite and a creamy mess.
Step 4: Add Toppings
The fun part! Right before serving, top each cup with peach slices or whatever fruit makes you happy. My neighbor makes these mini custard cups with berries instead, and they’re just as delicious. Get creative – drizzle some honey, sprinkle cinnamon, or add a mint leaf for fancy points!
Tips for Perfect No Bake Cheesecake Cups
After making these cheesecake cups more times than I can count (my family keeps requesting them!), I’ve picked up some foolproof tricks to guarantee perfection every time. First – that cream cheese must be properly softened. I leave mine out for about an hour before starting. Cold cream cheese equals lumpy filling, and nobody wants that!
Always use cold heavy cream straight from the fridge – it whips up so much better. And here’s my secret weapon: a piping bag! It makes filling those cups neat as a pin. No piping bag? No problem – just snip the corner off a plastic bag.
The most important tip? Don’t rush the chilling time! Those two hours in the fridge transform the filling from creamy to perfectly sliceable. Trust me, it’s worth the wait.
Variations for No Bake Cheesecake Cups
Oh, the possibilities! One of my favorite things about these cheesecake cups is how easily you can mix them up. Last summer, I got so creative that my kids started calling them “Mom’s Dessert Surprise” – never knowing what delicious twist they’d find!
For fruit lovers, try swapping those peaches for fresh strawberries or blueberries. A chocolate drizzle over the top turns them into something fancy – I did this for book club and they disappeared in minutes. Feeling tropical? Try crushed pineapple or mango like in these pineapple dessert jars – perfect for luau parties!
Got dietary needs? No problem! Gluten-free graham crackers work beautifully in the crust. For a dairy-free version, I’ve had great results with coconut cream instead of heavy cream. The best part? No matter how you tweak them, these little cups always bring the smiles!
How to Store No Bake Cheesecake Cups
Okay, let’s talk storage because I’ve learned some hard lessons about soggy crusts and weeping cheesecakes! These little beauties keep beautifully in the fridge for up to 3 days – just cover them loosely with plastic wrap. Want to freeze them? Absolutely! They’ll last about a month frozen solid. Here’s my trick: thaw them overnight in the fridge (never at room temperature!) and add fresh toppings right before serving. One warning though – if you store them with wet fruit on top, you’ll end up with sad, soggy crusts. Trust me, I speak from messy experience!
Nutritional Information
Just a quick note about nutrition – these values are estimates and can vary depending on your specific ingredients and brands. Like my grandma always said, “Desserts are for enjoying, not counting!” But if you’re curious, each cheesecake cup gives you a nice balance of creamy goodness with a touch of fruity freshness.
Frequently Asked Questions
Can I use frozen fruit for the topping?
Absolutely! Frozen peaches or berries work great – just thaw and pat them dry first so they don’t make your crust soggy. I’ve even used frozen mango in a pinch when I was craving something tropical. The key is to drain any excess liquid so your no bake cheesecake cups stay perfect!
How long do these cheesecake cups last in the fridge?
They’ll stay delicious for about 3 days if you store them properly. Just cover them loosely with plastic wrap or pop them in an airtight container. Pro tip: Keep the toppings separate until serving time – I learned this the hard way when my peach juice made the crusts soft overnight!
Can I make these cheesecake cups vegan?
You bet! I’ve had great success using dairy-free cream cheese and coconut cream instead of heavy cream. For the crust, just swap the butter for coconut oil. My vegan friends couldn’t believe how creamy they turned out – perfect for summer potlucks where dietary needs vary!
What if my filling won’t thicken?
Don’t panic! This happens sometimes if your cream wasn’t cold enough. Just pop the bowl in the fridge for 10-15 minutes, then whip it again. If it’s still too soft, add a bit more powdered sugar (about 1 tbsp at a time) until you get those dreamy stiff peaks. Works every time!
Ready to Make No Bake Cheesecake Cups?
Now that you’ve seen how easy these cheesecake cups are, it’s your turn to whip up some magic! I can’t wait for you to experience those first creamy bites – the way the buttery crust crumbles just right against the tangy-sweet filling. When you make them (because you totally should!), snap a pic and tag me. I love seeing all the creative topping combos people come up with. Happy no-bake baking, friends!
Pool Party No-Bake Cheesecakes
Ingredients
Equipment
Method
- Line a muffin tin with paper liners.
- Mix graham cracker crumbs, melted butter, and sugar in a bowl. Press 1-2 tablespoons into each liner to form the crust.
- Beat cream cheese until smooth. Add heavy cream, powdered sugar, and vanilla. Whip until fluffy.
- Spoon the filling over the crusts. Chill for at least 2 hours.
- Top with peach slices before serving.