There’s nothing quite like that first sip of a homemade summer cooler when the temperature climbs. I remember sweltering through afternoons at my grandmother’s house, where the only remedy was her famous 3-ingredient lemonade or a frosty strawberry cooler blended with fruit from her garden. Now I make these easy drinks for my own kids when they come in from playing in the sun – their faces lighting up the moment they see the pitcher on the counter. Whip up these homemade summer coolers in just minutes with basic ingredients, and you’ll taste why they’ve been my family’s go-to refreshment for generations.
Why You’ll Love These Homemade Summer Coolers
Trust me, once you try making these at home, you’ll never go back to store-bought versions again. Here’s why:
- Quick as a summer breeze: Both drinks come together in under 10 minutes—faster than waiting in line at a juice bar!
- Instant refreshment: That first icy sip on a scorching day? Pure magic. The lemonade zings and the strawberry cooler is like liquid sunshine.
- Your rules: Like it sweeter? Add more sugar. Want it tart? Cut back. Toss in mint, basil, or whatever fruit you’ve got—this is your thirst-quenching playground.
- Childhood nostalgia in a glass: These coolers taste like summer vacation—no fancy ingredients required, just honest, bright flavors that hit the spot every time.
Ingredients for Homemade Summer Coolers
What I love about these drinks? You probably have most of the ingredients sitting in your kitchen right now! I’ve made these coolers with whatever’s on hand for years, but here’s the classic lineup that always works perfectly.
For the Lemonade
My grandma would slap my wrist if I didn’t remind you: fresh lemons only! No shortcuts with bottled juice if you want that bright zing. Here’s your shopping list:
- 4 cups cold water (fridge-chilled makes all the difference)
- 1 cup fresh lemon juice (about 6 juicy lemons—roll them first to get more juice!)
- ½ cup sugar (start here—you can always add more to taste later)
- 1 cup ice cubes (crushed works great too)
For the Strawberry Cooler
When strawberries are in season, I’ll double this batch and freeze half for later. Pro tip: smell your berries before buying—they should be fragrant even through the container!
- 2 cups fresh strawberries, hulled (if they’re small, just slice the tops off)
- 3 cups cold water (ice water gives it instant chill factor)
- ¼ cup sugar (strawberries are sweet already, so we go lighter here)
- 1 cup ice cubes (trust me, you’ll want that extra frosty texture)

Equipment You’ll Need
You probably have everything needed for these homemade summer coolers already – just rummage through those kitchen cabinets! Here’s what I grab every time:
- Good ol’ blender: For that silky strawberry puree. Doesn’t need to be fancy – my $20 one has survived countless summers.
- Large pitcher: Glass lets you admire the colors, but plastic won’t break when kids handle it. Mine holds memories of dozens of backyard parties.
- Fine mesh strainer (optional): If you prefer seedless strawberry cooler like my aunt makes, this is worth digging out of the drawer.
- Wooden spoon: For mixing that sugar into the lemonade until it dissolves completely – no gritty surprises!
- Measuring cups: Eyeballing works in a pinch, but exact measures ensure consistent flavor every time.
That’s it! No special tools required. Sometimes I’ll bust out the citrus squeezer if my hands are tired, but honestly? A good old-fashioned hand squeeze works just fine.
How to Make Homemade Summer Coolers
Ready to transform simple ingredients into liquid summer magic? I’ve made these coolers a hundred different ways, but always come back to these foolproof methods. Whether you’re hosting a backyard bash or just need a quick cool-down after gardening, here’s exactly how I do it.
Making the Lemonade
This is where my grandmother’s wisdom shines: dissolve that sugar completely! Nothing worse than gritty lemonade. Here’s my technique:
- Pour 1 cup of cold water into your pitcher first—this gives the sugar something to melt into.
- Add the sugar gradually while stirring with your wooden spoon. Keep going until you can’t see any crystals—about 2 minutes of patience pays off.
- Mix in the lemon juice (freshly squeezed only—I’ll know if you cheated!). Taste and adjust sweetness if needed.
- Add remaining 3 cups water and ice. Stir just until combined—overmixing makes it cloudy.
Pro tip from my cousin’s food blog: Try adding a pinch of salt to balance flavors like they do in professional kitchens—it’s a game changer!
Making the Strawberry Cooler
The secret here? Blend until you can’t see even tiny strawberry bits—that silky texture makes all the difference.
- Toss strawberries, water, and sugar into the blender. Lid on tight!
- Blend on high for about 45 seconds. Peek inside—it should look like pink velvet.
- Optional strain step: Pour through a mesh strainer if you dislike seeds (my kids call this “fancy juice”).
- Transfer to a pitcher and stir in ice. The colder the better!
Fun variation: Swap some water with coconut water like this tropical fruit recipe suggests—adds amazing depth.
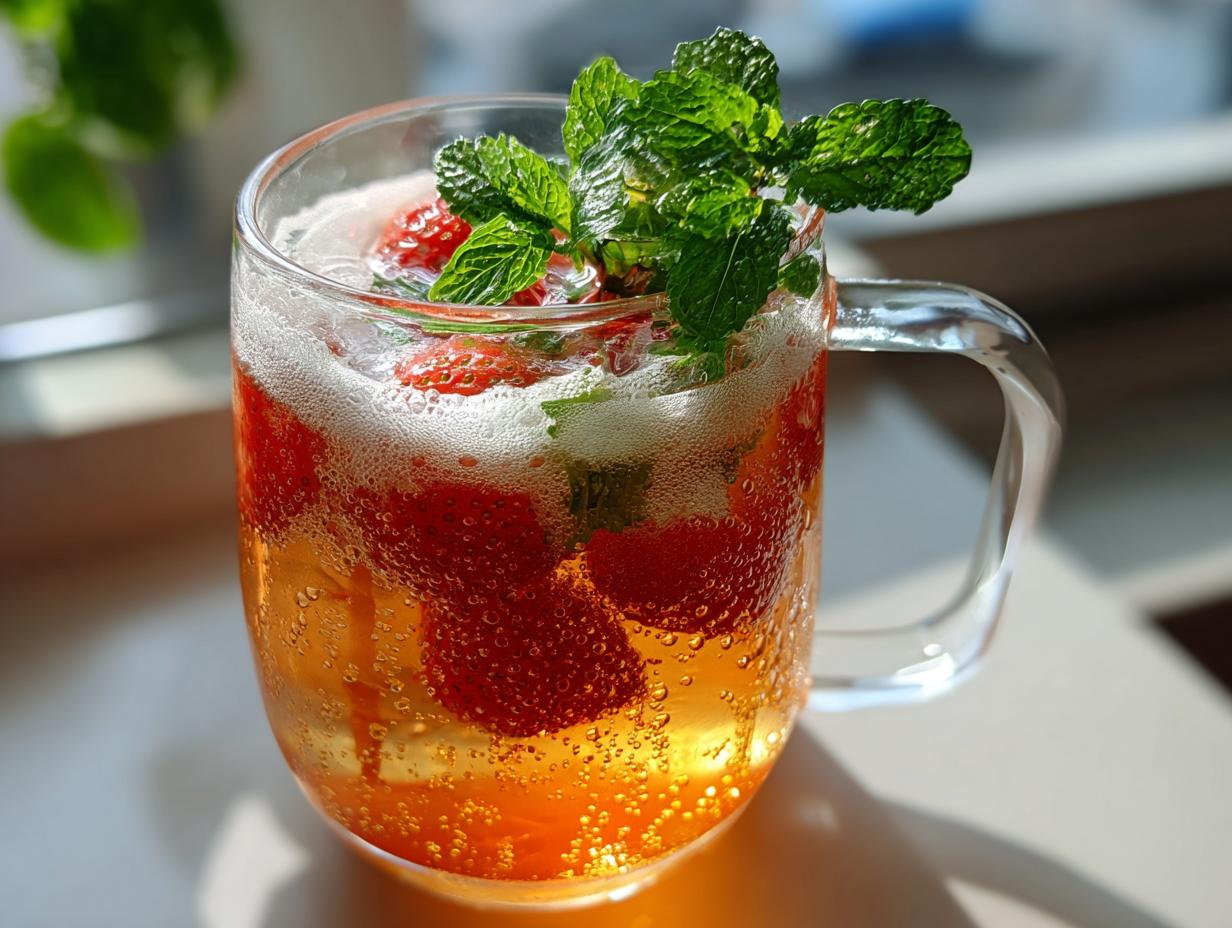
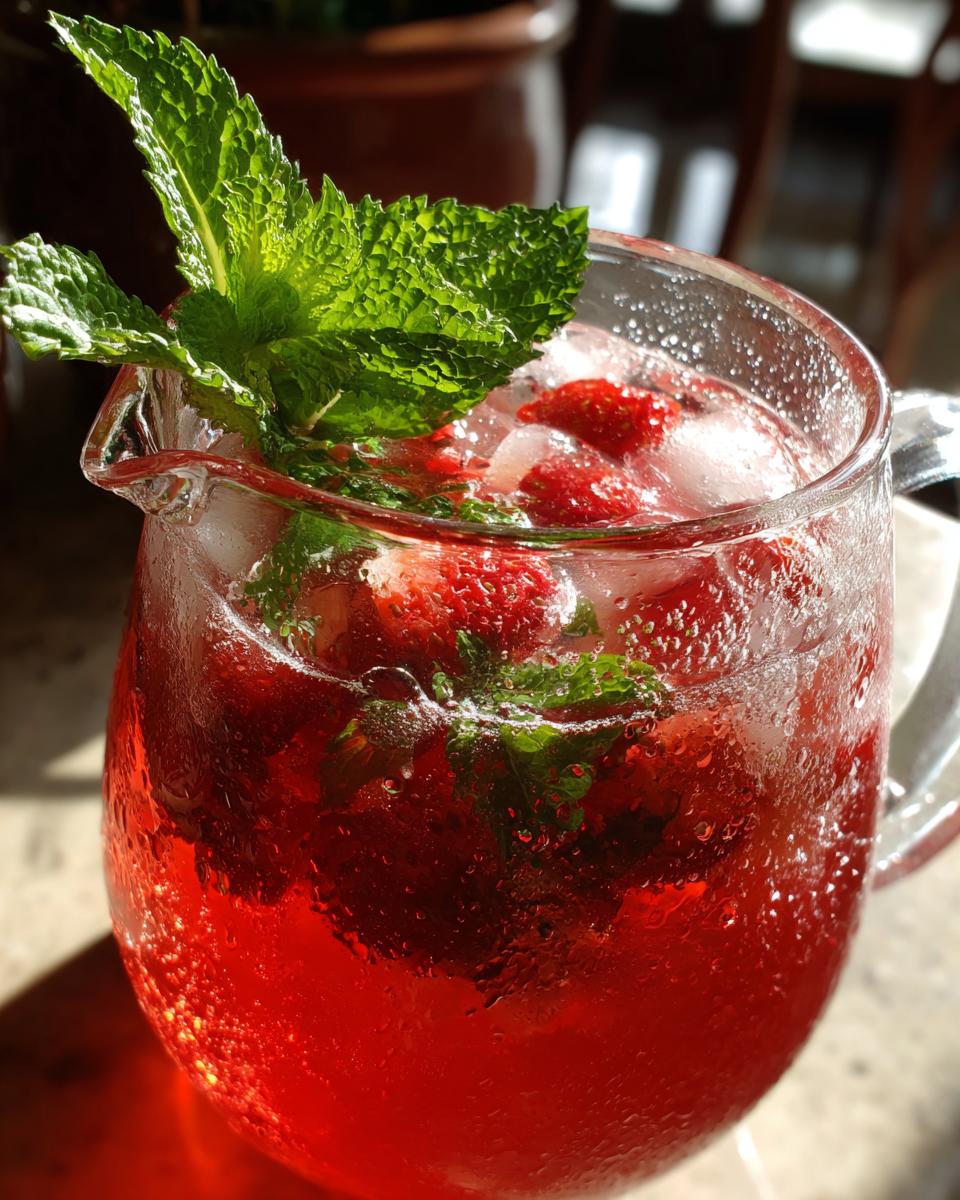
Now here’s my favorite part: Presentation! Pour over ice in mason jars, garnish with whole strawberries or lemon slices, and serve immediately. That first sweet-tart sip will have everyone asking for your “secret recipe”—just don’t tell them how easy it was!
Tips for the Best Homemade Summer Coolers
After making these coolers every summer since I was tall enough to reach the blender, I’ve picked up some tricks that’ll take yours from good to “can I get your recipe?” good:
- Fresh is best: Those strawberries should make your whole kitchen smell sweet before they even hit the blender. And lemons? Warm them for 10 seconds in the microwave first – you’ll squeeze out double the juice!
- Sweetness test: Always mix a tiny bit first. Dip a spoon, taste, then adjust. Remember – you can always add more sugar but can’t take it out!
- Chill factor: Use water straight from the fridge and add ice last so it doesn’t melt too fast. My kids love it when I freeze berry slices into the ice cubes for extra flair.
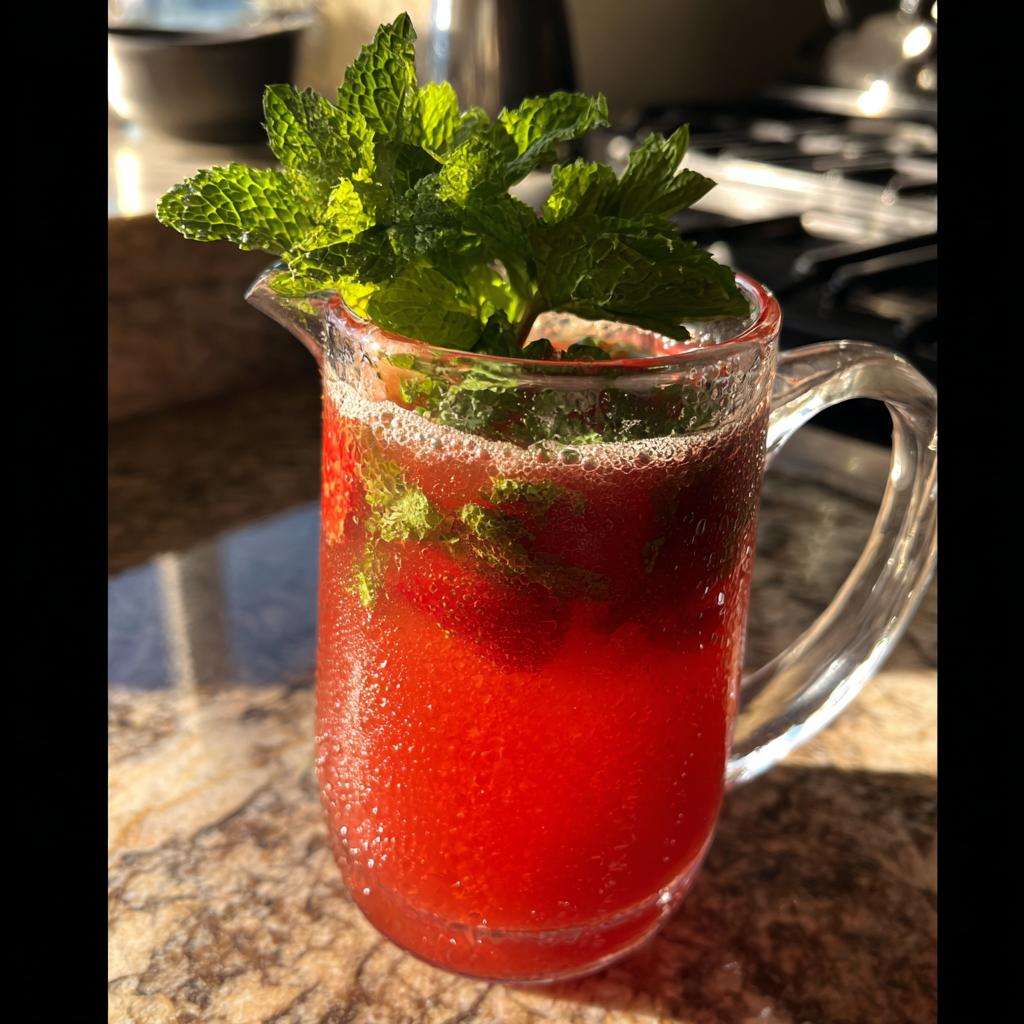
- Garnish game: A mint sprig or citrus wheel isn’t just pretty – it gives that refreshing herbal aroma with every sip. Basil works magic too if you’re feeling adventurous.
The real secret? Make extra. These disappear faster than sunscreen in July!
Variations to Try
The fun really starts when you play with these recipes! My neighbor swaps in cucumber slices for half the lemons – shockingly refreshing. Or try raspberries instead of strawberries when they’re in season (just strain extra carefully). Tropical mood? Mango puree makes an incredible orange-hued cooler that kids adore. Last summer’s hit? Frozen watermelon cubes blended right in – no added water needed. Your creativity (and whatever’s overly ripe in the fridge) is the only limit!
Serving Suggestions
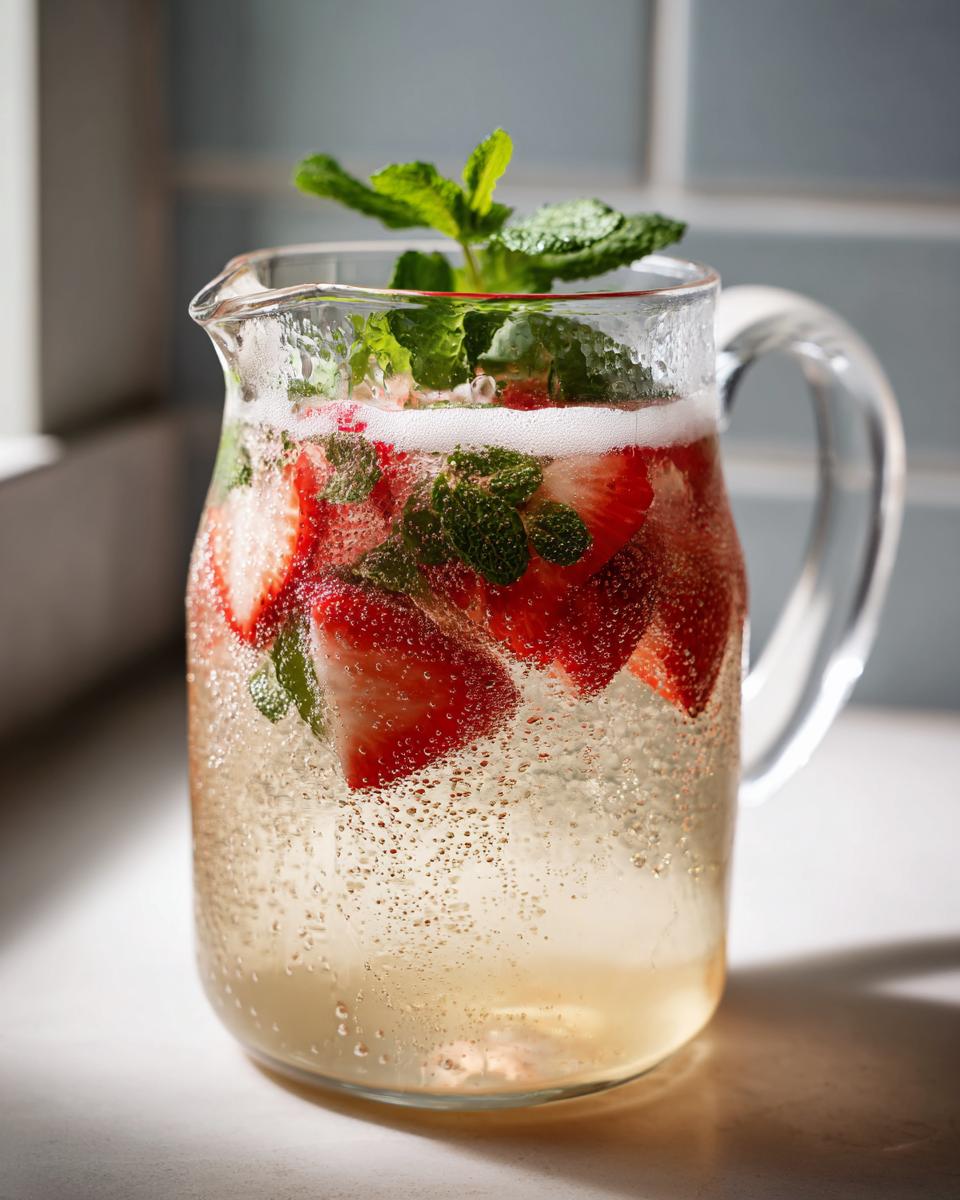
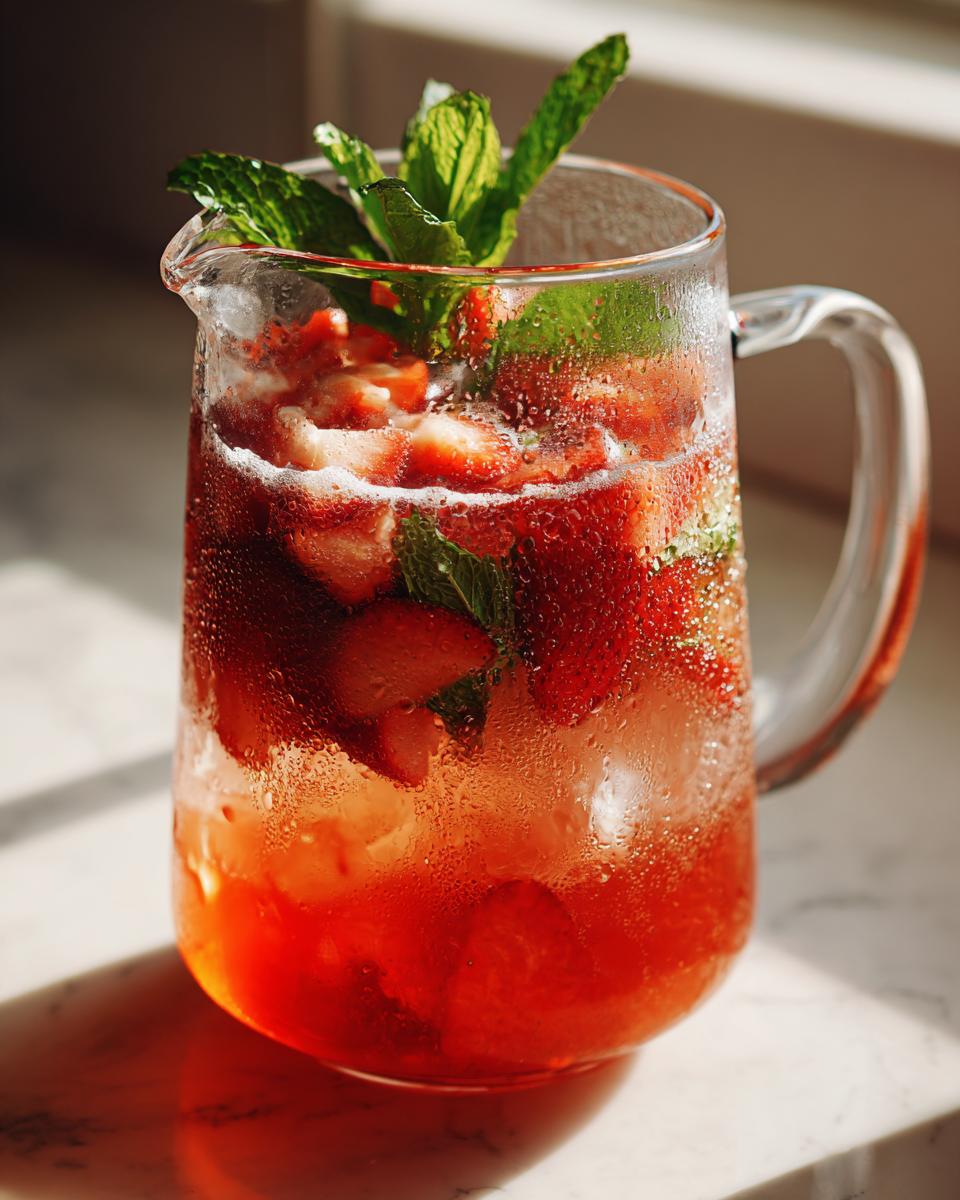
Nothing beats these coolers poured over ice in my grandmother’s old mason jars – those wide mouths are perfect for adding fun garnishes! For the lemonade, float thin citrus slices and a sprig of mint from the garden. The strawberry cooler looks gorgeous with a skewer of fresh berries perched on the rim. Serve them alongside simple summer snacks: fresh watermelon wedges, salty pretzels, or my kids’ favorite – cheese and crackers. These drinks turn any ordinary afternoon into an instant picnic!
Nutritional Information
Let’s be real – we’re not counting calories when enjoying these homemade summer coolers! Since ingredients vary (are your strawberries extra sweet this season? Did you use organic cane sugar?), exact numbers would just be guesses. What matters is that fresh lemon juice packs vitamin C, strawberries bring antioxidants, and every sip tastes like pure summer joy without artificial junk. Enjoy guilt-free!
Frequently Asked Questions
I get asked about these homemade summer coolers all the time—here are the most common questions (and my slightly opinionated answers)!
Can I use bottled lemon juice instead of fresh?
Oh honey, I won’t scold you—but fresh lemons make all the difference! That bright zing in my grandma’s recipe comes from real lemon juice with its natural oils. Bottled works in a pinch, but the flavor flattens out. If you must use bottled, cut the sugar by half—those concentrates are sweeter than fresh squeezed.
How long do these coolers last in the fridge?
The strawberry cooler stays perfect for 2 days (give it a good stir before serving). Lemonade? 3 days max—after that it starts tasting dull. Pro tip: don’t add ice to the pitcher until serving, or it’ll water down your masterpieces! Both freeze great though—pour into ice cube trays for instant summer popsicles.
Can I make them ahead for a party?
Absolutely! Prep the bases the night before—just hold the ice. The strawberry puree might separate, but a quick re-blend fixes it. For large batches, mix the lemonade concentrate (juice + sugar) separately, then combine with cold water when guests arrive. Your future self will thank you during the party madness!
What if my strawberries aren’t very sweet?
Been there! Taste your berries first—if they’re bland, add 1 tsp vanilla extract to the blender. It’s my magic trick! Or swap ½ cup water with orange juice for natural sweetness. Frozen berries work too—just thaw first and expect a deeper pink color.
One last tip: always make extra. Between kids refilling their cups and neighbors “just stopping by,” these refreshing drinks disappear faster than fireflies at dusk!
Ingredients
Equipment
Method
- For the lemonade, mix water, lemon juice, and sugar in a pitcher until sugar dissolves.
- Add ice cubes and stir well.
- For the strawberry cooler, blend strawberries, water, and sugar until smooth.
- Strain the mixture into a pitcher and add ice cubes.
- Serve both drinks chilled.