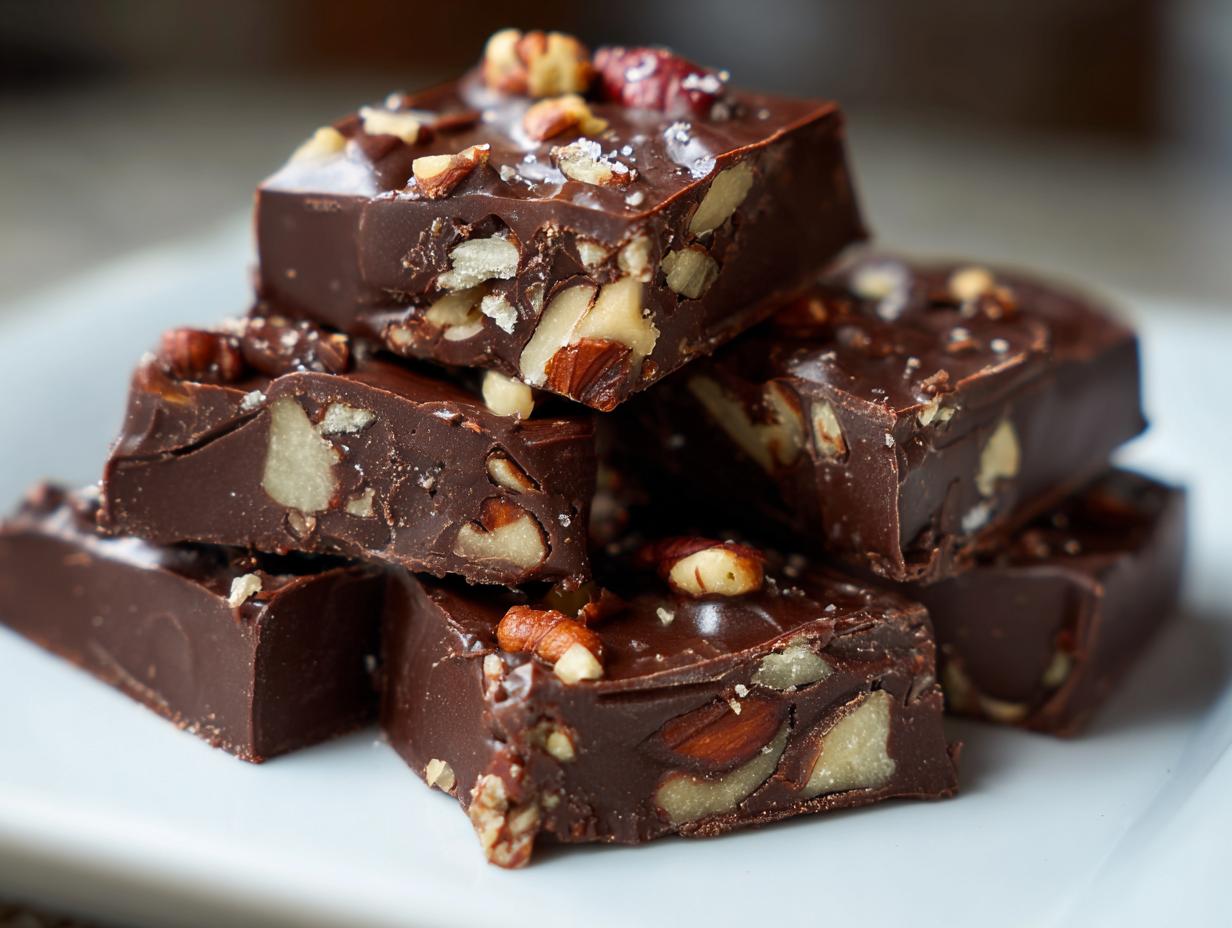
You’ll never catch me buying boxed chocolates again after discovering these fail-proof homemade chocolate candy recipes! There’s something magical about transforming simple ingredients into rich, melt-in-your-mouth treats with endless customization possibilities. My love affair began when I whipped up a batch for my niece’s birthday – those heart-shaped chocolates filled with toasted almonds and dried cherries became our family’s new tradition.
What I adore most about making homemade chocolate candy is how it turns basic pantry items into luxurious gifts that make people feel special. Just last Christmas, my brother actually begged me to “forget the fancy presents” and just make him another tin of those sea salt caramel chocolates. The best part? These recipes are shockingly simple – even for kitchen novices!
Whether you’re prepping for a holiday party or just craving something sweet, homemade chocolate candy recipes let you play chocolatier without the fuss. You get to control every bite, from the type of chocolate (I’m partial to dark, but milk chocolate works too!) to those creative mix-ins that make each batch uniquely yours. Trust me, once friends and family taste your creations, they’ll be asking for your “secret recipe” every occasion!
Why You’ll Love These Homemade Chocolate Candy Recipes
Let me tell you why these homemade chocolate candy recipes are about to become your new favorite kitchen project:
- Simpler than you think – With just a handful of ingredients and minimal equipment, you’ll be amazed at how professional your chocolates look (and taste!)
- Endless flavor playground – Swap in different nuts, dried fruits, or even a pinch of chili powder to make each batch unique. Last week I added orange zest and cardamom – instant holiday hit!
- Gifts that wow – Nothing says “I care” like hand-poured chocolates in pretty boxes or jars. My neighbors still rave about the lavender-honey truffles I gave them last Valentine’s Day
- Kid-friendly fun – My niece and nephew love picking their own mix-ins (rainbow sprinkles are their current obsession). It’s our rainy-day activity
- No bakery price tag – Quality chocolate plus pantry staples equals gourmet treats at a fraction of store-bought costs
Honestly? Once you see how easy and rewarding homemade chocolate candy can be, you might just start planning your next batch before the first one’s even finished setting!
Essential Ingredients for Homemade Chocolate Candy Recipes
Let me walk you through the simple ingredients that make these homemade chocolate candies so irresistible. I’ve learned through trial and error that quality matters here – but don’t worry, we’re not talking fancy chef’s pantry stuff!
For the Chocolate Base:
- 2 cups dark chocolate chips – I prefer 60-70% cacao for that perfect balance of sweetness and depth. Those big bags from the baking aisle work great!
- 1 tbsp coconut oil – This little miracle worker gives our chocolate that gorgeous shine and helps it melt smoothly. You won’t taste it, I promise.
Optional Mix-Ins (Pick Your Favorites!):
- 1/2 cup chopped nuts – Almonds, pecans, or hazelnuts add wonderful crunch. Toast them first for extra flavor – just watch they don’t burn!
- 1/4 cup dried fruit – Tart cherries or apricots are my go-tos, but raisins work in a pinch. Chop them small so they distribute evenly.
That’s seriously it! With just these few ingredients, you’re ready to make chocolate magic. The beauty of homemade candy is how easily you can adapt it – last week I swapped in crushed peppermint candies for the nuts and created instant holiday treats!
How to Make Homemade Chocolate Candy Recipes
Alright, let’s get to the fun part – making these irresistible homemade chocolate candies! I promise it’s easier than you think, and I’ll walk you through each step like I’m right there in the kitchen with you. The key is taking your time and enjoying the process – after all, you’re about to create something delicious!
Melting the Chocolate
First things first – let’s melt that chocolate to silky perfection. I always use a double boiler (just a heatproof bowl over simmering water) because it gives me the most control. Here’s my foolproof method: Fill the bottom pot with about an inch of water – make sure it doesn’t touch the bowl above! Keep the heat low and stir constantly with a rubber spatula. The chocolate and coconut oil will melt together beautifully in about 5 minutes. Pro tip: If you don’t have a double boiler, check out these easy chocolate chip dessert recipes for microwave melting tips – just be extra careful not to overheat!
Adding Mix-Ins
Now for the creative part! Once your chocolate is smooth and glossy, take it off the heat before stirring in your goodies. I like to add nuts first since they’re heavier – give them a good stir to coat evenly. Then fold in the dried fruit gently so it doesn’t clump. Feeling adventurous? Try swapping in crushed cookies, toffee bits, or even a pinch of sea salt. The possibilities are endless – that’s what makes homemade chocolate candy so special!

Setting the Candy
Here’s where patience comes in (the hardest part for me!). Pour your chocolate mixture into silicone molds – they make popping out the candies a breeze. Let them sit at room temperature for about 10 minutes to set slightly before transferring to the fridge. This prevents condensation from making them sticky. Chill for at least an hour until firm to the touch. Trust me, the wait is worth it when you bite into that perfect snap!
See? I told you it was simple! Now you’ve got the basics down, you can start experimenting with all sorts of flavor combinations. Before you know it, you’ll be giving the fancy chocolatiers a run for their money!
Tips for Perfect Homemade Chocolate Candy Recipes
After making more batches of homemade chocolate candy than I can count (and eating my fair share of “testers”), I’ve picked up some foolproof tricks to guarantee success every time. First – don’t skimp on the chocolate! Splurge on good-quality chips or bars; it makes all the difference in flavor and texture. My second must-do? Always dry your mix-ins completely – even a little moisture can make your chocolate seize up. And here’s my secret weapon: keep a hairdryer handy to gently warm your molds before pouring. It helps the chocolate flow into every detail for picture-perfect candies!
Temperature control is everything when working with chocolate. If your kitchen’s warm, pop the molds in the freezer for 5 minutes before filling – it helps set the chocolate faster. And when melting, go low and slow! Rushing with high heat is the quickest way to end up with grainy chocolate. One last pro tip: if your chocolate does get too thick, add just a tiny bit more coconut oil (we’re talking 1/4 teaspoon at a time) to bring it back to that perfect pourable consistency.

Remember, homemade chocolate candy is supposed to be fun! Don’t stress if your first batch isn’t bakery-perfect. Mine certainly weren’t! The beauty is in the imperfections – and in licking the spoon clean afterward. Now go forth and make some chocolate magic!
Variations for Your Homemade Chocolate Candy Recipes
Now that you’ve mastered the basics, let’s get creative with your homemade chocolate candy! My kitchen experiments have led to some delicious discoveries – like the time I accidentally grabbed smoked sea salt instead of regular and created an instant hit. Here are my favorite ways to jazz up your chocolates:
1. Salty-Sweet Sensation: Sprinkle flaky sea salt over the chocolate right after pouring into molds. The contrast makes the chocolate taste even richer! For extra flair, add crushed pretzel pieces with the nuts.
2. Swirled Elegance: Melt white chocolate separately and drizzle it over the dark chocolate in the molds. Use a toothpick to create marble effects – my niece calls these “van Gogh chocolates”!
3. Spiced Surprise: Stir in 1/4 teaspoon cinnamon or cayenne pepper with the melted chocolate for a warm kick. Last Christmas, I added orange zest and cardamom to half the batch – they disappeared first!
The best part? You can mix and match these ideas! My current obsession is white chocolate-drizzled candies with pistachios and a tiny sprinkle of rose petals. What will you create first?
Storing and Gifting Homemade Chocolate Candy
Let me share my hard-earned wisdom about keeping your homemade chocolate candy fresh and making it gift-worthy! First rule – always store in an airtight container at cool room temperature (that steamy kitchen counter is chocolate’s worst enemy). Layer them between parchment paper so they don’t stick together. They’ll stay perfect for about 2 weeks… if they last that long in your house!
Now for the fun part – gifting! I’ve turned mason jars into adorable candy holders with just some ribbon and a handwritten tag. For special occasions, I use pretty bakery boxes lined with tissue paper – you can find them at craft stores. Pro tip: include a little note with storage instructions so your lucky recipients enjoy them at their best. Last Valentine’s Day, I tucked heart-shaped chocolates into mini Chinese takeout boxes with “Sweet Love” stamped on the lid – my friends still talk about it!
Nutritional Information for Homemade Chocolate Candy Recipes
Now, I’m no nutritionist (just a chocolate enthusiast!), but here’s what you should know about these homemade chocolate candy recipes. The nutritional values can vary quite a bit depending on your chocolate brand, mix-ins, and portion sizes. My rule of thumb? Dark chocolate packs more antioxidants, while milk chocolate tends to be sweeter. Those optional nuts add healthy fats and protein, but also extra calories. The beauty of making your own is you control exactly what goes in – unlike store-bought candies with mystery ingredients! Just remember – everything in moderation, even when it’s this delicious.
Frequently Asked Questions About Homemade Chocolate Candy Recipes
I get so many questions about these homemade chocolate candies – let me share the answers to the ones that pop up most often! First up: “Can I use milk chocolate instead of dark?” Absolutely! Just keep in mind milk chocolate is sweeter and melts at a slightly lower temperature. I like to reduce the coconut oil to 1/2 tablespoon when using milk chocolate to keep it from getting too soft. Check out these easy dessert recipes for more chocolate-swapping tips!
“How long do these homemade chocolates last?” is another common one. Stored properly in an airtight container (I swear by my glass cookie jars), they’ll stay fresh for about 2 weeks at room temperature. If your kitchen runs warm, pop them in the fridge – just let them come to room temp before serving for the best texture.
And yes, “Can I freeze homemade chocolate candy?” You bet! Layer them between parchment in a freezer-safe container for up to 3 months. Thaw overnight in the fridge – no one will guess they weren’t made fresh that day!
My personal favorite question: “What’s the secret to getting them out of the molds cleanly?” Here’s my trick – after chilling, let the molds sit at room temp for 5 minutes. The slight warmth makes the candies release like magic. If they’re being stubborn, gently flex the silicone while holding it upside down over a towel.
Last but not least – “Can kids help make these?” Oh honey, that’s half the fun! My niece loves measuring mix-ins (though we do the melting together for safety). Just keep little hands away from hot bowls and sharp knives. The memories you’ll make are even sweeter than the candy!
Share Your Homemade Chocolate Candy Creations
I’d absolutely love to see what chocolatey masterpieces you create! Did you try a wild new mix-in? Maybe you found the perfect gift packaging? Drop me a comment below – your ideas might inspire someone else’s next batch! And if you snap photos (I know I can’t resist), tag me so I can ooh and ahh over your creations. Happy chocolate making, friends – can’t wait to hear about your sweet successes!
Homemade Chocolate Candy
Ingredients
Equipment
Method
- Melt the chocolate chips and coconut oil in a double boiler over low heat, stirring until smooth.
- Remove from heat and stir in chopped nuts and dried fruit if using.
- Pour the mixture into silicone molds and let it cool at room temperature for 10 minutes.
- Transfer to the refrigerator and chill for at least 1 hour until firm.
- Pop the candies out of the molds and serve or store in an airtight container.