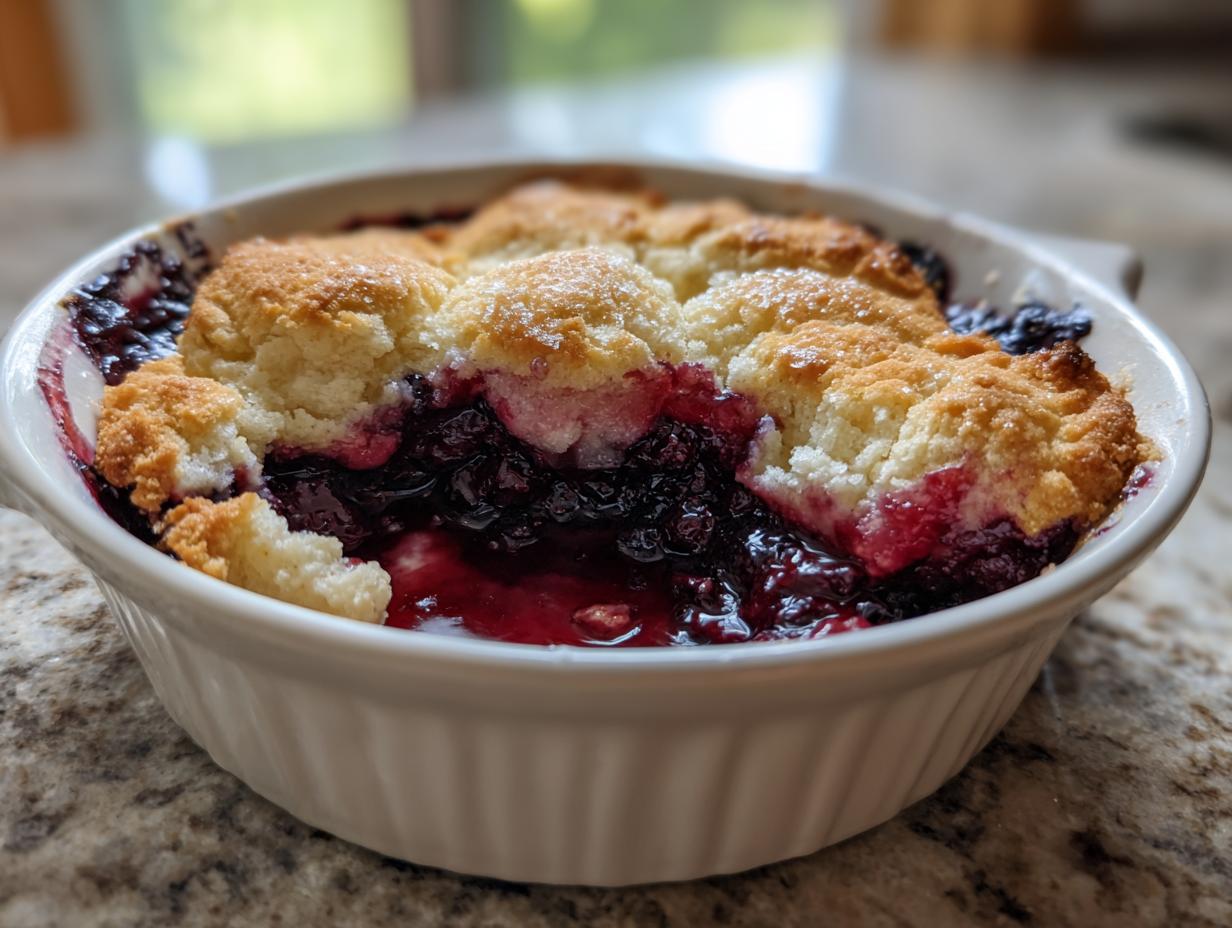
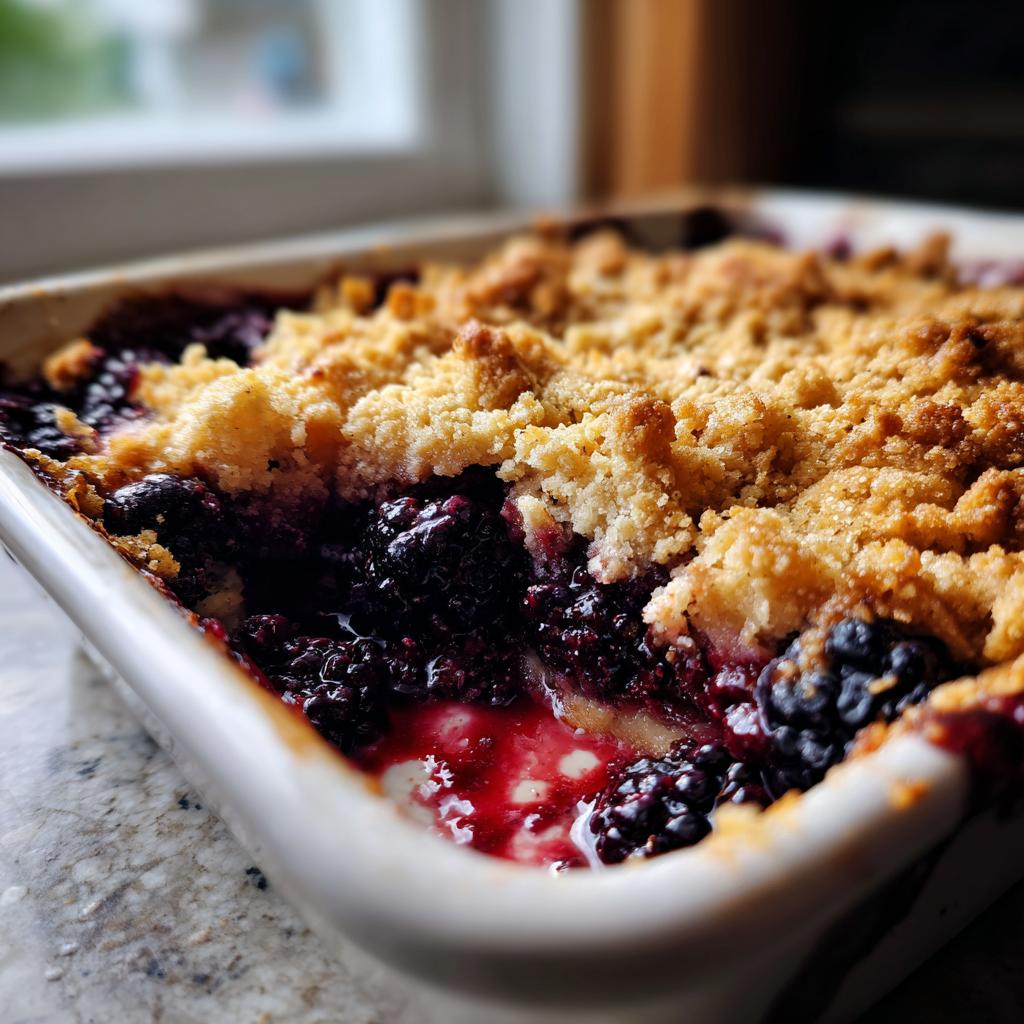
Oh, how I love the smell of homemade blackberry cobbler warming up the kitchen! There’s something magical about that sweet berry scent mixing with buttery biscuit topping – it’s pure comfort in a baking dish. I still remember the first time I made this recipe for my family. My grandma smiled and said, “Now that’s how you do a proper cobbler!” The juice bubbling up around the golden crust, that perfect balance of tart and sweet… it’s become our go-to dessert for Sunday dinners and summer gatherings.
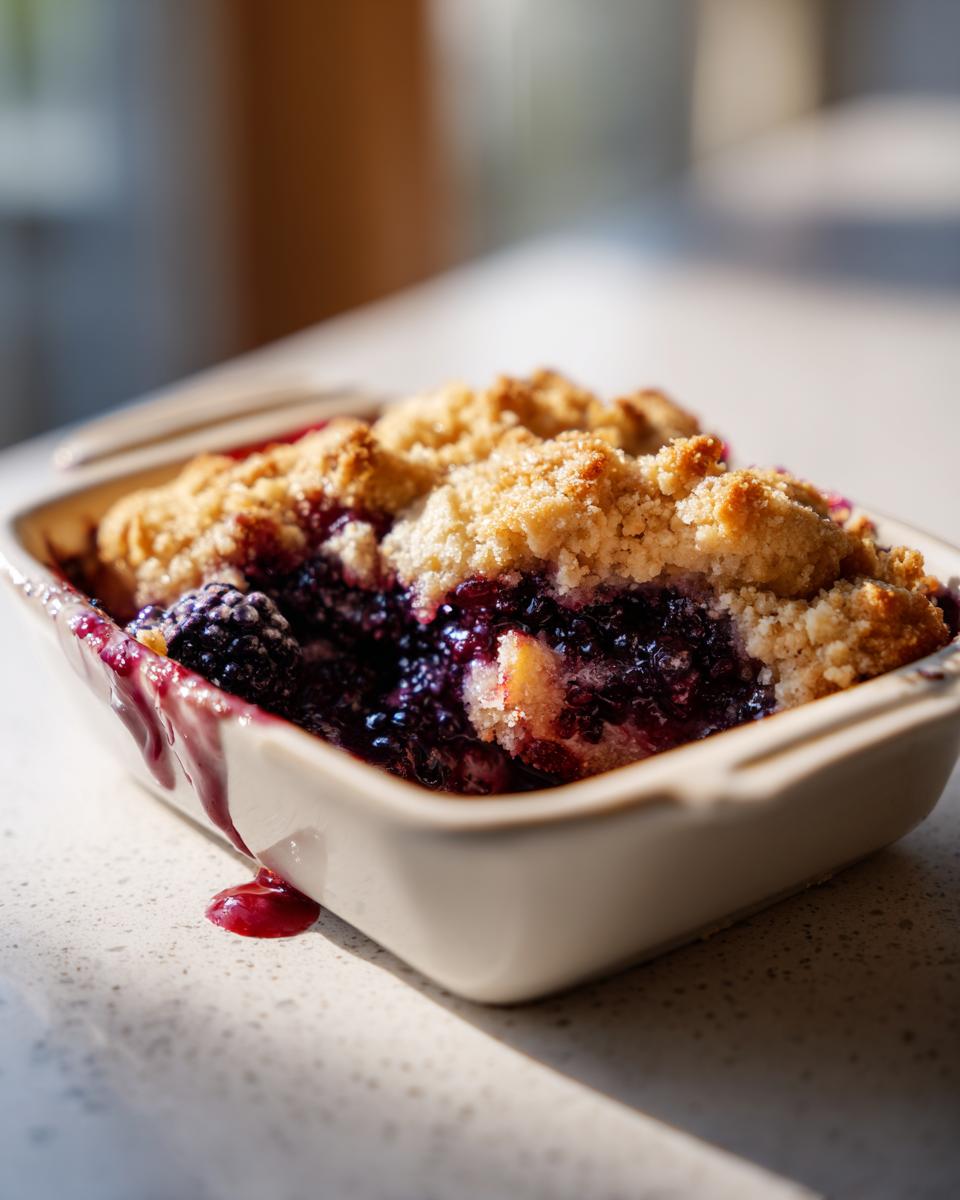
What makes this blackberry cobbler so special? It’s simpler than you think – just fresh berries, pantry staples, and about an hour of your time. No fancy techniques required! The beauty of this dessert is how the blackberries break down into this incredible syrupy filling while the top bakes up crisp and tender. Don’t be surprised if this becomes your family’s new favorite way to enjoy blackberries – mine still asks for it every time berry season rolls around.
The secret’s in using the ripest blackberries you can find. I like to pick mine from the backyard bushes when they’re practically bursting with juice, but store-bought works just fine too. Trust me, this homespun dessert beats anything from a bakery. Whether you’re making it for a special occasion or just because it’s Tuesday, this blackberry cobbler tastes like love in every bite.
Why You’ll Love This Homemade Blackberry Cobbler
Let me tell you why this cobbler has become my family’s most-requested dessert:
- So easy – just mix, drop, and bake! No special skills needed
- Ready in about an hour from start to finish (most of that’s baking time!)
- Uses simple ingredients you probably have on hand already
- That golden, buttery topping soaks up all the sweet berry juices perfectly
- Fresh blackberries burst with flavor in every bite
- Kids and adults go crazy for it – the perfect family dessert
Honestly, the hardest part is waiting for it to cool enough to eat without burning your tongue! But oh, that first warm bite with vanilla ice cream melting over the top? Pure happiness.
Ingredients for Homemade Blackberry Cobbler
Okay, let’s gather our goodies! You’ll want everything measured and ready to go – trust me, it makes the whole process smoother. I’ve separated things into filling and topping ingredients because that’s how my grandma taught me to organize baking projects.
For the Filling
- 4 cups fresh blackberries – Look for plump ones that give slightly when pressed
- 1/2 cup granulated sugar – Adjust up to 3/4 cup if your berries are extra tart
- 1 tablespoon lemon juice – Fresh squeezed makes all the difference
- 1 tablespoon cornstarch – Our secret thickener for that perfect syrupy texture
For the Topping
- 1 cup all-purpose flour – Spoon and level it, don’t scoop!
- 1/2 cup granulated sugar – Gives that irresistible golden crunch
- 1 teaspoon baking powder – Make sure it’s fresh for the best rise
- 1/2 teaspoon salt – Balances all that sweetness beautifully
- 1/2 cup milk – Whole milk makes the topping extra tender
- 1/4 cup unsalted butter, melted – Let it cool slightly before mixing
A quick pro tip from my kitchen disasters: measure your cornstarch and baking powder carefully. Too much and the textures go all wonky (though I won’t tell if you sneak an extra berry or two into the measuring cup!).
How to Make Homemade Blackberry Cobbler
Alright friends, let’s get baking! I’ve made this cobbler more times than I can count (much to my family’s delight), and today I’m sharing all my secrets for perfection. First things first – grab that apron because we’re about to make some magic happen in that oven!
Prepping Like a Pro
Before anything else, preheat your oven to 375°F (190°C). This ensures even baking from the very start. Lightly grease your 9×13 inch baking dish with butter – and don’t skip this step! That moment when the blackberry juices caramelize against the buttered edges…that’s what dreams are made of.
The Blackberry Filling
Now for the fun part – the berries! In a large bowl, gently toss together:
- 4 cups fresh blackberries (if they’re HUGE berries, you might halve some)
- 1/2 cup granulated sugar
- 1 tablespoon lemon juice
- 1 tablespoon cornstarch
Tip from my kitchen: Let this mixture sit for 5 minutes after stirring. The berries will start releasing their gorgeous juices, and the cornstarch helps create that perfect syrupy texture we all love.
Mixing the Topping
In another bowl, whisk together your dry ingredients:
- 1 cup all-purpose flour
- 1/2 cup granulated sugar
- 1 teaspoon baking powder
- 1/2 teaspoon salt
Now stir in the wet ingredients (make sure your melted butter has cooled slightly!):
- 1/2 cup milk
- 1/4 cup melted unsalted butter
Mix just until combined – a few lumps are totally fine! Overmixing makes the topping tough, and we want it light and fluffy.
Baking Your Masterpiece
Spread your blackberry mixture into the prepared baking dish. Now grab a spoon and drop dollops of the topping all over – no need to be perfect here! Those rustic edges and gaps are where the berry juices bubble up beautifully.
Bake for 45 minutes until the topping is golden brown and the filling is bubbly around the edges. That magical moment when you pull it from the oven and hear the berries “singing” (that gentle bubbling sound) is pure joy!
Bonus Tips from My Kitchen
- If your oven runs hot, check at 35 minutes – all ovens are different!
- Let it cool 10-15 minutes before serving (I know, torture…) so the filling can set
- For extra crispness, broil for 1-2 minutes at the end (watch closely!)
See? I told you it was easy! Now grab those berries and get baking – your future self (and probably your whole family) will thank you. And if you’re looking for another berry dessert idea, you might enjoy this blueberry crumble recipe too!
Tips for Perfect Homemade Blackberry Cobbler
After burning my fair share of cobblers (who knew sugar bubbles over that fast?!), I’ve learned a few tricks for blackberry cobbler perfection. First tip? Taste your berries before adding sugar. If they’re super tart, bump up to 3/4 cup. If they’re sweet already, stick with 1/2 cup – you can always sprinkle extra on top after baking.
For the juiciest results, let your berry mixture sit for 10 minutes after mixing – the sugar draws out those gorgeous juices. And don’t skip the cornstarch! One Thanksgiving, I forgot it and ended up with blackberry soup (tasty, but messy). Now I keep extra cornstarch in an obvious spot so I never make that mistake again.
Here’s my foolproof doneness test: the filling should bubble actively around the edges, and the topping should look dry on top with golden-brown spots. If the topping’s browning too fast, tent with foil. Let it rest 15 minutes before serving – that patience pays off in perfect texture!
Final pro tip: bake it on a sheet pan to catch any bubbly overflow. Your oven (and your future self scrubbing burnt sugar) will thank you!
Serving Suggestions for Homemade Blackberry Cobbler
Oh friends, let’s talk about how to serve this beauty! You’ve waited patiently (sort of) while it baked, and now the real fun begins. My number one rule? Always serve blackberry cobbler warm. That first spoonful melting a scoop of vanilla ice cream into the berry juices? Pure heaven! The cold ice cream against the warm cobbler creates this magical contrast that’ll have everyone scraping their bowls.
If you’re feeling fancy, try my grandma’s trick – drizzle just a bit of heavy cream over each serving. It makes the berry colors pop and adds this rich creaminess that’s incredible. Whipped cream works too, especially if you fold in a bit of the cobbler juice right at the end. Toothpicks optional – we won’t judge if you lick the plate!
For drinks, I love pairing it with strong black coffee to cut through the sweetness. Tea drinkers? Earl Grey’s bergamot notes play beautifully with the blackberries. After dinner, try it with a small glass of dessert wine – the flavors will sing! And if you want another vanilla-packed treat alongside, these vanilla bean dessert bars make a lovely addition to your dessert spread.
Storage and Reheating Instructions
Now, let’s talk about keeping that delicious blackberry cobbler tasting fresh! I hate to admit how many times I’ve stood in front of the fridge eating cold leftovers straight from the dish… but here’s the proper way to store it. When cooled, cover the baking dish tightly with plastic wrap or transfer portions to an airtight container. It’ll keep beautifully in the fridge for 3-4 days – if it lasts that long in your house!
For reheating, I always prefer the oven (about 300°F for 10-15 minutes) because it brings back that wonderful crisp topping texture you lose in the microwave. But let’s be real – when you’re desperate for that midnight snack, 30 seconds in the microwave works just fine too! Just know the topping will be softer.
Pro tip from my many leftovers experiments: if you’ve got individual portions, try reheating with a little pat of butter on top. It melts right into the topping and makes it taste freshly baked all over again. My husband swears it’s better than the first day!
Nutritional Information
Now let’s be honest – when a warm blackberry cobbler is calling your name, who’s counting calories? That said, I know some folks like to have an idea of what they’re enjoying. Just remember, nutritional values can vary quite a bit based on your exact ingredients and brands used. Things like the sweetness of your berries, whether you use whole or low-fat milk, or that extra scoop of ice cream on top (no judgment here!) all make a difference. So consider these rough estimates rather than exact numbers. The important thing? That every bite is savored and enjoyed!
Frequently Asked Questions
Can I use frozen blackberries for this cobbler?
Absolutely! Frozen blackberries work great, but don’t thaw them first. Just toss them in frozen with the sugar and cornstarch – they’ll release plenty of juice as they bake. You may need to add 5-10 extra minutes to the baking time since they start off cold.
How do I prevent a soggy cobbler topping?
Oh, I’ve battled the dreaded soggy topping too! The secret is making sure your oven is fully preheated before baking, and spacing the topping dollops apart so steam can escape. Don’t spread the topping smoothly – those craggy edges crisp up beautifully. A little extra baking powder helps too!
Can I make this blackberry cobbler ahead of time?
You bet! Mix the filling and topping separately, then refrigerate them overnight. Next day, assemble and bake – just add 5-10 more minutes to account for the cold ingredients. The baked cobbler keeps beautifully for 2 days at room temp (covered), though we rarely have leftovers!
What can I use instead of cornstarch?
No cornstarch? No problem! Tapioca flour or arrowroot powder work similarly. In a real pinch, I’ve used 2 tablespoons of all-purpose flour, though the filling won’t thicken quite as much. Just avoid instant pudding mix (yes, I tried it – weird texture!).
Can I make this in individual ramekins?
Absolutely! Small ramekins make the cutest individual cobblers. Just reduce baking time to 25-30 minutes and watch them closely. I love doing this for dinner parties – each guest gets their own personal dessert with crispy edges all around!

Rate This Recipe
Did you try this blackberry cobbler? I’d love to hear how it turned out in your kitchen! Drop me a note below – your tips and stories make my day way more than that last spoonful of cobbler (and that’s saying something!).
Homemade Blackberry Cobbler
Ingredients
Equipment
Method
- Preheat the oven to 375°F (190°C). Grease a 9×13 inch baking dish.
- In a large bowl, mix blackberries, sugar, lemon juice, and cornstarch. Pour into the baking dish.
- In another bowl, whisk flour, sugar, baking powder, and salt. Stir in milk and melted butter until combined.
- Drop spoonfuls of the topping over the blackberry mixture.
- Bake for 45 minutes or until the topping is golden and the filling is bubbly.
- Let cool slightly before serving.