Who says Halloween snacks have to be all sugar and no substance? My Halloween veggie tray has become the unexpected star of every spooky gathering I’ve hosted. It all started when my niece – who usually turns up her nose at anything green – actually reached for a cucumber ghost before the candy bowl! That’s when I knew this colorful, creepy-cute platter was magic. The best part? You can whip it up in 20 minutes flat with just a handful of fresh veggies and a little creativity. Trust me, this healthy Halloween snack disappears faster than a vampire at sunrise. For more frightfully fun ideas, check out our Halloween snacks collection and spooky food and drink inspiration.
Why You’ll Love This Halloween Veggie Tray
Listen, I know what you’re thinking – “veggies at a Halloween party?” But trust me, this isn’t your average crudité platter. Here’s why this tray always steals the show:
- Instantly festive – Those cute veggie shapes turn snack time into a spooky spectacle (the olive spiders always get squeals!)
- Secretly healthy – A guilt-free way to balance out all that candy (parents will thank you!)
- Endlessly customizable – Swap in whatever veggies you’ve got – purple cauliflower for witches’ hair? Yes please!
- Kid-approved magic – Even picky eaters can’t resist “eating” a cucumber ghost or tomato eyeball
It’s the perfect way to make healthy eating fun when everyone’s hyped up on sugar. The kids think they’re getting a treat, and you get to be the sneaky veggie superhero!
Ingredients for Your Halloween Veggie Tray
Here’s the beauty of this recipe – it’s mostly pantry staples and whatever fresh veggies you can get your hands on! I’ve made this with everything from fancy farmers market produce to last-minute grocery store grabs, and it always turns out adorable. The key is choosing veggies that hold their shape and have bold colors that pop against your base.
For the Base
You’ll need just 1 cup of hummus to create your spooky scene’s foundation. I love how the creamy texture looks like haunted ground! For a twist, you could use:
- Black bean dip (extra spooky!)
- Guacamole (perfect for a monster swamp theme)
- Tzatziki (creamy ghosts anyone?)
Really, any thick dip will do the trick – just make sure it’s sturdy enough to hold your veggie creations.
Vegetables for Spooky Shapes
This is where the magic happens! Here’s my go-to lineup, but feel free to get creative:
- 1 orange bell pepper – Cut into pumpkin shapes (I use a small cookie cutter or just freehand triangles!)
- 1 cucumber – Sliced into rounds to become ghost canvases (peel strips for extra spook factor!)
- 1 cup cherry tomatoes – Your future eyeballs (the more lopsided, the better!)
- 1 cup black olives – Some whole for spider bodies, some sliced for legs and ghost faces
- 1 cup baby carrots – Great for filling space (I call these “monster fingers”)
- 1 cup broccoli florets – Perfect little trees for your haunted veggie forest
Pro tip: The more color variety, the better your Halloween veggie tray will photograph. Purple carrots? Green bell peppers? Throw ’em in!
Equipment You’ll Need
Don’t stress – this Halloween veggie tray comes together with just three basic tools that I bet you already have in your kitchen. Here’s all you’ll need:
- A large serving tray – The bigger the better for fitting all your creepy creations!
- A sharp knife – For carving those perfect pumpkin peppers and ghost cucumbers
- A cutting board – Keep your counters clean while prepping your spooky shapes
That’s it! No fancy gadgets required – though I won’t stop you if you want to bust out some Halloween cookie cutters for extra flair.
How to Assemble Your Halloween Veggie Tray
Okay, grab your knives and let’s get spooky! I promise this is way easier than carving a pumpkin – and way less messy too. The secret to a showstopping Halloween veggie tray is working in layers, just like building a haunted house. First the base, then your creepy creatures, and finally all those little details that make it come alive (or should I say… undead?). Want to see how I make my Halloween food extra creepy? Check out these spooky deviled eggs that would pair perfectly with your veggie tray!
Step 1: Prepare the Base
Start by spreading that hummus like you’re preparing the ground for a graveyard scene! I use the back of a spoon to make it slightly uneven – perfect for hiding little veggie tombstones later. If your hummus is thick, add a teaspoon of water to make it spreadable. No hummus? No problem! Black bean dip looks fantastically eerie, or go with guacamole for a swampy monster lair effect. Just make sure your base is about 1/4 inch thick so your veggies have something to sink their teeth into (pun totally intended).
Step 2: Create Spooky Veggie Shapes
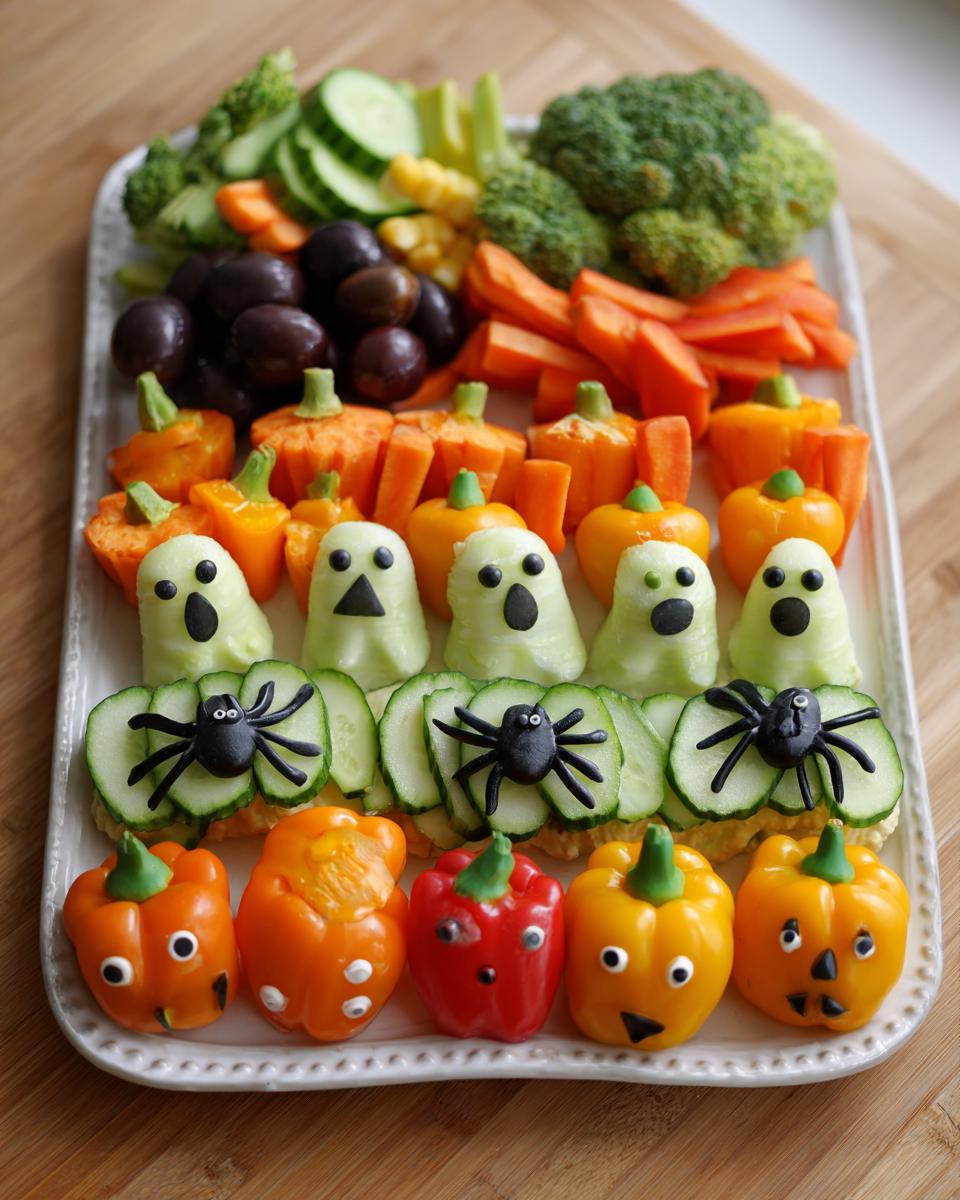
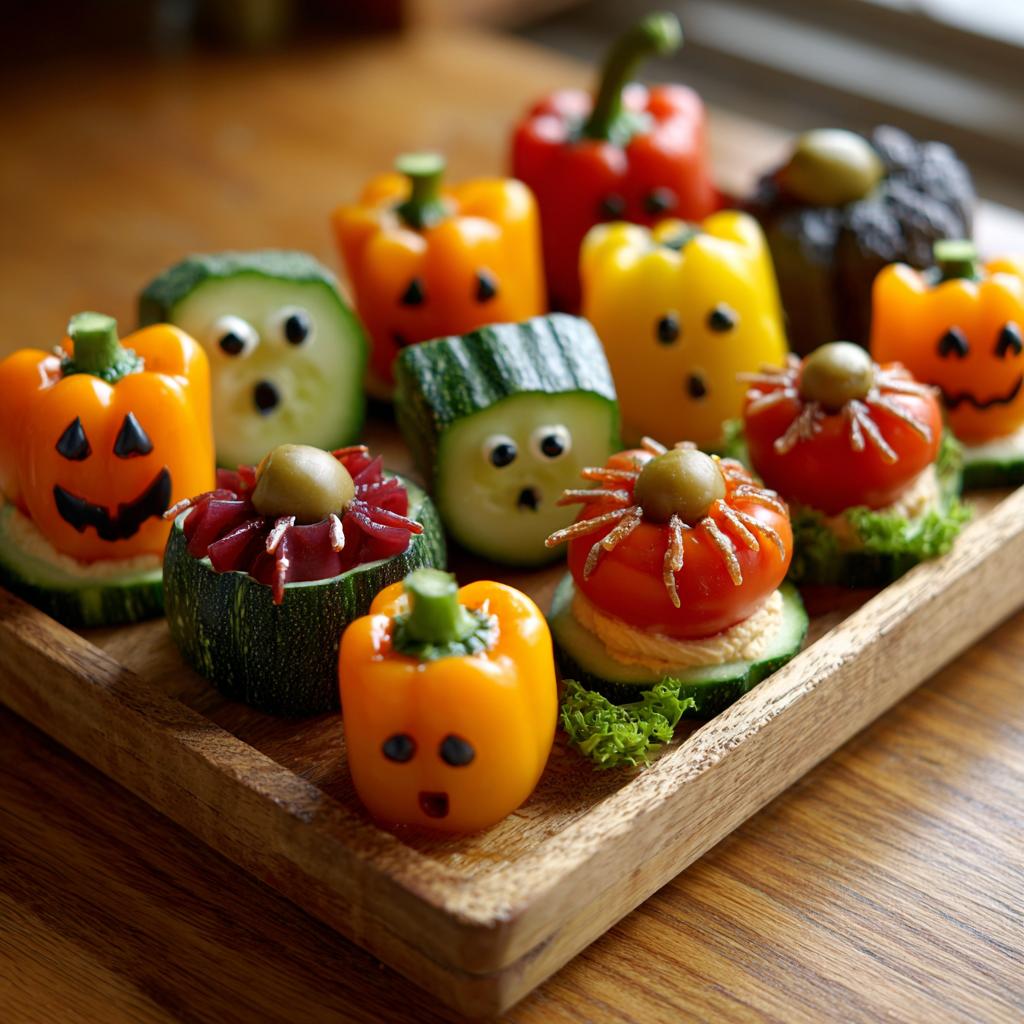
Now for the fun part – bringing your veggies to life! Here’s how I turn ordinary produce into Halloween characters:
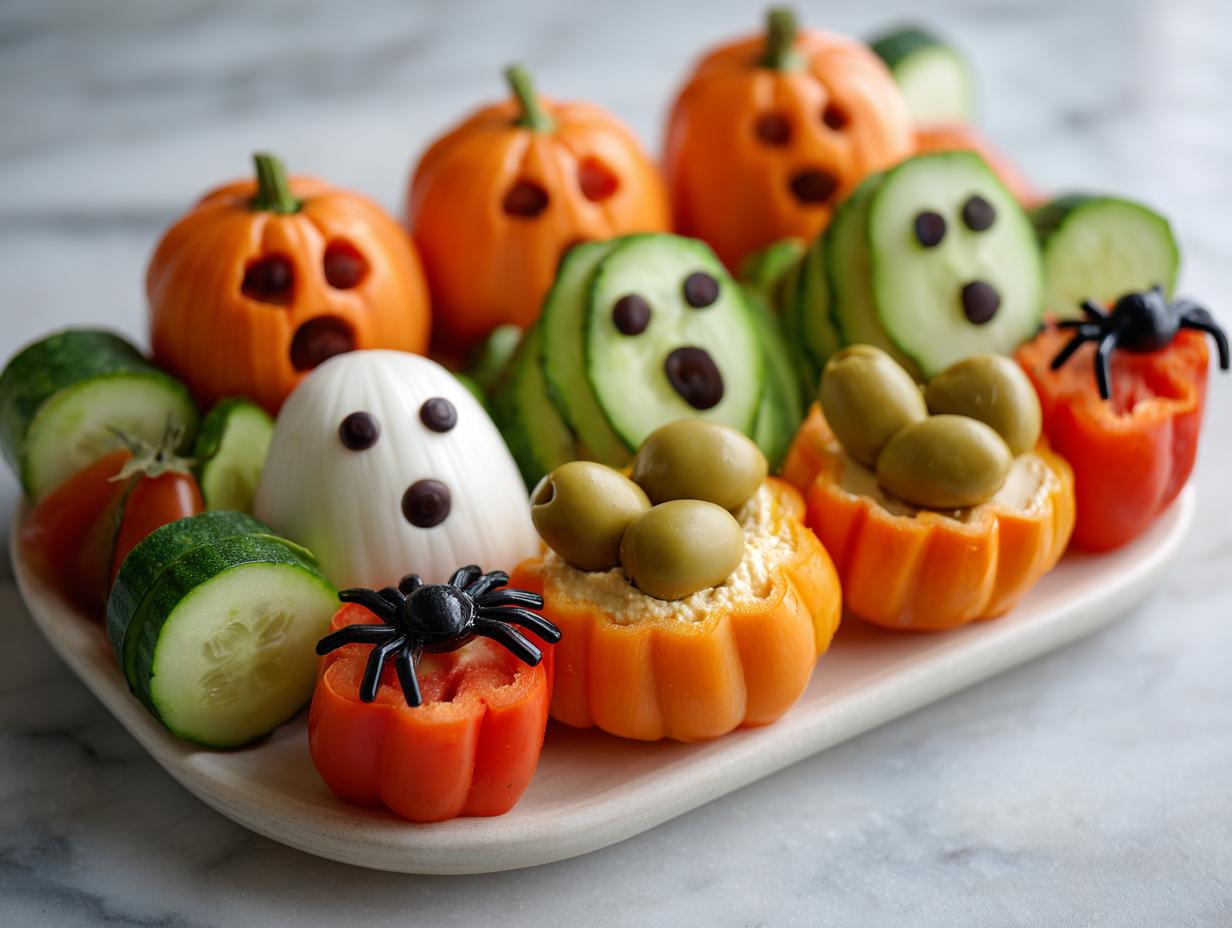
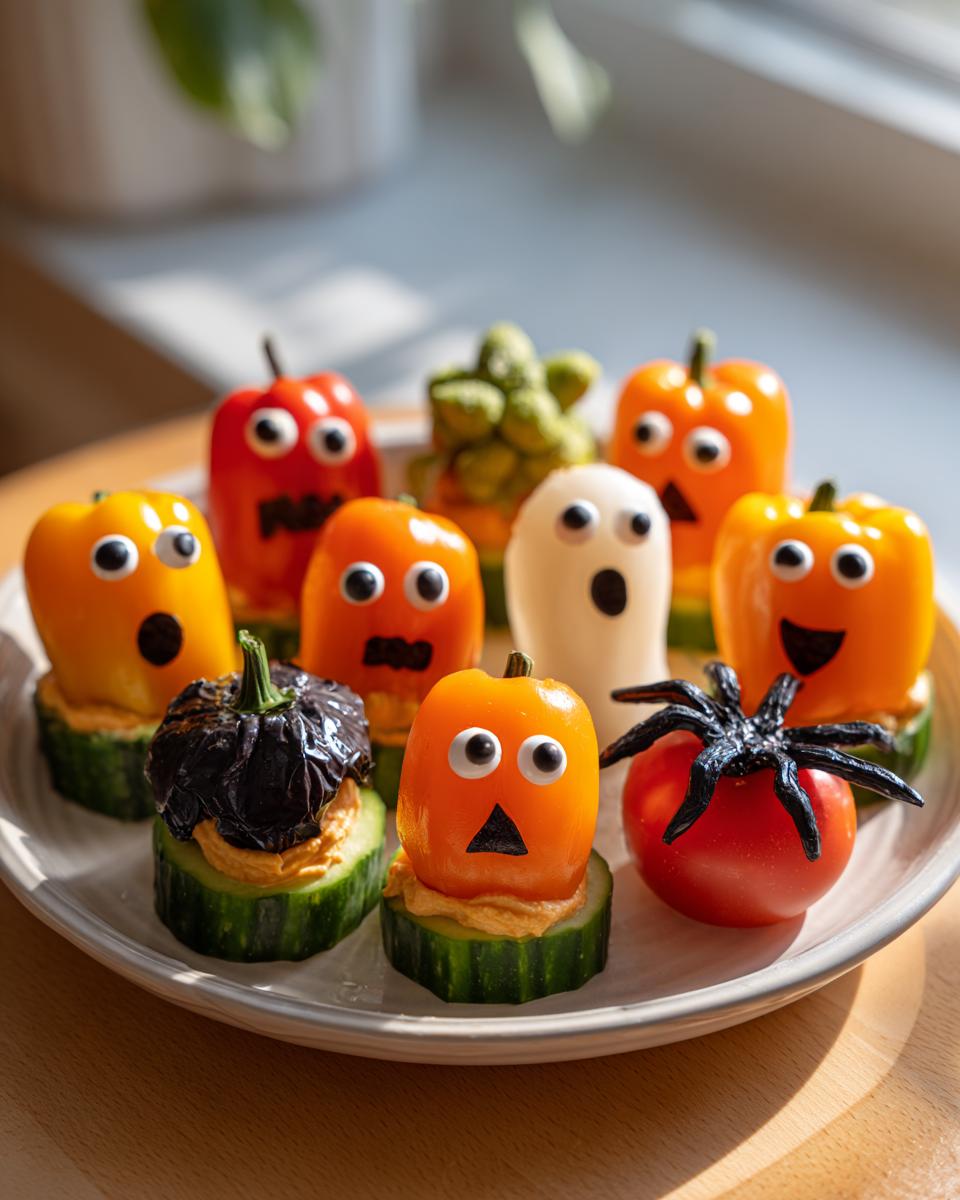
- Pumpkin Peppers: Slice your orange bell pepper into 1/2-inch rings, then use a small knife to carve triangle eyes and a jagged mouth. So easy!
- Cucumber Ghosts: For each ghost, place a tiny piece of black olive on a cucumber round. Make one big oval “eye” or two little circles – the messier, the spookier!
- Olive Spiders: Use whole olives for bodies. Slice another olive into 8 thin strips (careful – they’re slippery!) and arrange 4 on each side as legs.
- Tomato Eyeballs: Cut small pieces of olive and place them on tomatoes. A tiny dab of cream cheese helps them stick if needed!
Arrange them artistically – maybe a spider crawling toward a ghost? Pure Halloween drama!
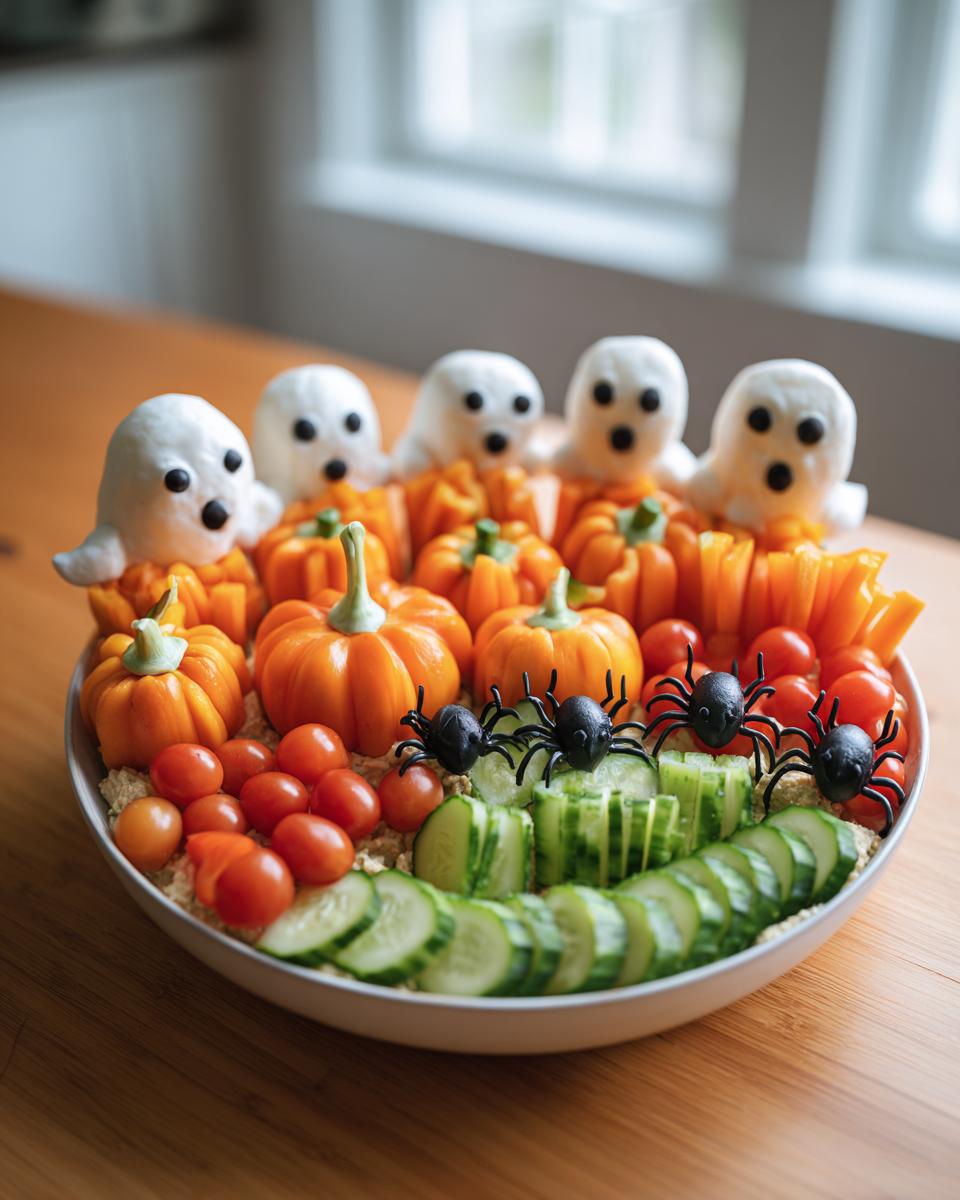
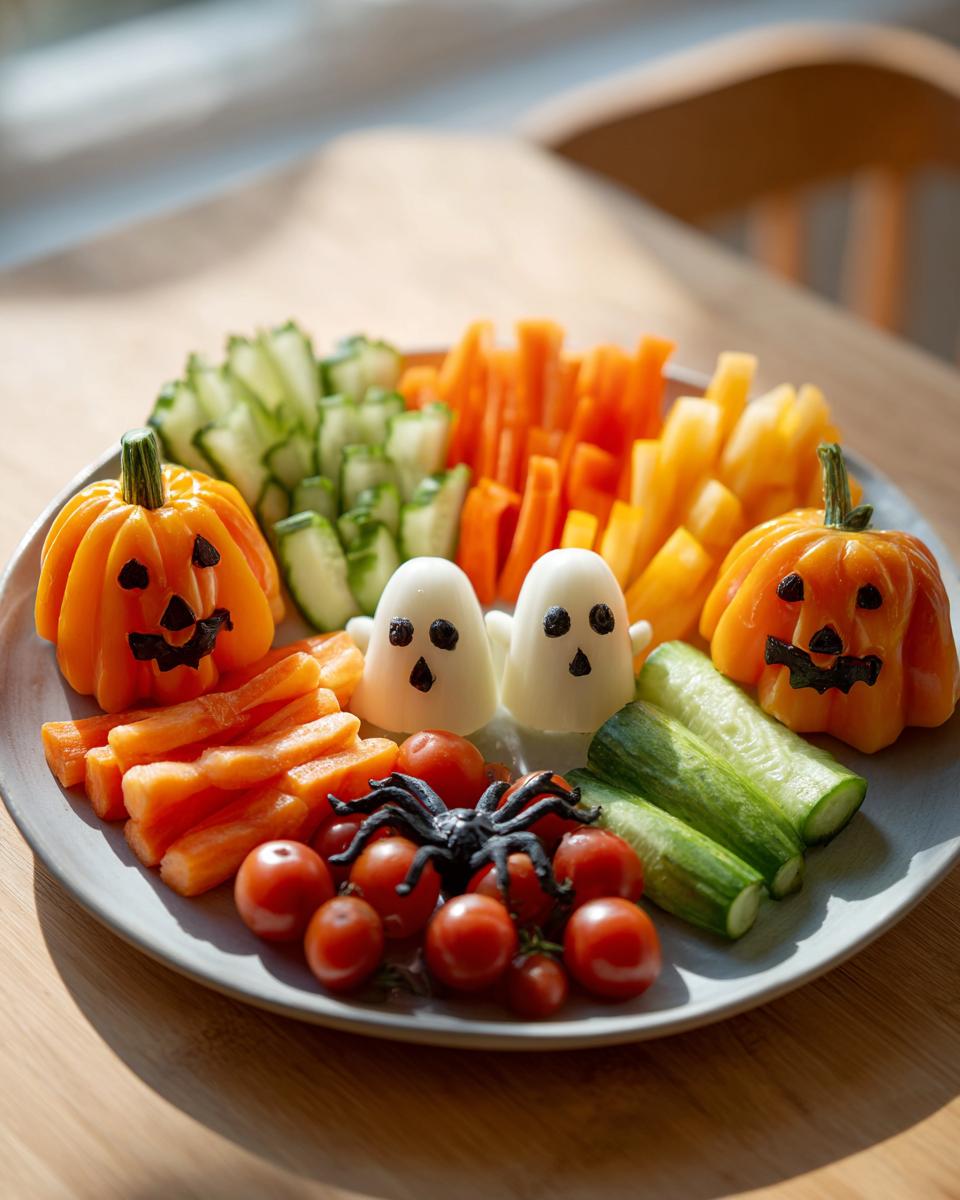
Step 3: Add Finishing Touches
Fill in all the empty spaces with baby carrots (monster fingers!) and broccoli florets (mini haunted trees). The more you pack in, the richer your spooky scene looks. I like to leave a few carrots sticking straight up like they’re reaching out of the hummus grave – trust me, the kids go wild for this! Serve with extra dips in small bowls if you want – a blood-red marinara or eerie green goddess would be perfect additions. Now step back and admire your masterpiece before the hungry monsters (I mean guests) descend!
Tips for the Perfect Halloween Veggie Tray
After making enough spooky veggie trays to feed a zombie horde, I’ve learned some tricks to make yours scream “perfection!” Here are my can’t-live-without Halloween veggie hacks:
- Cookie cutters are your BFF: Those pumpkin-shaped bell peppers? A mini cookie cutter makes them in seconds! I’ve even used bat and ghost cutters on cucumber slices.
- Prep the night before: Wash and chop all veggies, then store them in separate containers with damp paper towels. Your tray comes together in 5 minutes flat on party day!
- Dip first, decorate later: Spread your base dip 1-2 hours ahead, but wait to add olive eyes and details until right before serving – soggy ghost faces are the scariest part!
- Lemon juice = magic: A quick spritz keeps apples and cucumbers from browning if you’re prepping early. Nobody wants a zombie-rot veggie tray!
Follow these tips and your Halloween spread will look like it was made by a (friendly!) kitchen witch!
Variations for Your Halloween Veggie Tray
Look, I make this Halloween veggie tray every year, but I never make it the same way twice! Once you’ve got the basic method down, the fun really begins. Last year I swapped the hummus for black bean dip – instant haunted graveyard vibes! This year I’m thinking purple cauliflower “brains” with a blood-red beet hummus… See what I mean? The possibilities are endless!
Here are some of my favorite ways to switch it up:
- Try purple carrots instead of orange – they make killer witch fingers!
- Use guacamole as your base and create a swamp monster scene with celery stick logs
- Make mummies by wrapping cucumber slices with thin strips of tortilla
- Dye your hummus orange with turmeric for an extra festive pumpkin patch
The only limit is your imagination (and whatever veggies are on sale this week). Happy haunting!
Serving and Storage Tips
Here’s the best way to keep your Halloween veggie tray looking fresh and frightening all night! Serve it right away with extra bowls of ranch or guacamole for dipping – I call it “monster slime” to get the kids excited. If you need to store it (though I doubt there’ll be leftovers!), just cover the tray tightly with plastic wrap and refrigerate for up to 2 days. The cucumbers might get slightly soft, but those olive spiders will still be party-ready! Just refresh any wilting veggies with a quick ice water bath before serving again.
Frequently Asked Questions
I get so many questions about my Halloween veggie tray – seems like everyone wants to recreate the magic! Here are answers to the ones I hear most:
Can I make this Halloween veggie tray ahead of time?
Absolutely! Wash and chop all your veggies the night before, then store them separately in airtight containers with damp paper towels to keep them crisp. Wait to assemble until an hour or two before your party – trust me, nobody likes soggy olive eyeballs!
What other veggies work for Halloween shapes?
Ohhh I love getting creative with this! Radishes make creepy skulls, zucchini slices become Frankensteins with olive details, and jicama cuts perfectly into tombstones. Check out more healthy snack ideas for inspiration – the spookier the better!
Will kids actually eat veggies shaped like monsters?
You’d be shocked! My pickiest nephew gobbled up cucumber ghosts last year while declaring “I’m eating spirits!” The key is making it fun – let them help decorate or give the veggies silly monster names. Food psychology for the win!
What if I don’t have hummus?
No worries at all! Black bean dip looks fantastically eerie, guacamole makes a great swamp base, or even just plain cream cheese works wonderfully. The veggies are the real stars here.
How long does the assembled tray last?
Honestly? About 5 minutes once guests see it! But realistically, covered tightly in the fridge, it’ll stay fresh-looking for about 12 hours. The veggies might lose a little crunch by day two.
Nutritional Information
Just a quick heads up – these numbers are rough estimates since brands and veggie sizes can vary. But hey, we’re talking fresh veggies and hummus here, so you know it’s gotta be better for you than that third candy bar! Consider this your guilt-free Halloween treat.
Halloween Veggie Tray
Ingredients
Equipment
Method
- Spread the hummus evenly on the serving tray to create the base.
- Cut the orange bell pepper into pumpkin shapes and arrange them on the tray.
- Slice the cucumber into rounds and use black olives to create ghost faces on them.
- Place cherry tomatoes on the tray and add small pieces of black olive to make them look like eyeballs.
- Arrange black olives to resemble spiders by placing one olive as the body and slicing another into legs.
- Fill the remaining space with baby carrots and broccoli florets.