Oh, Easter chocolate bark – it’s the one treat that makes me feel like a kid again! Every spring, my kitchen turns into a candy workshop where I whip up these colorful, crunchy slabs of joy. I’ll never forget the first time I made it with my niece – we ended up with chocolate on our noses and sprinkles in our hair, but those messy batches tasted like pure happiness. What I love most about Easter chocolate bark variations is how foolproof they are. Whether you’re team dark chocolate or go crazy for white chocolate pastels, this recipe adapts to whatever sweets you’ve got in your pantry. It’s the perfect last-minute Easter dessert when you need something impressive but don’t want to fuss with complicated baking. Plus, it’s so versatile – one year I even shaped mine into egg shapes using cookie cutters for the kids’ Easter baskets! Check out more of my favorite simple Easter dessert ideas if you’re looking for more holiday inspiration.
Why You’ll Love These Easter Chocolate Bark Variations
Trust me, once you try making Easter chocolate bark, you’ll wonder how you ever survived the holiday without it! Here’s why this recipe has become my springtime staple:
- Speed demon: From fridge to table in under 20 minutes – perfect when the Easter bunny’s running late!
- Kid magnet: My nieces go wild sprinkling toppings – and I love that cleanup’s just one parchment paper toss.
- Endless creativity: Swap out toppings with whatever’s in your pantry – last year’s leftover jelly beans? Yes please!
- Gift-ready: I tuck pieces into cute cellophane bags with ribbon – instant hostess gifts that always impress.
- No oven required: When I’m juggling ham glazes and potato salads, this no-bake treat saves my sanity.
The best part? Even when my toppings go lopsided (which they often do), it still tastes amazing and looks festive.
Essential Ingredients for Easter Chocolate Bark Variations
I’m pretty relaxed about most recipes, but for perfect Easter chocolate bark variations, you’ll want to follow my foolproof ingredient list. The beauty of this treat lies in its simplicity – you only need two main components: a chocolate base and festive toppings. But oh, what a difference quality ingredients make!
Base Ingredients
Let’s start with the foundation – the chocolate. I always keep these basics on hand:
- 12 oz chocolate chips – dark, milk, or white (I often mix them for a marbled effect that looks so pretty on an Easter tray)
- 1 tsp coconut oil – optional, but it gives the chocolate that gorgeous sheen and helps it melt smoother (trust me on this one)
Pro tip from my many chocolate disasters: splurge on good-quality chocolate chips. The cheap stuff tends to seize up or taste waxy – not the springtime delight we’re going for!
Toppings
This is where the Easter magic happens! Here’s my go-to toppings list, but feel free to get creative:
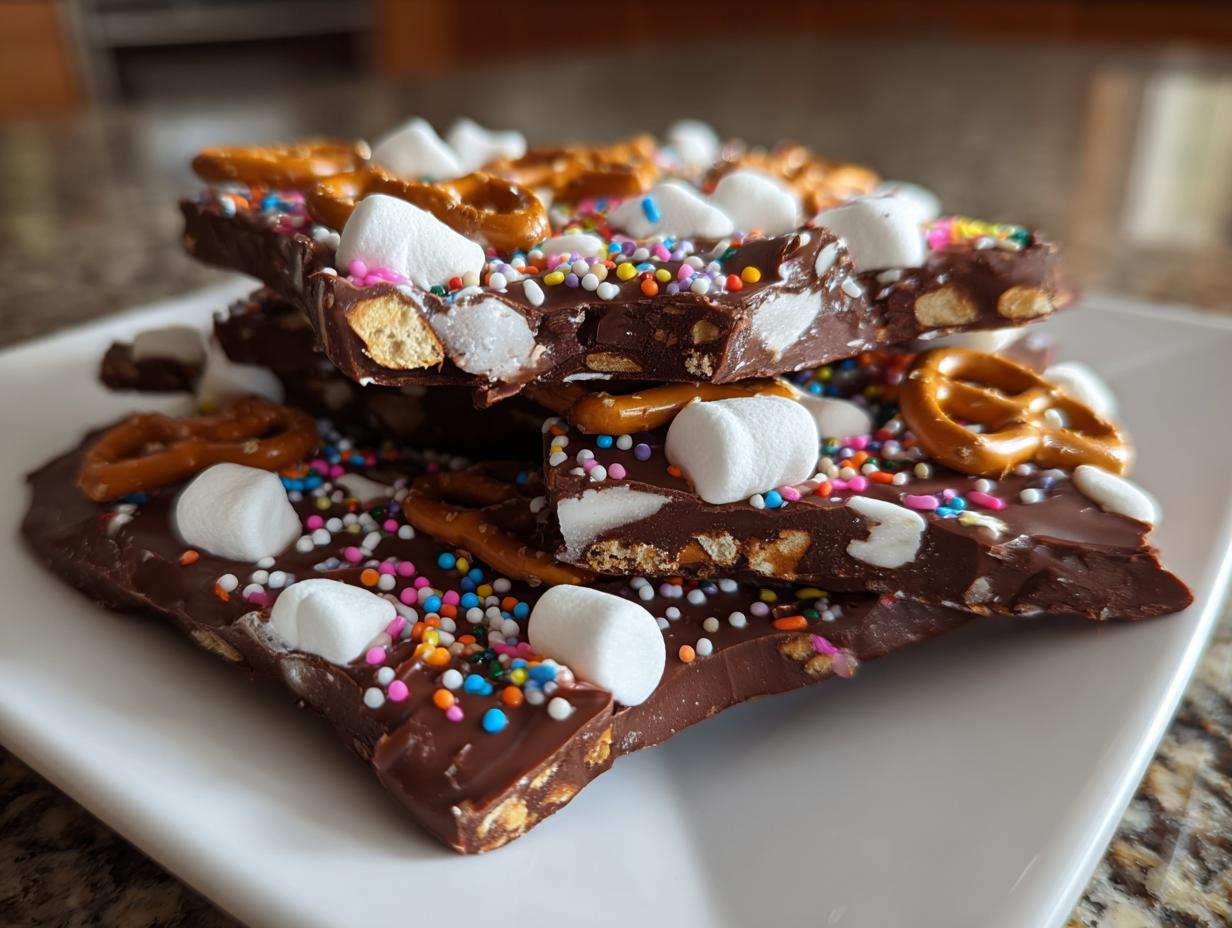
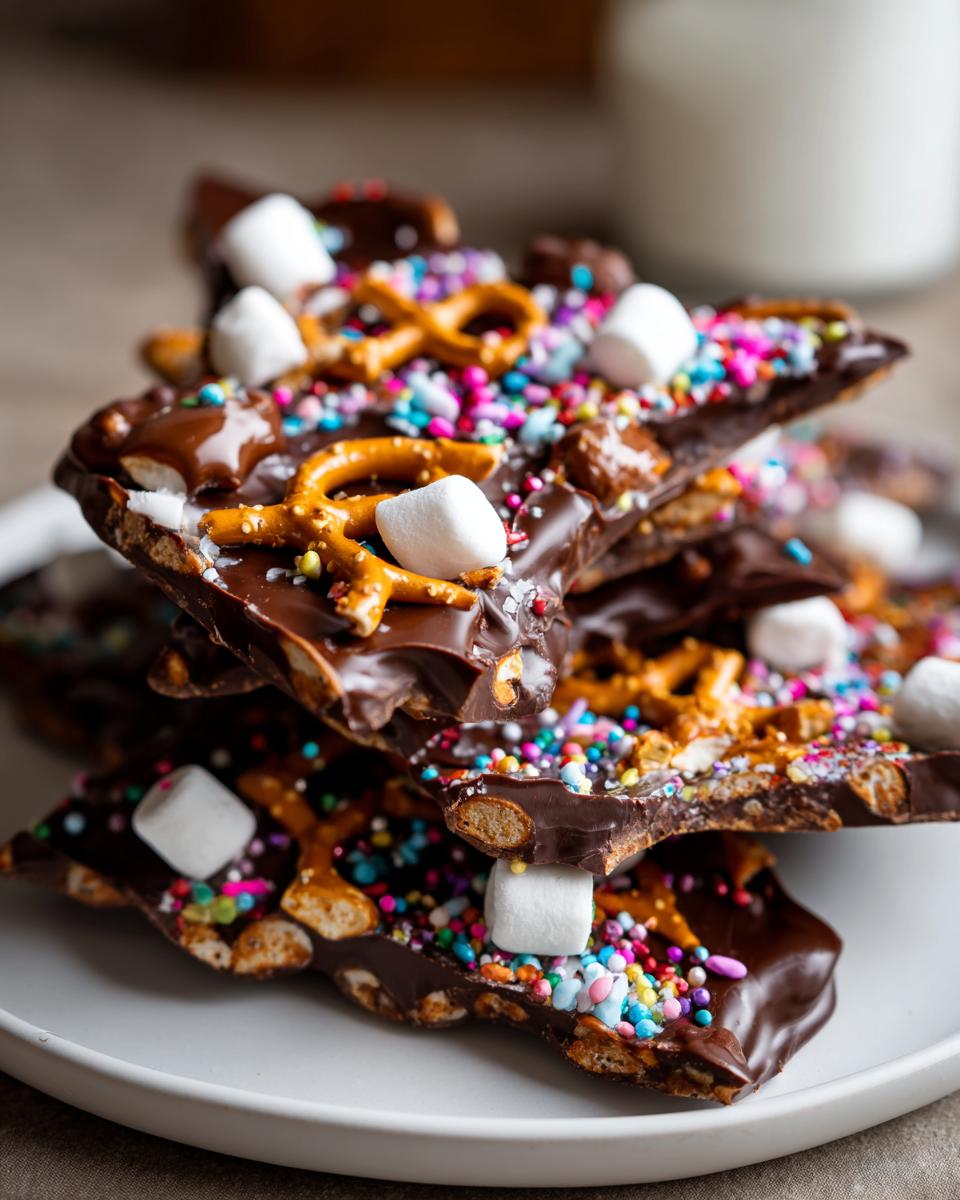
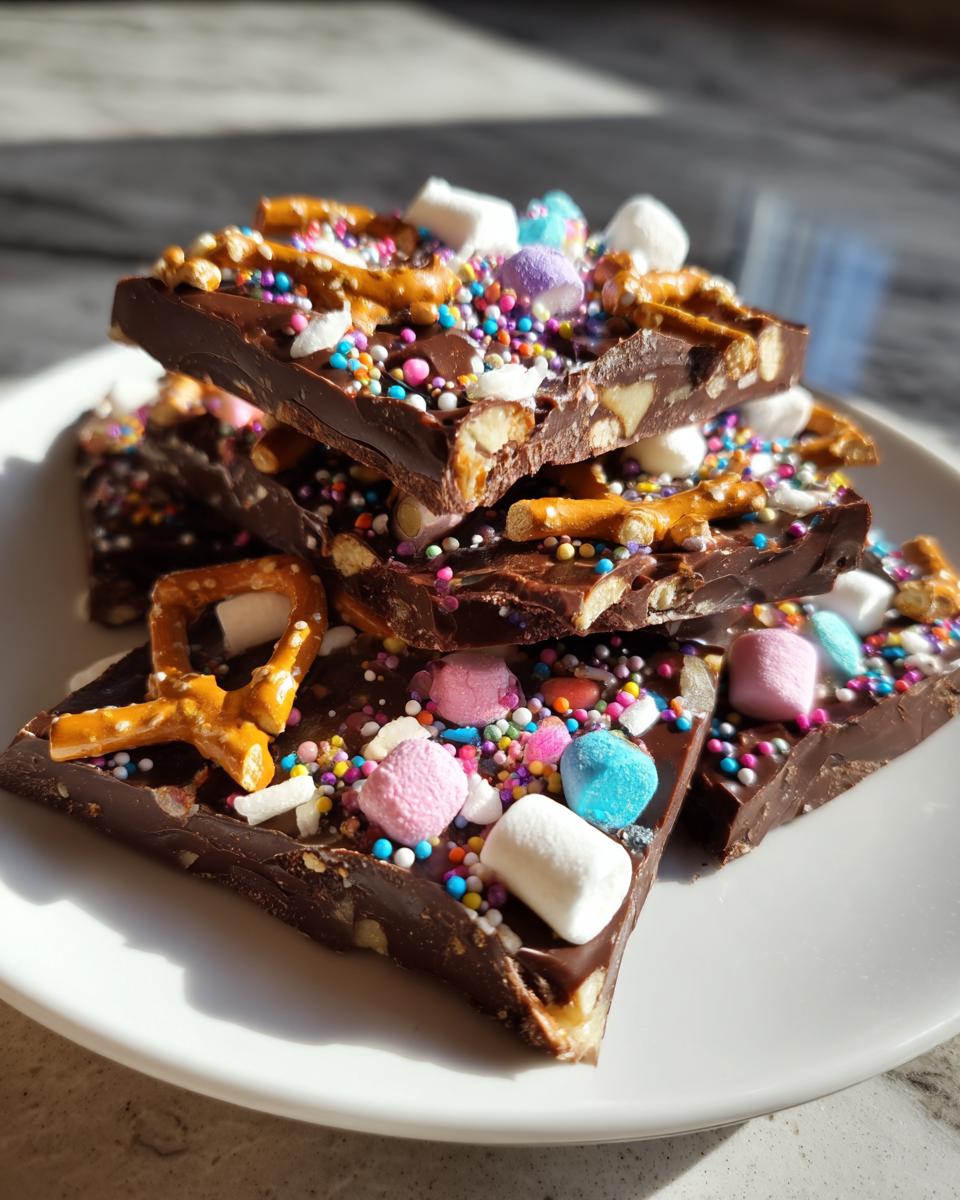
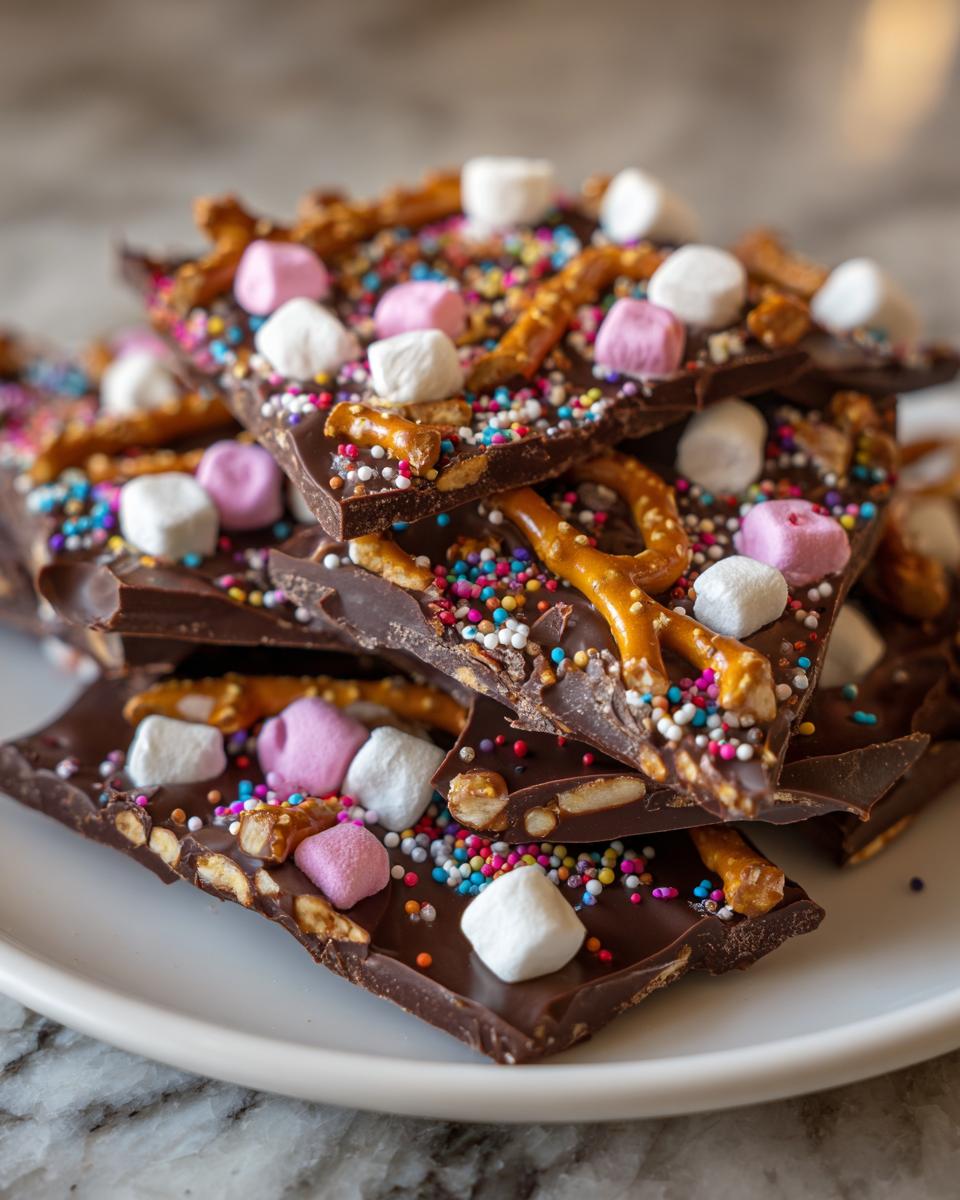
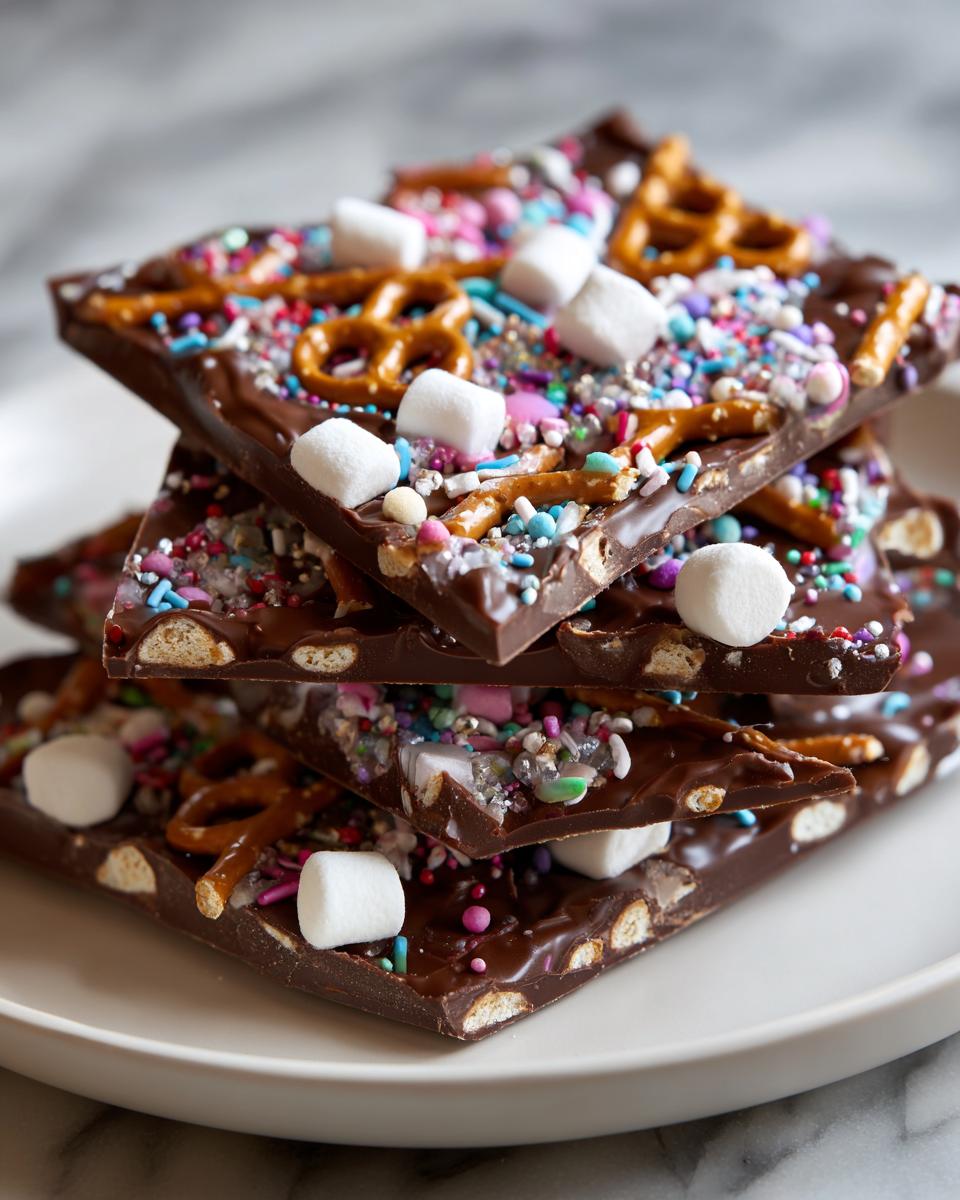
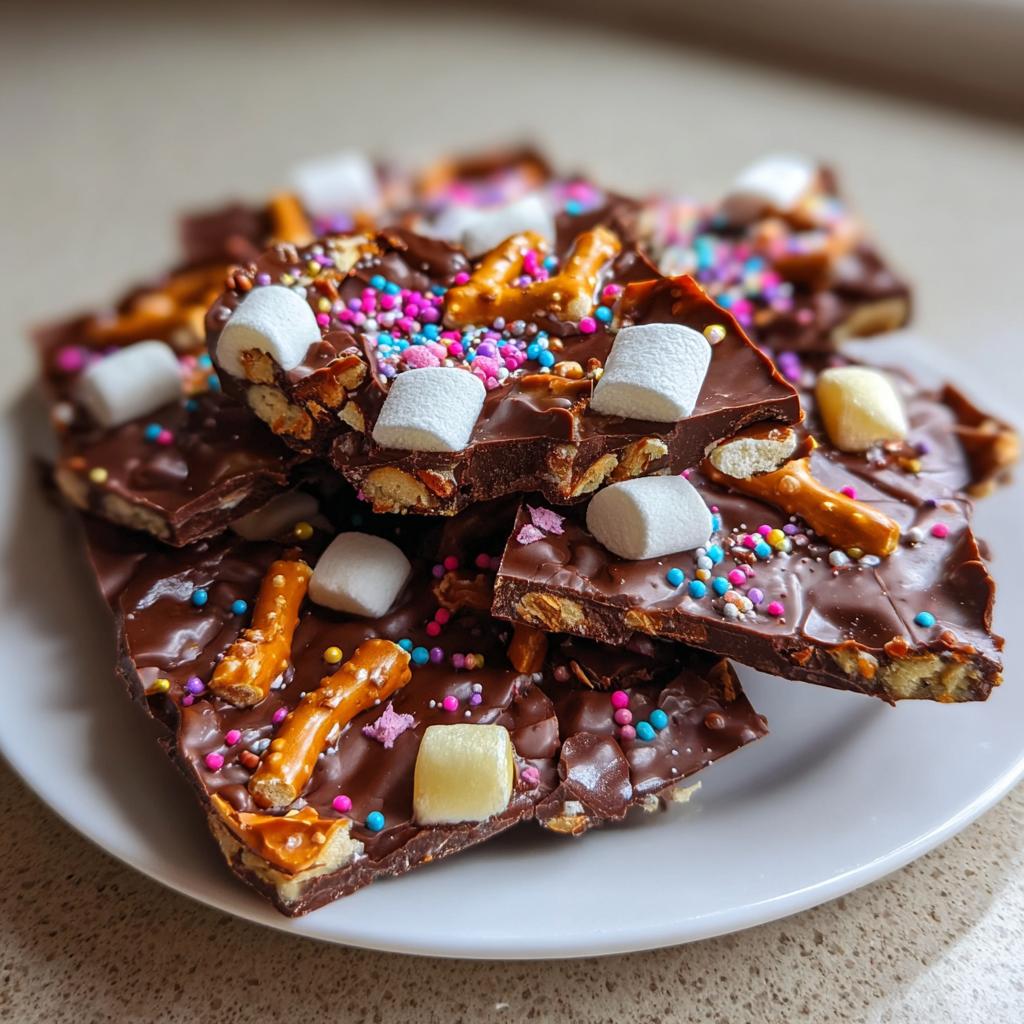
- 1/2 cup mini marshmallows – they look like adorable little clouds on your bark
– that salty-sweet combo is irresistible - 1/4 cup sprinkles – Easter-themed pastel colors make everything merrier
- 1/4 cup dried fruit – I love tart cranberries or chewy apricots for contrast
If you’re cooking for allergies, swap nuts for sunflower seeds or just double up on agreements. The fun part is making it your own – last year I crushed up some leftover peanut butter eggs from my sons’ baskets and they were
How to Make Easter Chocolate Bark Variations
Okay, let me walk you through my foolproof method for making Easter chocolate bark variations – it’s so easy you’ll laugh! I’ve made every mistake possible (hello, burnt chocolate disasters), so follow these steps and you’ll get perfect results every time.
1. Prep your workspace: First, line a baking sheet with parchment paper – don’t skip this! That one time I tried wax paper instead? Let’s just say I spent Easter scraping chocolate off my counter. Have all your toppings measured and ready to go before melting the chocolate.
2. Melt the chocolate: Here’s my secret – microwave the chocolate chips in a microwave-safe bowl at 50% power for 30 seconds, stir, then repeat. Stop when there are just a few unmelted chips left – the residual heat will finish the job. Overheating makes chocolate grainy (learned that the hard way!). If it seizes up, add a teaspoon of coconut oil to rescue it.
3. Spread it out: Pour the melted chocolate onto your prepared sheet and use an offset spatula or the back of a spoon to spread it about 1/4 inch thick. Work quickly before it starts to set! I like making irregular edges for that rustic homemade look.
4. Add your toppings: This is the fun part! Sprinkle your toppings evenly over the wet chocolate, then gently press them in with clean fingers. Don’t overdo it – you want to see that beautiful chocolate peeking through. Pro tip: add heavier items first (like pretzels), then lighter ones (like sprinkles).
5. Let it set: Now the hardest part – waiting! You can leave it at room temperature for about an hour, but I usually pop mine in the fridge for 15-20 minutes when I’m impatient. The chocolate should be completely firm when ready.
6. Break it up: Use your hands to break the bark into rustic pieces – I love the irregular shapes! For cleaner breaks, you can score the chocolate lightly with a knife before it fully sets. Store in an airtight container between layers of parchment paper.
See? Easier than dyeing Easter eggs! The key is working quickly once the chocolate is melted and not overthinking the toppings. Even when mine turns out lopsided, it always disappears fast at parties!
Creative Easter Chocolate Bark Variations to Try
Once you’ve mastered the basic Easter chocolate bark, the real fun begins – playing with themes! Here are my favorite variations that always steal the show at spring gatherings. Each one starts with the same easy base, but the toppings transform them into edible Easter masterpieces.
Pastel Bunny Bark: This one’s for the kids (okay, and me). Use white chocolate as your base and swirl in a few drops of pink and purple food coloring with a toothpick for a marbled effect. Top with pastel M&M’s, mini marshmallows, and those adorable bunny-shaped sprinkles. It looks almost too cute to eat… almost. Check out my Easter candy bark recipe for more pastel perfection!
Carrot Patch Crunch: Melt together white and orange chocolate chips for a marbled carrot effect, then sprinkle with crushed oreos (dirt!), green jelly beans (carrot tops), and actual dried carrot slices if you’re feeling fancy. I like to break this one into long shards that resemble actual carrots – the kids go nuts for it!
Peeps Party Bark: Take your melted milk chocolate and press whole Peeps right into it while it’s still warm. Add some pastel pretzel twists and a sprinkle of pastel nonpareils. The marshmallow Peeps get slightly toasted where they touch the warm chocolate – pure magic. Pro tip: arrange the Peeps in little groups so each piece of bark gets one when you break it up.
Speckled Egg Bark: This elegant version starts with a dark chocolate base. After it’s set but still slightly tacky, flick a mixture of vanilla extract and food coloring across the surface with a toothbrush to create that beautiful “speckled egg” look. Top with crushed pistachios and dried cranberries for color contrast. It’s the perfect sophisticated option for adult Easter brunches.
The best part? You can mix and match these ideas to create your own signature bark. Last year, I made a batch with half Peeps and half carrot patch – total crowd pleaser! What fun combinations will you dream up?
Tips for Perfect Easter Chocolate Bark Variations
After years of making Easter chocolate bark (and yes, a few chocolatey messes along the way), I’ve picked up some game-changing tricks! Here’s how to take your bark from good to “wow, did you really make this?”:
First up – parchment paper is your best friend. That one Easter I tried skipping it? Let’s just say I’m still finding chocolate bits in odd kitchen corners. For extra shine, temper your chocolate by melting 2/3 of it first, then stirring in the remaining 1/3 off heat until smooth. Takes an extra minute but makes such a difference!
My quirky signature move? Cookie cutters! After spreading the chocolate, I press clean cutters halfway in to mark shapes. Once set, they break along the lines into perfect Easter eggs or bunnies. The kids think it’s magic.
Storage-wise, layer pieces between parchment in an airtight container at room temp – the fridge can cause condensation and dull the pretty colors. If your kitchen’s warm, add a silica gel packet to prevent blooming (those white streaks).
Oh, and resist the urge to overcrowd with toppings! I learned that lesson after a particularly avant-garde bark that looked more like a candy junkyard than a spring treat. A little negative space lets each component shine.
Serving and Gifting Easter Chocolate Bark Variations
Oh, the fun doesn’t stop at making this bark – presenting it is half the joy! I love packaging my Easter chocolate bark variations in cellophane bags tied with pastel ribbons – instant festive gifts that make everyone feel special. For kids’ Easter baskets, I break it into egg-sized pieces and tuck them between the grass. And here’s my favorite trick: arrange different flavors on a tiered stand for Easter brunch – they disappear faster than the deviled eggs! Pair it with my other favorite Easter brunch recipes for the ultimate spring spread.
For teacher gifts, I stack bark pieces in clear mason jars with a cute bunny tag. And don’t get me started on how perfect this is for egg hunts – I hide some bark pieces along with the plastic eggs for a sweet surprise. Last year, I even glued mini chocolate bark shards to toothpicks as cupcake toppers – total showstopper! Whether you’re serving it at a fancy brunch or sneaking pieces straight from the fridge (no judgment here), this Easter treat brings smiles every time.
FAQs About Easter Chocolate Bark Variations
After making countless batches of Easter chocolate bark (and fielding questions from curious neighbors who smelled the chocolate), here are the answers to the most common questions:
Can I use vegan chocolate?
Absolutely! I’ve successfully used dairy-free chocolate chips with coconut oil. Just watch the melting closely – vegan chocolate can be temperamental. My niece’s allergic to dairy, so we use Enjoy Life brand which melts beautifully.
How long does Easter chocolate bark last?
Stored properly in an airtight container, it stays fresh about 2 weeks (if it lasts that long!). The marshmallows might get slightly stale after 5 days, so I add those fresh if making ahead. Pro tip: hide some in the back of the pantry – it’s my secret stash!
Can I freeze chocolate bark?
You can, but with caution! Freeze it flat on parchment paper first, then transfer to freezer bags. Thaw overnight in the fridge to prevent condensation. The texture changes slightly, but it’s perfect for blending into milkshakes if it gets frostbitten (my kids’ favorite “oops” solution).
What’s the best chocolate for beginners?
Start with good quality chocolate chips – they’re formulated to melt smoothly. My first attempt with fancy baking chocolate seized up terribly! Now I keep it simple with Nestle or Ghirardelli chips until I’m feeling adventurous.
Help! My toppings sank into the chocolate!
We’ve all been there! Let the chocolate cool slightly until it thickens but is still spreadable. Another trick? Press toppings gently with a spatula instead of sprinkling. Last resort? Melt a little extra chocolate to drizzle over sunken goodies – turns mistakes into “gourmet layered bark”!
Nutritional Information
Now, I’m no nutritionist (just a chocolate enthusiast!), but here’s what you should know about Easter chocolate bark variations. Since we’re using quality chocolate and fun toppings, this is definitely a treat rather than a health food – and that’s perfectly okay for holiday indulgences!
Nutritional values vary based on ingredients used, but here’s a rough estimate per serving (about a 2″ piece): around 150-200 calories, with 8-10g of sugar depending on your chocolate and toppings. Dark chocolate versions will have more antioxidants, while white chocolate bark tends to be sweeter. The dried fruit adds some fiber, and nuts (if you use them) contribute healthy fats.
This is just an estimate per serving – your actual nutrition will depend on how generous you are with those sprinkles (no judgment here – I’ve been known to go overboard too!). The important thing is enjoying this festive treat with family and friends. After all, Easter only comes once a year!
Easter Chocolate Bark Variations
Ingredients
Equipment
Method
- Line a baking sheet with parchment paper.
- Melt chocolate chips in a microwave-safe bowl in 30-second intervals, stirring between each, until smooth.
- Spread melted chocolate evenly onto the prepared baking sheet.
- Sprinkle toppings over the chocolate while it’s still wet.
- Let the bark cool at room temperature or in the refrigerator until firm.
- Break into pieces and serve.