There’s something magical about banana bread—how those forgotten, overripe bananas on your counter can transform into a warm, comforting loaf that fills your kitchen with the sweetest aroma. I remember the first time I made banana bread with my mom, her hands guiding mine as we mashed the bananas into a sticky, fragrant mess. “The spottier the bananas, the better,” she’d say, and she was right. That loaf came out so moist and tender, it became our go-to recipe for lazy Sunday mornings and last-minute potlucks. Now, whenever I see those brown-speckled bananas, I know it’s time to whip up a batch of this easy banana bread. It’s the kind of recipe that feels like a hug—simple, forgiving, and always delicious.

Why You’ll Love This Banana Bread
Oh, where do I even start? This banana bread is my absolute favorite for so many reasons. First off, it’s ridiculously easy—no fancy techniques or equipment needed. Just mash, mix, and bake. The texture? Pure magic. Those ripe bananas make it so moist it practically melts in your mouth. And the best part? It’s crazy versatile. Toast a slice for breakfast, pack it in lunchboxes, or enjoy it as an afternoon pick-me-up. Trust me, once you try this recipe, you’ll never let those overripe bananas go to waste again!

Banana Bread Ingredients
Okay, let’s talk ingredients—because using the right stuff makes all the difference in banana bread! I’ve made this recipe dozens of times, and I swear by these simple, pantry-friendly items. You probably have most of them already. Just remember: those bananas need to be really ripe—like, almost-black-spots ripe. That’s when they’re sweetest and mash up beautifully.
Dry Ingredients
- 1.5 cups all-purpose flour – The backbone of our bread. No need to sift, just fluff it with a fork before measuring.
- 1 tsp baking soda – Our rising agent. Make sure it’s fresh so your bread doesn’t fall flat!
- ½ tsp salt – Just enough to balance all that sweetness.
Wet Ingredients
- 3 ripe bananas, mashed – About 1 cup mashed. The browner the better—trust me on this.
- ½ cup butter, melted – I use unsalted, but salted works too (just reduce the added salt slightly).
- ¾ cup sugar – I like white sugar for a clean sweetness, but brown sugar adds nice depth too.
- 1 large egg – Room temperature blends best.
- 1 tsp vanilla extract – The secret flavor booster. Pure vanilla makes a difference!
See? Nothing fancy here—just good, simple ingredients that come together to make something magical. Now let’s get mixing!
How to Make Banana Bread
Alright, let’s get baking! I promise this couldn’t be simpler. I’ve made this banana bread more times than I can count—sometimes bleary-eyed before coffee, sometimes with kids “helping”—and it always turns out perfectly. The key is taking it one step at a time and not overthinking it. Want to know my biggest secret? Don’t overmix the batter! A few lumps are totally fine—actually, they’re good. Ready? Let’s do this.
Step 1: Prep the Pan and Oven
First things first: get that oven heating to 350°F (175°C). This temperature is the sweet spot—hot enough to bake through but not so hot it browns too quickly. While it’s warming, grab your loaf pan and give it a good greasing with butter or nonstick spray. I use my fingers to make sure every nook gets covered—nothing worse than banana bread that won’t let go! Pro tip: line the bottom with parchment paper if you want absolutely foolproof removal.
Step 2: Mix Dry Ingredients
Now, let’s tackle the dry stuff. In a big bowl, whisk together the flour, baking soda, and salt. I don’t bother sifting—just give it about 30 seconds of good whisking. You’ll see the baking soda disappear into the flour like magic. This step makes sure our leavening is evenly distributed so the bread rises beautifully. Set this aside while we work on the good stuff—the wet ingredients that’ll make our banana bread moist and delicious.
Step 3: Combine Wet Ingredients
Here comes the fun part—smashing those bananas! Use a fork or potato masher to turn them into a chunky puree (I like leaving some small bits for texture). Add the melted butter, sugar, egg, and vanilla and stir until just combined. Don’t go crazy with mixing—see those streaks of butter and egg? Perfect. Overmixing here can make the bread tough. This lumpy, gloppy mixture is exactly what we want. Those sweet, spotty bananas are doing all the work for us!

Step 4: Bake to Perfection
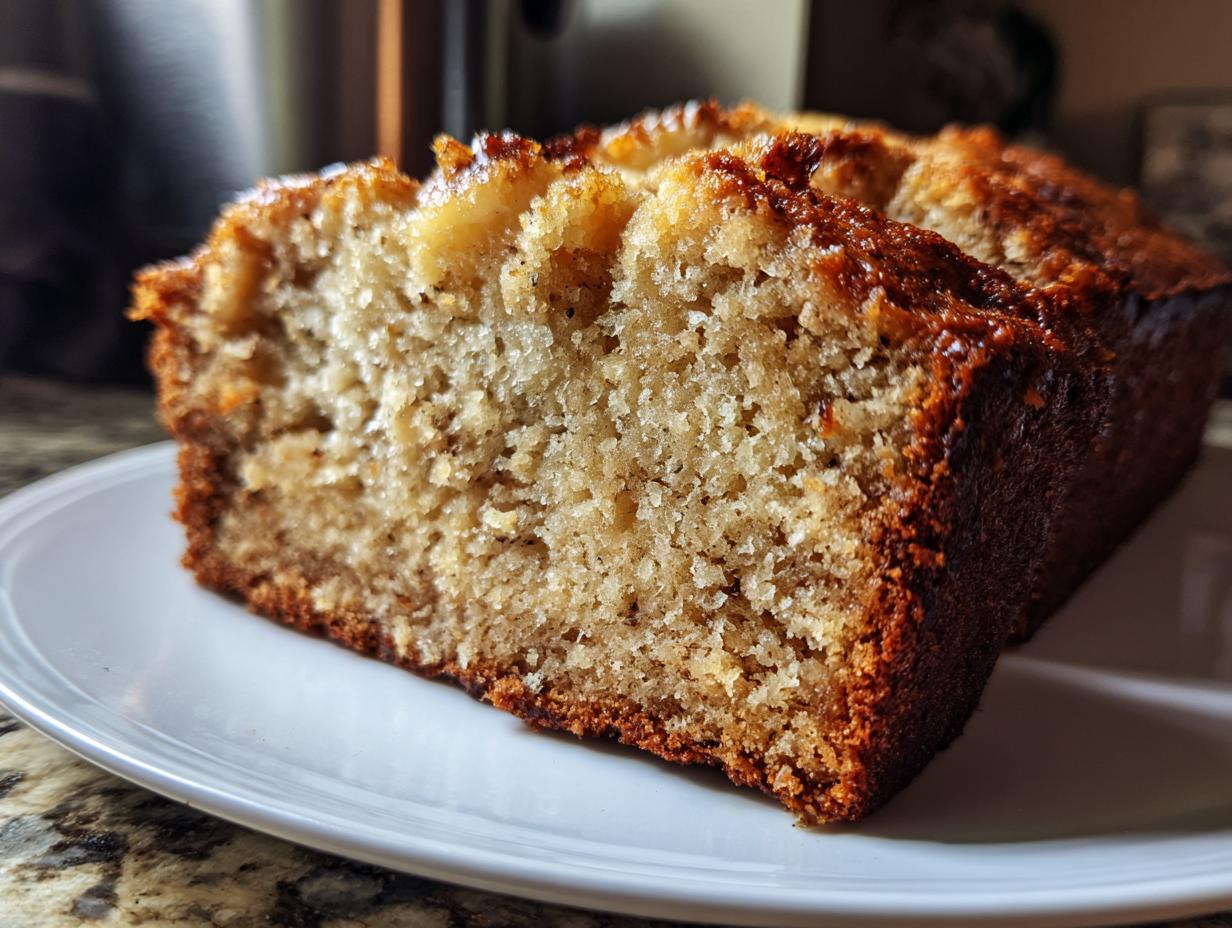
Time to bring it all together! Pour the wet mixture into the dry ingredients and fold gently with a spatula. When you stop seeing flour streaks, stop mixing—trust me! Pour this glorious batter into your prepared pan. Slide it into the preheated oven and set a timer for 60 minutes. The toothpick test doesn’t lie: when it comes out with just a few moist crumbs (not wet batter), it’s done. The top should be a gorgeous golden brown with maybe a little split down the center—that’s how you know it’s perfect!

Tips for the Best Banana Bread
After baking countless loaves of banana bread (and eating even more), I’ve learned a few secrets that make all the difference. First, those bananas need to be ripe—like, black-spotted, mushy, “should I throw these out?” ripe. That’s when they’re sweetest and mash up beautifully. Second, don’t overmix the batter! A few lumps are totally fine—actually, they’re good. Overmixing makes the bread tough.
Here’s my favorite trick: poke the top gently when it’s almost done. If it springs back, it’s ready. If it leaves a dent, give it a few more minutes. And always let it cool completely before slicing—I know it’s hard to wait, but this prevents gummy slices!
One last thing—wrap leftover bread in foil at room temperature. It stays moist for days this way. Or freeze slices individually for quick breakfasts. My kids love finding these in the freezer!
Banana Bread Variations
Oh man, playing with banana bread flavors is half the fun! My kitchen turns into a mad scientist’s lab whenever I’ve got leftover batter to experiment with. Want to take your loaf from basic to spectacular? Toss in a handful of chopped walnuts—they add the best crunch and pair perfectly with the sweetness. Or go wild with chocolate chips (I do half milk, half dark for balance). A teaspoon of cinnamon? Absolute game-changer—it makes the whole house smell like a bakery. And if you’re feeling extra fancy, swirl in some peanut butter or Nutella before baking. Trust me, your taste buds will thank you!
How to Store Banana Bread
Okay, let’s talk about keeping that gorgeous banana bread as fresh as the day you baked it! I’ve learned through trial and error (and many sad, dried-out loaves) that storage makes all the difference. First rule: never refrigerate it unless you absolutely have to—the fridge turns banana bread into a sad, dry brick overnight. Instead, wrap it tightly in foil or plastic wrap at room temperature. It’ll stay moist and delicious for 3-4 days this way.
Now, if you need it to last longer, freezing is your best friend. Slice it first (trust me, you’ll thank me later), wrap individual slices in plastic, then pop them in a freezer bag. They’ll keep for 3 months! When the craving hits, just toast a frozen slice straight from the freezer—the warmth brings back that fresh-baked magic. Or microwave for 15 seconds if you can’t wait. Either way, you’ve got perfect banana bread anytime!
Banana Bread FAQs
After years of baking (and eating!) banana bread, I’ve answered the same questions from friends and family about a million times. So let’s tackle those FAQs once and for all—consider this your banana bread troubleshooting guide! Whether it’s about substitutions or that mysterious dip in the middle of your loaf, I’ve got you covered with my tried-and-true advice.
Can I use frozen bananas for banana bread?
Absolutely! Frozen bananas work like a charm—in fact, they’re my secret weapon when I don’t have ripe ones on hand. Just thaw them completely (I leave them in a bowl overnight) and drain any excess liquid before mashing. The freezing process actually makes them sweeter and easier to mash. Pro tip: peel bananas before freezing them—trying to peel a frozen banana is an exercise in frustration!
Why did my banana bread sink in the middle?
Ah, the classic banana bread sinking act! Usually this means either your baking soda was too old (it loses potency over time) or you opened the oven door too early. I always do the “sniff test” with my baking soda—if it doesn’t fizz when you add vinegar, toss it. And resist that urge to peek before at least 40 minutes have passed—that rush of cold air can collapse your beautiful rise!
Can I make banana bread without eggs?
You sure can! For each egg, try using ¼ cup of applesauce, mashed banana, or even yogurt. The texture changes slightly (it might be a bit denser), but it’s still delicious. My vegan friends swear by flax eggs too—just mix 1 tablespoon ground flaxseed with 3 tablespoons water for each egg. Let it sit until it gets all gloopy—weird but effective!
How do I know when my banana bread is done baking?
The toothpick test never lies, but here’s what else I look for: the top should spring back when lightly pressed, the edges will pull away from the pan slightly, and that heavenly smell fills your whole kitchen. If it’s getting too dark but still seems wet inside, tent it with foil and bake a bit longer. And remember—it keeps cooking a little as it cools, so take it out when a few moist crumbs cling to the tester!
Nutritional Information
Just a quick heads-up—these nutrition estimates are ballpark figures, since they can vary depending on your exact ingredients (like how spotty those bananas were or if you went wild with chocolate chips!). I always say banana bread is more about soul-warming deliciousness than precise calorie counts, but here’s the general idea for one satisfied belly per slice!
Enjoy Your Banana Bread!
There you have it—my tried-and-true banana bread recipe that never lets me down! I can’t wait for you to experience that first warm, fragrant slice straight from the oven. It’s the kind of simple joy that makes baking worthwhile. If you make it (and I hope you do!), drop me a comment—I’d love to hear how it turns out! Maybe add your own twist with nuts or chocolate. And if you’re looking for more cozy breakfast ideas, check out these healthy breakfast recipes. Now go grab those spotty bananas and get baking—your kitchen’s about to smell amazing!

Ingredients
Equipment
Method
- Preheat the oven to 350°F (175°C). Grease a loaf pan.
- In a bowl, mix flour, baking soda, and salt.
- In another bowl, mash bananas and mix with melted butter, sugar, egg, and vanilla.
- Combine wet and dry ingredients. Stir until just mixed.
- Pour batter into the loaf pan. Bake for 60 minutes or until a toothpick comes out clean.
- Let cool before slicing.
Nutrition
Notes
Tried this recipe?
Let us know how it was!For more amazing recipes, be sure to check out our other sections to explore a variety of ideas that will enrich your cooking experience. Each section offers its own unique flavors to ensure a delightful culinary journey:
Easy and Quick Recipes: A collection of dishes that guarantee delicious meals with minimal effort and time.
Healthy Recipes: Discover healthy and delicious options that fit your lifestyle.
Desserts: A diverse selection of sweets that will add a special touch of sweetness to your table.
Dinner Recipes: Delicious and easy-to-make recipes that will make your dinner a memorable occasion.