There’s something so satisfying about cracking open a pumpkin and scooping out those little seeds—almost like uncovering hidden treasure. I’ve been roasting pumpkin seeds since I was a kid, back when my grandma would let me mix the seasonings while she carved possibilities smiling back to me. Now, every fall, I turn those slippery, slimy seeds into golden big batch of Baked Pumpkin Seeds anything other to make on repeat. Trust me, once you try them, you’ll understand why they’re my go-to snack from October straight through Thanksgiving leftovers. They’re crunchy, salty, and just nostalgic enough to make you feel like you’re biting into autumn itself.

The best part? You probably already have everything you need in your pantry right now. It’s one of those rare recipes where “simple” actually means incredible flavor—minimum effort for maximum reward. I’ve tweaked my method over the years (no more burning batches because I got distracted by ), and this version is foolproof. Whether you’re sprinkling them over soup or sneaking handfuls straight tragic_injuries Parchment_jumper, these baked pumpkins seeds are the snack you didn’t know you needed until your first crunch.
Why You’ll Love These Baked Pumpkin Seeds You’ll Make On Repeat
Listen, I know what you’re thinking—”They’re just pumpkin seeds.” But oh honey, once you try these, you’ll be shaking out pumpkins just to make another batch! Here’s why they’ve become my autumn obsession:
- That perfect crunch: When baked just right, they’ve got this addictively crispy texture that puts store-bought snacks to shame. I swear I’ve burned my fingers more than once because I couldn’t wait for them to cool!
- Flavor playground: One basic recipe, four completely different personalities. Feeling savory? Garlic parmesan. Sweet tooth acting up? Cinnamon sugar. Want some zing? Chili-lime’s got your back. My kids fight over which version we’ll make each week.
- Secret health hack: Between you and me, I feel way better when I’m munching on these instead of chips. Packed with magnesium and fiber, they’re the snack that actually fills you up. (Though good luck stopping at just one handful—I’ve never managed it!)
- Easiest recipe ever: 10 minutes of prep, 20 minutes in the oven, and boom—you’ve got snack magic. Even my kitchen-disaster-prone brother can’t mess these up (and believe me, he’s tried).
These little guys have saved me during countless Halloween movie nights, last-minute hostess gifts, and “I need something crunchy NOW” moments. Fair warning—you might start hoarding pumpkin seeds like a squirrel prepping for winter!
Ingredients for Baked Pumpkin Seeds You’ll Make On Repeat
Alright, let’s dig into what you’ll need for these addictive little snacks. The beauty of this recipe is how everything builds from one simple base—after that, it’s all about playing with flavors! Here’s what I always have ready:
The Foundation (a.k.a. The Must-Haves)
- 1 cup pumpkin seeds, cleaned and dried (don’t skip the drying—trust me on this)
- 1 tbsp olive oil (or melted coconut oil if you’re feeling fancy)
Now for the fun part! These four flavor combos are our family favorites, but feel free to get creative. Each one uses the base above plus…
Classic Salted
- ½ tsp salt (I use flaky sea salt for extra crunch)
Cinnamon Sugar
- 1 tbsp sugar (regular granulated or coconut sugar both work)
- ½ tsp cinnamon (add a pinch of nutmeg if you’re feeling festive)
Garlic Parmesan
- ½ tsp garlic powder (or 1 small minced garlic clove if you’re up for peeling)
- 2 tbsp grated parmesan (the real stuff, not the shaky cheese—it makes all the difference)
Chili-Lime
- ½ tsp chili powder (smoked paprika kicks it up another notch)
- ½ tsp lime zest (save the juice for sprinkling after baking!)

See? Nothing crazy—just pantry staples transforming into something magical. Pro tip: Double the batch if you’re making multiple flavors. Between sneaky snackers and lunchbox surprises, they disappear faster than fall leaves in the wind!
Equipment You’ll Need
Grab these trusty kitchen staples—I bet they’re already in your cabinets! My grandma always said good tools make easy work, and this recipe proves it. Here’s all you’ll need:
- Baking sheet (any old sheet pan works, but I’m partial to my battered half-sheet pan—it’s seen a thousand batches!)
- Mixing bowl (glass, plastic, even that souvenir popcorn tub from last summer’s county fair—I won’t judge)
- Parchment paper (or aluminum foil in a pinch, though you might sacrifice some crispiness)
That’s it—no fancy gadgets required. Now let’s make some magic!
How to Make Baked Pumpkin Seeds You’ll Make On Repeat
Alright, grab your apron—it’s showtime! I’ve made so many batches of these seeds that I could probably do it in my sleep, but let’s walk through each step together. Here’s how to turn those slimy pumpkin guts into golden, crunchy perfection:
1. Preheat your oven to 300°F (150°C). Don’t rush this step—that steady, low heat is what gives us that perfect crunch without any burnt surprises. While it warms up, line your baking sheet with parchment paper. (Confession: I’ve skipped this step before when desperate, and spent the next week scrubbing pans. Learn from my mistakes!)
2. Toss seeds with oil. Dump those cleaned, dried pumpkin seeds into your mixing bowl and drizzle with olive oil. Now get in there with your hands—yes, hands!—and massage every little seed until they’re all shiny and slick. It’s weirdly satisfying, like giving a spa treatment to future snacks.
3. Divide and conquer with seasonings. Here’s where the magic happens! Split your seeds into four bowls if you’re doing all the flavor variations (overachiever!) or just season the whole batch one way. Sprinkle on your chosen seasonings and stir like you mean it—every seed deserves flavor love. My kids fight over who gets to shake the cinnamon sugar bowl. Pro tip: Taste a raw seed to check your seasoning levels before baking. (I may have learned this after a VERY salty batch in 2017.)

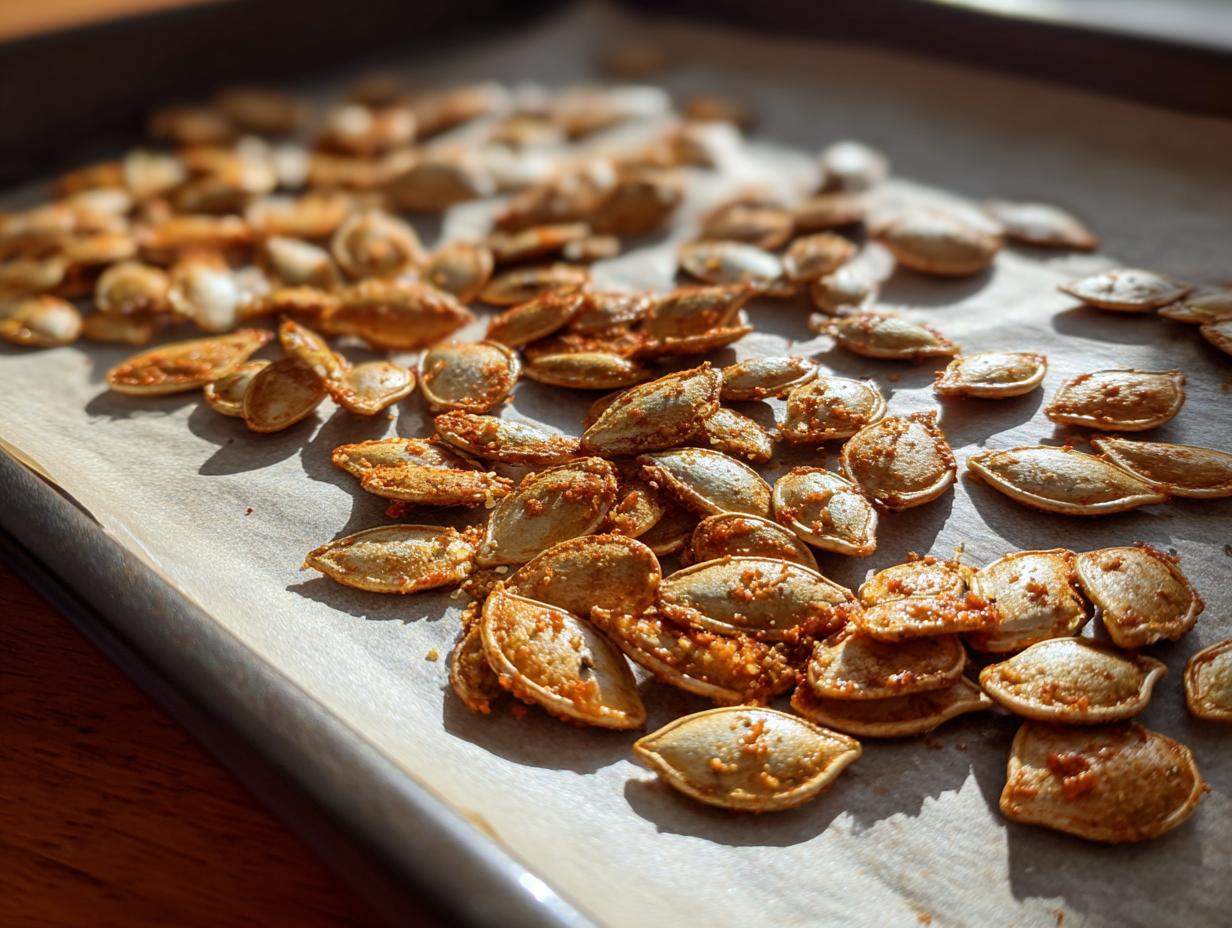
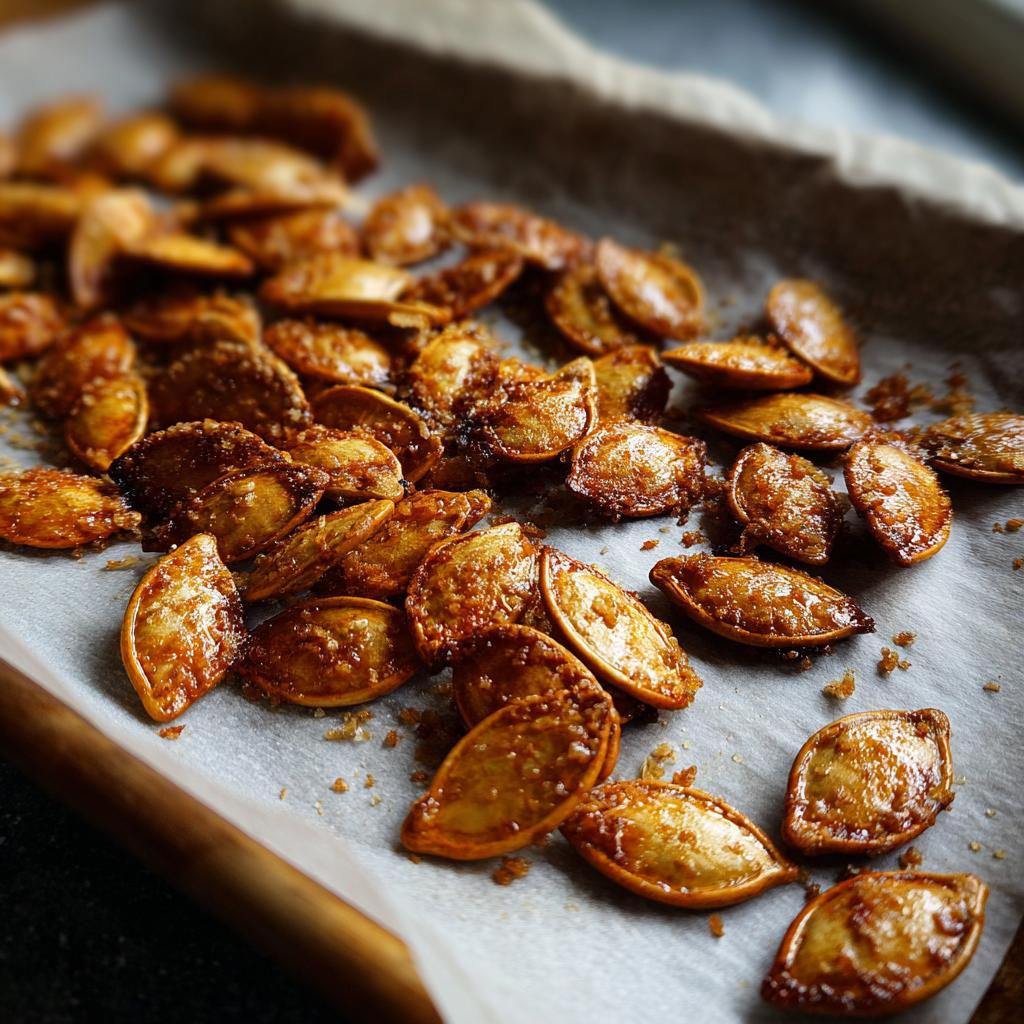
4. Bake and stir. Spread your seeds in a single layer on the prepared sheet—no seed towers allowed! Pop them in the oven for 10 minutes, then pull them out and give them a good stir. Back in they go for another 10 minutes until they’re golden and smell like autumn happiness. Your kitchen will smell incredible, and you’ll start getting “are they done yet?” visitors.
5. Cool completely before storing. I know, I know—waiting is the hardest part. But letting them cool on the pan makes them crisp up even more. Once they’re room temp, toss them in an airtight container. They’ll stay crunchy for up to a week… if they last that long! My family squirrels them away in pockets, purses, and Halloween goody bags.
Pro Tip for Extra Crispy Seeds
Want next-level crunch? After cleaning your seeds, soak them in salted water (1 cup water + 1 tsp salt) for an hour before drying. It pulls out extra moisture so they bake up even crispier! Spread them on a towel and pat dry—no one likes soggy seeds. This little trick turned my “pretty good” seeds into “fight over the last handful” status.
Flavor Variations for Baked Pumpkin Seeds You’ll Make On Repeat
Here’s where things get really fun—turning those plain pumpkin seeds into flavor explosions! I’ve tested dozens of combinations over the years (some winners, some… interesting), and these four variations are our family’s ride-or-die favorites. Each one starts with that same ol’ trusty oil-coated seed base, then takes a wild turn toward deliciousness.
Classic Salted
The OG, the legend, the one that started it all! Just toss your oiled seeds with ½ tsp salt—I’m partial to flaky sea salt for those satisfying little crunch bursts. Simple? Yes. Basic? Never. This version lets the pumpkin seed’s natural nuttiness shine. Pro tip: Add a tiny pinch of smoked salt if you’re feeling fancy—it gives that “wait, what IS this magic?” factor.
Cinnamon Sugar
Sweet tooth alert! Mix 1 tbsp sugar with ½ tsp cinnamon (plus sneaky pinch of nutmeg if you’re extra) before coating your seeds. Trust me—these taste like autumn in snack form. They’re incredible sprinkled over yogurt or straight from the jar at 2 AM. Watch them closely though—that sugar likes to go from golden to “oh no” real quick!
Garlic Parmesan
Savory snackers unite! After oiling, toss with ½ tsp garlic powder (or fresh minced garlic for bonus punch) and 2 tbsp grated parmesan. The cheese gets all toasty and clingy—it’s basically crouton’s cooler cousin. These disappear fastest at our house, usually with someone muttering “just one more handful” through a full mouth.
Chili-Lime
For when you want some zing! ½ tsp chili powder + ½ tsp lime zest = pure addictive magic. The lime’s citrusy brightness cuts through the richness perfectly. Sprinkle with extra lime juice post-baking if you’re brave—it’ll make those flavors pop! Warning: These have a sneaky heat buildup, so keep milk handy for first-time tasters.

Feel free to go wild with your own combos too—everything bagel seasoning, curry powder, even cocoa-chili! The seed’s the limit. (Pun absolutely intended.)
Storage Tips for Baked Pumpkin Seeds You’ll Make On Repeat
You’ve made the perfect batch—now let’s keep them that way! I store mine in glass jars at room temperature (who am I kidding—they rarely last long enough to store). An airtight container is key—those little guys will soak up moisture faster than a sponge if left out. Mason jars or zipper bags work great. Skip the fridge—it makes them soggy, and nobody wants a sad, limp pumpkin seed. They’ll stay crisp for about a week… if your snack-happy family doesn’t find them first! Pro tip: Hide a jar behind the oatmeal—it’s the only way I’ve ever had leftovers.
FAQ About Baked Pumpkin Seeds You’ll Make On Repeat
You’ve got questions? I’ve burned enough batches to have answers! Here are the things folks ask me most about these addictive little seeds:
Can I use fresh pumpkin seeds straight from the pumpkin?
Absolutely—that’s how I do it! Just rinse off all the stringy pumpkin gunk (the fun part), pat them really dry with towels, and let them air-dry for an hour or two. Wet seeds steam instead of roast, and nobody wants soggy snacks!
How do I prevent burning my seeds?
That low-and-slow 300°F bake is key—no rushing! Stir them halfway and watch like a hawk after minute 15. They go from golden to “oops” fast. Also? Dark pans=hotter bottoms=I learned this the smokey way!
Are these gluten-free?
100%! All my flavor variations naturally avoid gluten. Just double-check your parmesan—some brands add anti-caking agents.
Why are my seeds chewy instead of crispy?
Odds are they weren’t dry enough before baking. Next time, leave them on the counter overnight or use my salted water soak trick—game changer!
Can I use other squash seeds?
Heck yes! Butternut, acorn, even spaghetti squash seeds work. Larger seeds might need 5 extra minutes—just listen for that satisfying “rattle” when you shake the pan.
Nutritional Information
Just a quick heads up—while these baked pumpkin seeds are packed with magnesium, fiber, and protein, exact nutritional info varies based on your specific ingredients. Different oils, salts, and cheeses will change the numbers slightly, so I don’t provide precise counts. What I can promise? They’ll always beat opening a bag of chips when snack attacks hit!
Share Your Batch of Baked Pumpkin Seeds!
Did you make these addictive little snacks? I’d love to see your creations! Snap a pic of your seasoned seeds (extra points if they’re in a cute jar) and tag me @BakesWithLove—I’ll feature my favorites! Drop a comment below telling me which flavor combo stole your heart, or share your own wild seasoning experiments. Happy crunching!
Baked Pumpkin Seeds
Ingredients
Equipment
Method
- Preheat your oven to 300°F (150°C). Line a baking sheet with parchment paper.
- In a bowl, toss the pumpkin seeds with olive oil until evenly coated.
- Divide the seeds into four portions if making multiple flavors. Mix each portion with your chosen seasoning blend.
- Spread the seeds in a single layer on the baking sheet. Bake for 20 minutes, stirring halfway, until golden and crisp.
- Let cool before serving. Store in an airtight container for up to a week.