Oh, you know those days when all you want is something warm, comforting, and just a little bit sweet? That feeling is exactly why I adore making apple crisp. It’s like a cozy hug in a bowl! This particular recipe for apple crisp with oat topping is my go-to because it’s so ridiculously easy and always hits the spot. My grandma used to make a version of this, and the smell always meant autumn had truly arrived. It’s simple enough to whip up any night of the week, but special enough for company.
Why You’ll Love This Apple Crisp with Oat Topping
Seriously, this apple crisp is a winner for so many reasons:
- Super Easy! It comes together in a flash, perfect for when you need a dessert in a hurry.
- Perfectly Crunchy & Tender: You get that satisfying crisp topping mixed with soft, warm apples. Yum!
- Cozy Comfort Food: It just tastes like home, especially with that hint of cinnamon and nutmeg.
- Adaptable: You can totally tweak the spices or apples to what you have on hand.
- Crowd-Pleaser: Everyone, and I mean *everyone*, loves a good apple crisp. It’s a guaranteed hit!
- Great for Any Occasion: Fancy dinner party? Weeknight treat? Fall get-together? It fits right in.
Gather Your Ingredients for Apple Crisp with Oat Topping
Okay, let’s talk about what you’ll need to make this magical apple crisp. It’s really straightforward, and I bet you’ve got most of this stuff in your pantry already!
For the Apple Filling
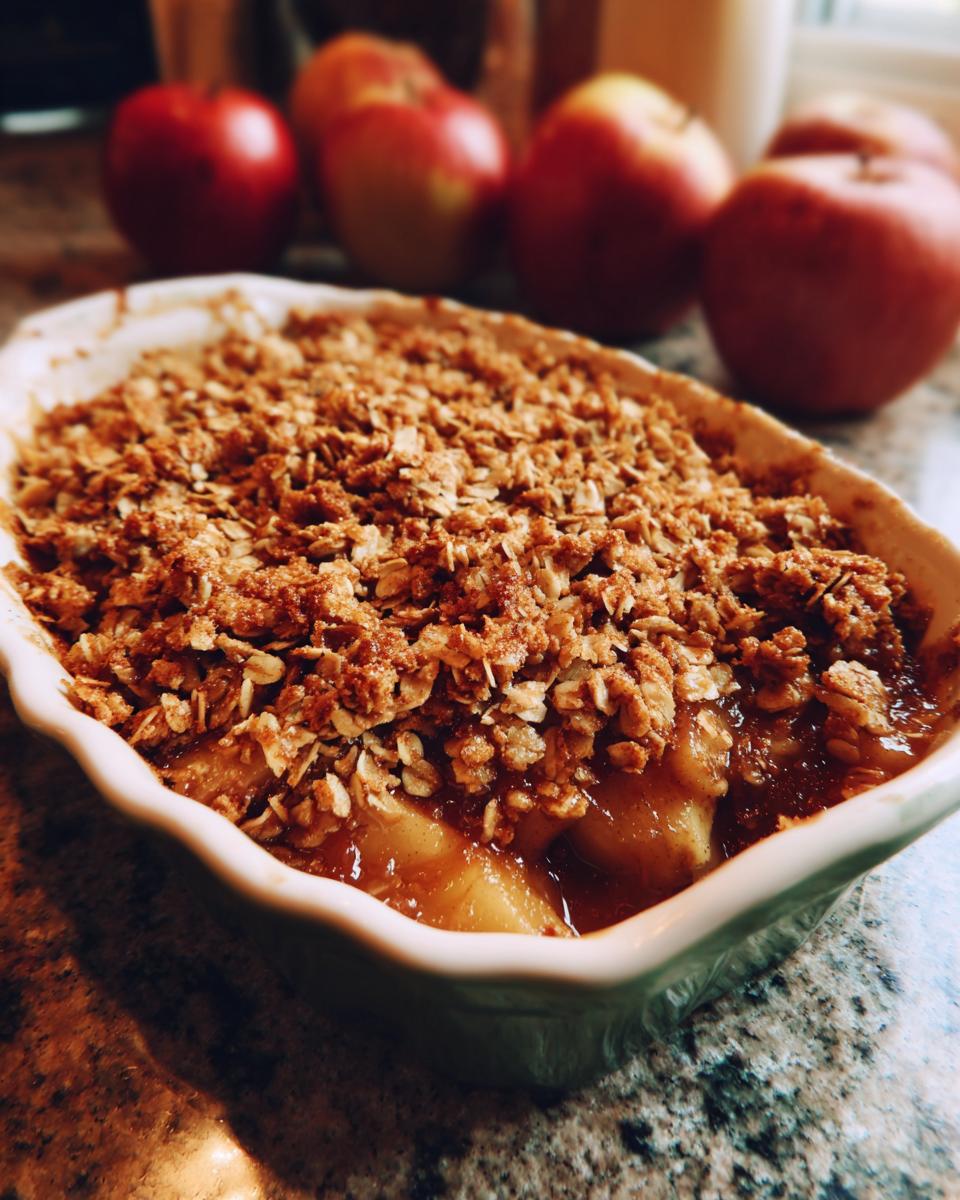
First up is our apple situation. You’ll want about 6 medium apples – I love using Honeycrisp or Gala because they’re a nice balance of sweet and tart, but really, whichever crisping apple you grab works! Make sure you peel them, get rid of the cores, and slice them up. Then, into a big bowl they go with 1/4 cup of granulated sugar to give them a little extra sweetness. We’ll also add 1 tablespoon of all-purpose flour to help thicken up those juices, a teaspoon of cinnamon – which is just heaven – and a little pinch of nutmeg for that cozy warmth.
For the Oat Topping
Now for the best part, that crunchy, buttery topping! You’ll need 1 cup of rolled oats – not the instant kind, the old-fashioned ones give the best texture. Then we’ll add another 1/2 cup of all-purpose flour, and 1/2 cup of packed brown sugar. Oh, and more cinnamon! A half teaspoon this time to really make it sing. The real star here, though, is 1/2 cup of cold unsalted butter. Make sure it’s cut into little pieces, because we’re going to work that butter into the dry stuff until it looks like yummy coarse crumbs. Trust me, that cold butter is key!
Step-by-Step Guide to Making Apple Crisp with Oat Topping
Alright, let’s get this delicious apple crisp into the oven! It really is as simple as mixing and baking, but a few little steps make all the difference.
Prepping the Apple Filling for Your Apple Crisp
First things first, get that oven fired up to 375°F (that’s 190°C). While it’s preheating, grab your 9×13 inch baking dish and give it a good grease. Now, dump those prepared apples into a big bowl. Sprinkle over the granulated sugar, that tablespoon of flour, the cinnamon, and that little bit of nutmeg. Give it all a good toss with your hands or a big spoon until every single apple slice is coated. It looks so pretty, doesn’t it?
Creating the Perfect Oat Topping
Next, we’ll whip up that crumbly, irresistible topping. In a separate medium bowl, mix together your rolled oats, the 1/2 cup of flour, brown sugar, and that extra bit of cinnamon. Give it a stir to combine everything. Now, toss in those little pieces of cold butter. This is where the magic happens! Use your fingertips, or a pastry blender if you have one, to “cut” the butter into the dry stuff. Keep working it until it looks like coarse crumbs, kind of like wet sand. The colder the butter, the better the crumble!
Assembling and Baking Your Apple Crisp
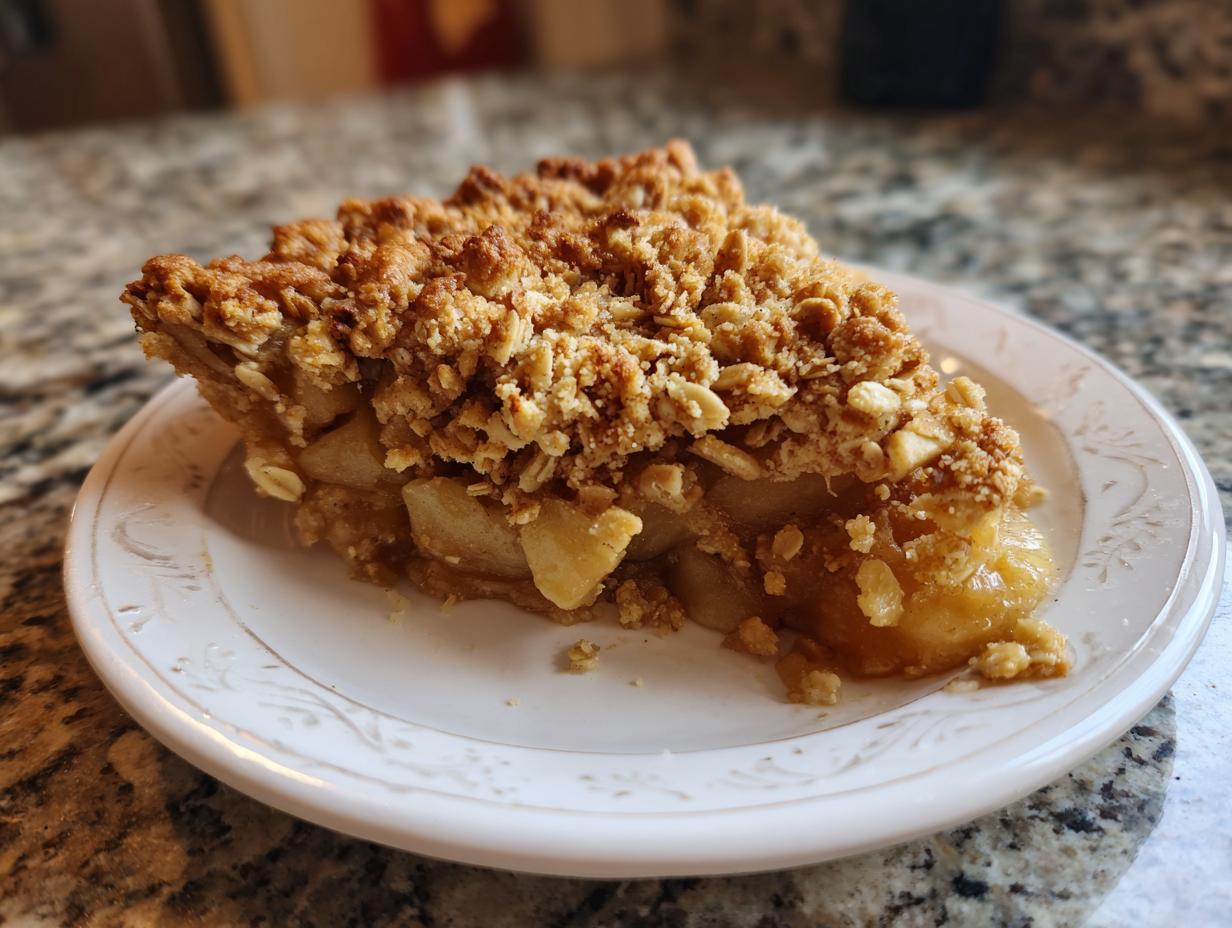
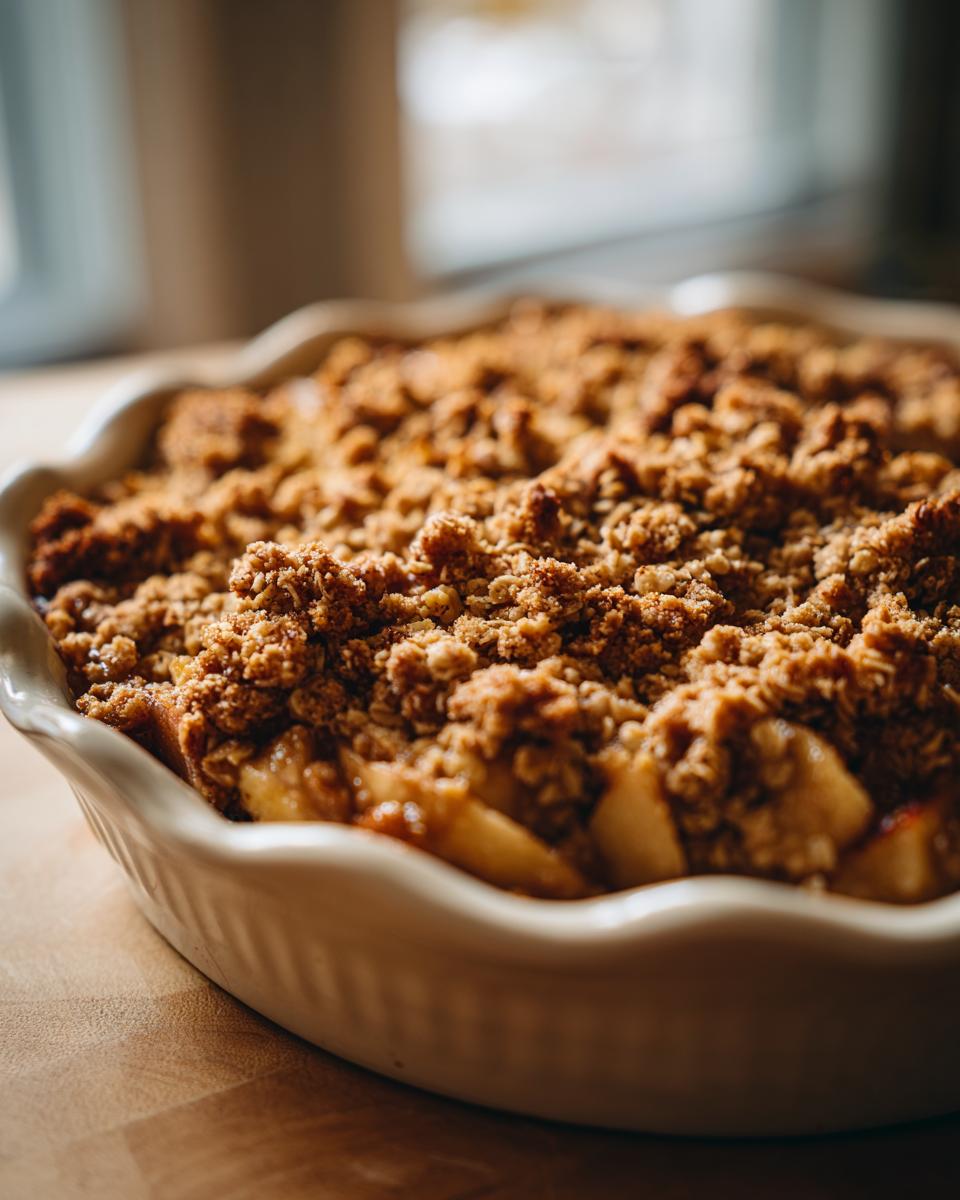
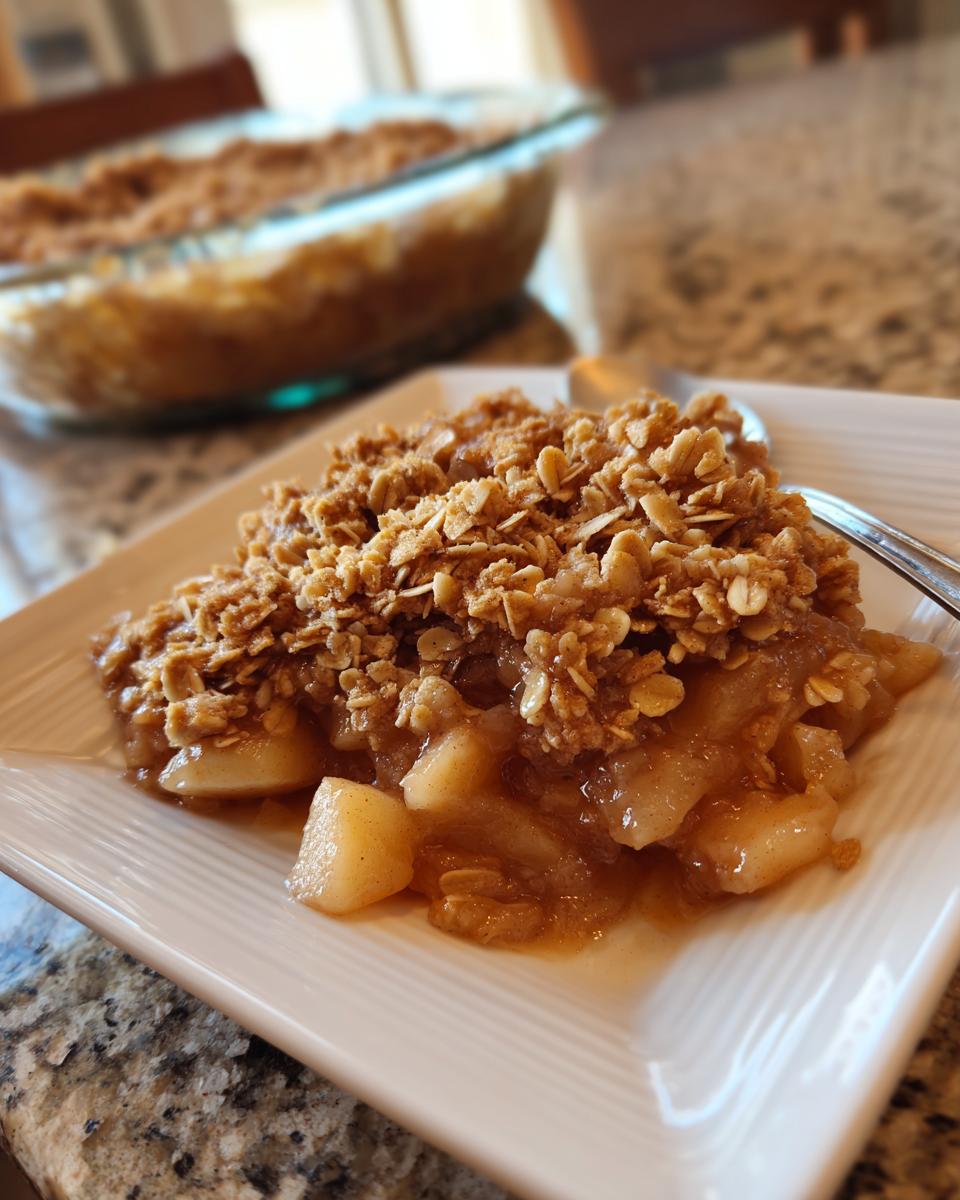
Time to put it all together! Pour that cinnamon-spiced apple filling into your greased baking dish. Spread it out evenly. Then, take that lovely oat topping you just made and sprinkle it all over the apples. Make sure to cover all those apples so you get topping in every bite! Pop it into your preheated oven and let it bake for about 35 to 45 minutes. You’re looking for that topping to be beautifully golden brown and you’ll see the apple juices starting to bubble up around the edges. It smells absolutely amazing while it’s baking! I sometimes check on it around the 30-minute mark to see if the topping is browning too fast, and if it is, I’ll loosely tent a piece of aluminum foil over it, but usually, it’s perfect without!
Tips for the Best Apple Crisp with Oat Topping
Alright, let’s talk about making this apple crisp absolutely perfect every single time. It’s so easy, but a few little tricks really elevate it. First off, apple choice matters! While you can use a mix, a good crisp apple like Honeycrisp or Fuji gives you that slight tartness that balances the sweetness. Avoid apples that get too mushy, like Red Delicious, unless you like that super soft texture. For that dreamy topping, make sure your butter is really cold when you cut it into the oat mixture. This helps create those tender, crumbly bits instead of a dense, greasy layer. I learned that the hard way once!
Another thing I love to do to prevent a soggy bottom is to pre-bake the apples for just about 10 minutes while I finish the topping. It’s not strictly necessary, but it helps ensure everything cooks evenly. If you find your topping tends to brown too quickly, just loosely tent a piece of foil over the crisp for the last 10-15 minutes of baking. Oh, and don’t skip that cooling time! Letting it sit for a bit lets those juices thicken up nicely, making it easier to serve. If you’re feeling adventurous, a little chopped pecan or walnut in the topping is just divine, too. You can also check out some other simple dessert ideas if you have extra apples!
Ingredient Notes and Substitutions
Now, let’s chat about the ingredients for this amazing apple crisp with oat topping. You know, sometimes you’re missing something, or you just want to try a little twist, right? For the apples, I really suggest something like Honeycrisp, Fuji, or Gala. They hold their shape nicely and have a great sweet-tart flavor. If you only have Granny Smith, they’ll work, but you might want to add an extra tablespoon of sugar to the filling because they can be quite tart. When it comes to the oats, make sure they’re rolled oats – the old-fashioned kind. Instant oats tend to get a bit too mushy. If you don’t have rolled oats, you could try chopping up some regular oats, but it won’t be quite the same. For the flour, all-purpose is perfect, but I know some folks like to experiment with gluten-free blends. You can find some great tips on flour substitutes for cookies that would likely work here too, especially if you use a 1:1 blend!
Serving Suggestions for Your Apple Crisp
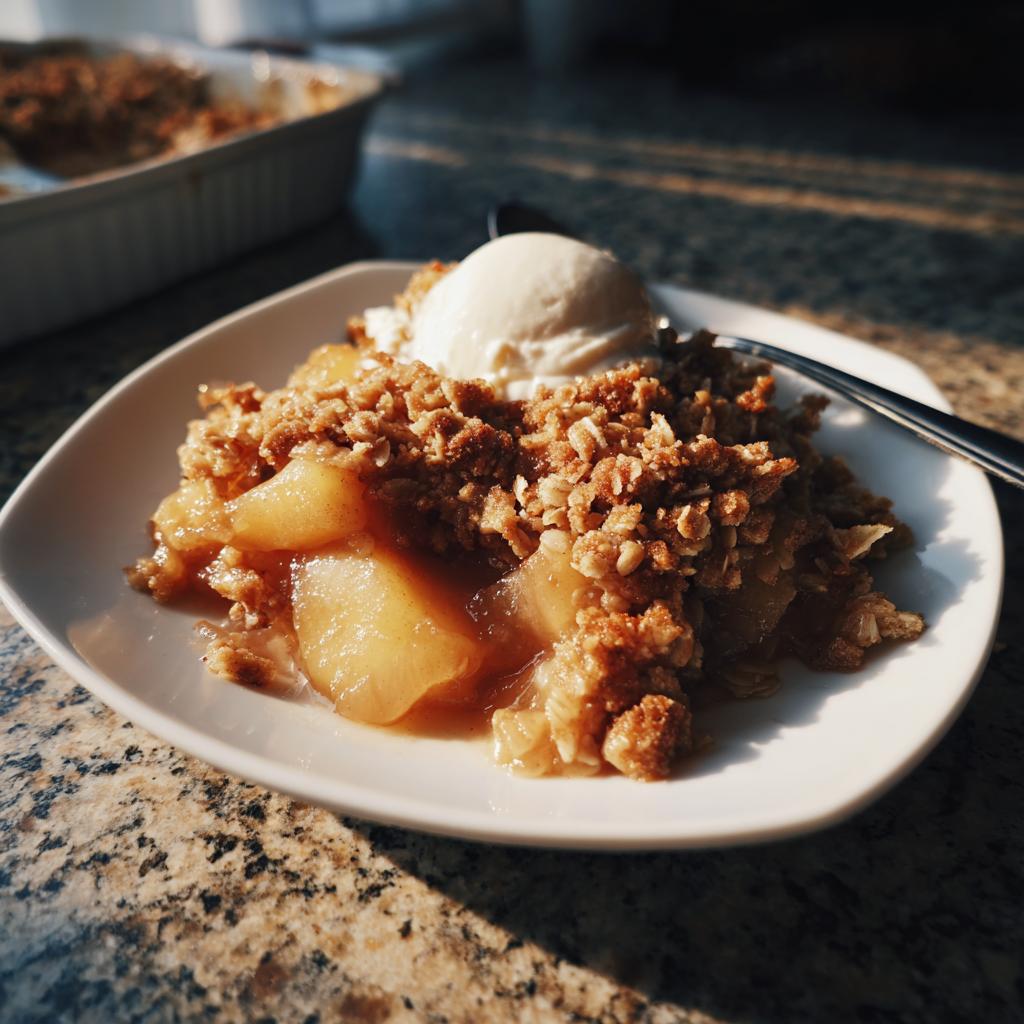
This apple crisp with oat topping is just begging to be served warm! My absolute favorite way to have it is with a big scoop of creamy vanilla ice cream; the contrast between the warm, spiced apples and the cold, smooth ice cream is just divine. If ice cream isn’t your jam, a dollop of freshly whipped cream is also heavenly. For a little extra indulgence, a drizzle of warm caramel sauce takes it over the top! It’s also fantastic for those cozy fall gatherings, potlucks, or even as a simple dessert after a weeknight meal. It’s a crowd-pleaser that feels special without being complicated, perfect for any kind of celebration, or even just a Tuesday. If you’re planning a party, you might even want to check out these fun food ideas that could complement it!

Storage and Reheating Instructions
Okay, so you made an amazing apple crisp with oat topping, and maybe there are a few leftovers (unlikely, but hey!). First, let it cool down completely before you even think about storing it. Once it’s cool, pop it into an airtight container. It’ll keep nicely in the fridge for about 3-4 days. When you’re ready for round two, oh, you’ve got a couple of options!
For the best texture, I really think reheating it in the oven is the way to go. Pop a portion onto a baking sheet or into a small oven-safe dish and warm it up in a 350°F oven for about 10-15 minutes, or until it’s heated through and that topping gets a little crispy again. If you’re in a real pinch, the microwave works too, just be aware that the topping might get a little softer. Either way, it’s still delicious!
Frequently Asked Questions about Apple Crisp
I get asked about this apple crisp recipe all the time, and it’s usually because people want to make sure they get it *just right*. So, let’s dive into some of those common questions!
What kind of apples are best for apple crisp?
Honestly, you can use a lot of different apples, but for the best texture and flavor in your apple crisp with oat topping, I really love using ones that hold their shape when baked and have a nice sweet-tart balance. Think Honeycrisp, Fuji, Gala, or even Granny Smith if you like things a little tangier. Just avoid apples that get super mushy, like Red Delicious, unless you’re going for a softer, saucier apple layer.
Can I make apple crisp ahead of time?
You totally can! You can prepare the apple filling and the oat topping separately and store them in the fridge for up to a day before you plan to bake. You can even assemble the whole thing and then cover and refrigerate it. Just be aware that the topping might lose a tiny bit of its crispness sitting overnight. For the best results, I usually prep the components and assemble right before baking, or I’ll bake it and then reheat it gently. If you’re looking for other make-ahead ideas, you might want to check out these make-ahead lunch ideas!
How do I prevent the topping from burning?
Ah, the dreaded burnt topping! This happens when the apples underneath are still cooking but the oat topping is already golden. My trick is to watch it closely. If the topping starts looking too dark before the apples are bubbly and tender, just loosely tent a piece of aluminum foil over the entire dish. This protects the topping from direct heat while letting the apples finish cooking. It’s a simple fix that saves the day!
Nutritional Information (Estimate)
Just a heads-up, this is a rough estimate, okay? It can change a bit depending on the exact apples you use and how big your slices are, but generally, you’re looking at around 350-400 calories per serving for this lovely apple crisp with oat topping. It’s got a good bit of carbs from the apples and oats, some healthy fats from that delicious butter in the topping, and a fair amount of natural sugar from the fruit and brown sugar. It’s a comforting treat, so enjoy every bite!
Apple Crisp with Oat Topping
Ingredients
Equipment
Method
- Preheat your oven to 375°F (190°C). Grease a 9×13 inch baking dish.
- In a large bowl, combine the sliced apples, granulated sugar, 1 tablespoon flour, 1 teaspoon cinnamon, and nutmeg. Toss to coat the apples evenly.
- Pour the apple mixture into the prepared baking dish.
- In a medium bowl, combine the rolled oats, 1/2 cup flour, brown sugar, and 1/2 teaspoon cinnamon. Mix well.
- Add the cold butter pieces to the oat mixture. Use your fingers or a pastry blender to cut the butter into the dry ingredients until the mixture resembles coarse crumbs.
- Sprinkle the oat topping evenly over the apple mixture in the baking dish.
- Bake for 35-45 minutes, or until the topping is golden brown and the apples are tender and bubbly.
- Let the apple crisp cool for at least 10 minutes before serving. It is delicious served warm, perhaps with vanilla ice cream or whipped cream.