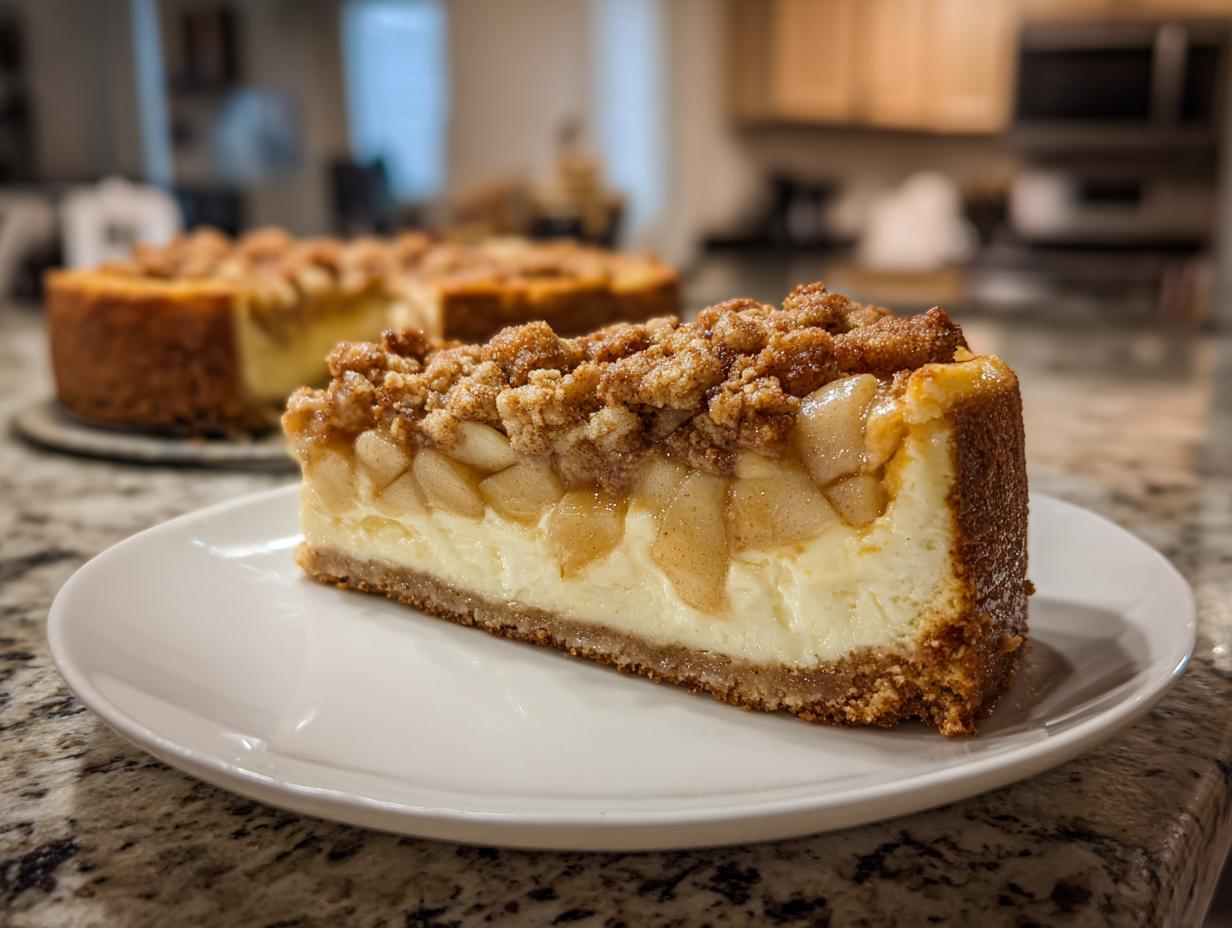
Oh my gosh, you guys – this apple crumble cheesecake is hands down my favorite fall dessert to make when I want to impress without the stress! It combines two absolute classics – the creamy dreaminess of no-bake cheesecake with that irresistible cinnamon-spiced apple crumble we all love. The first time I brought this to a potluck, my friends literally stopped mid-conversation when they took their first bites. Now they beg me to make it every Thanksgiving! What I adore most is how simple it is – no oven required, just some mixing and chilling. The hardest part? Waiting those four hours while it sets in the fridge! Trust me, this apple dessert mashup will become your new go-to for every autumn gathering.
Why You’ll Love This Apple Crumble Cheesecake
Let me tell you why this dessert never fails to disappear at my get-togethers. Honestly, I could go on forever!
- Zero oven drama: No baking means no stress about cracks or water baths – just mix, chill, and voilà! Perfect for those “Oh no, I need a dessert NOW” moments.
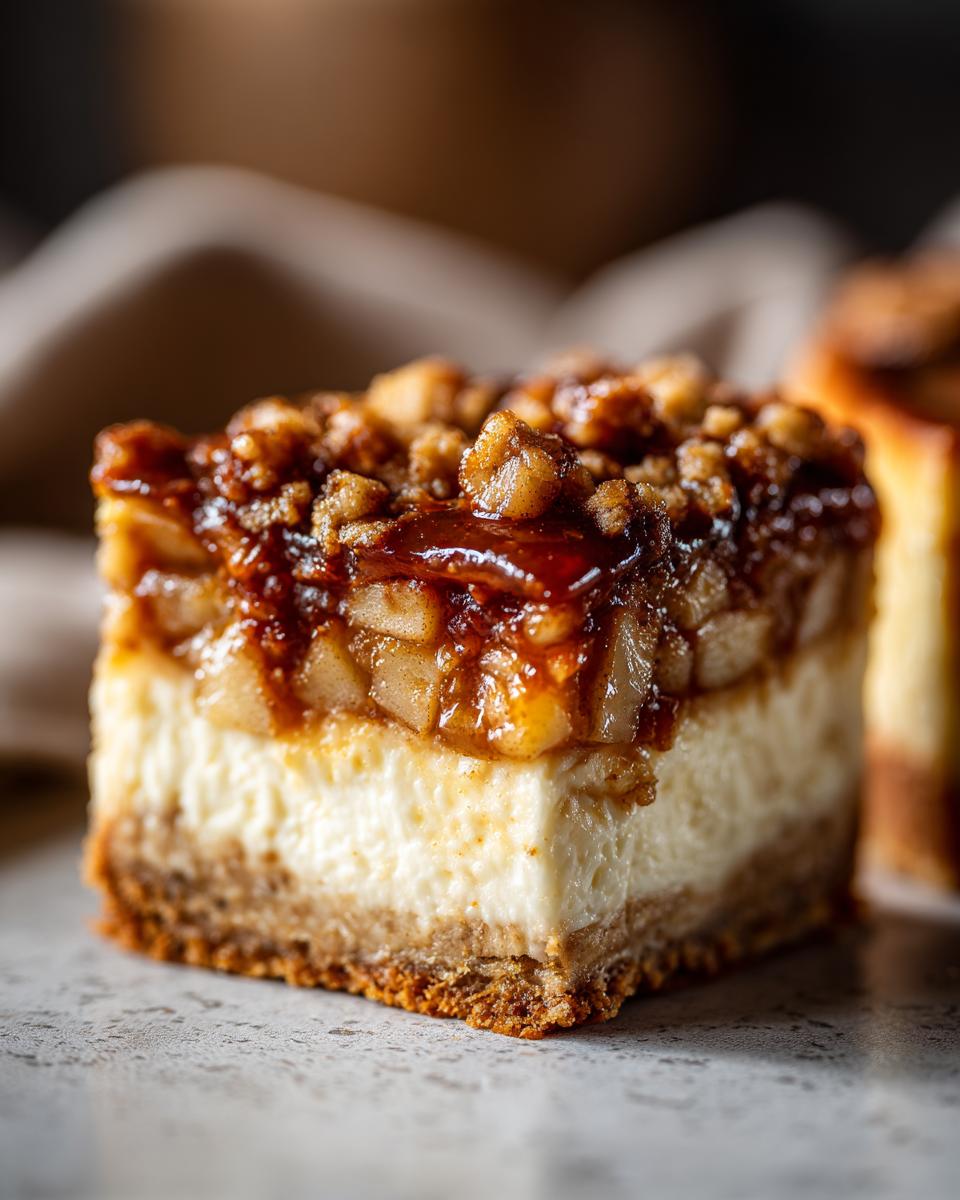
- Fall in every bite: That warm cinnamon-kissed apple topping makes you want to put on a cozy sweater and watch the leaves change color immediately.
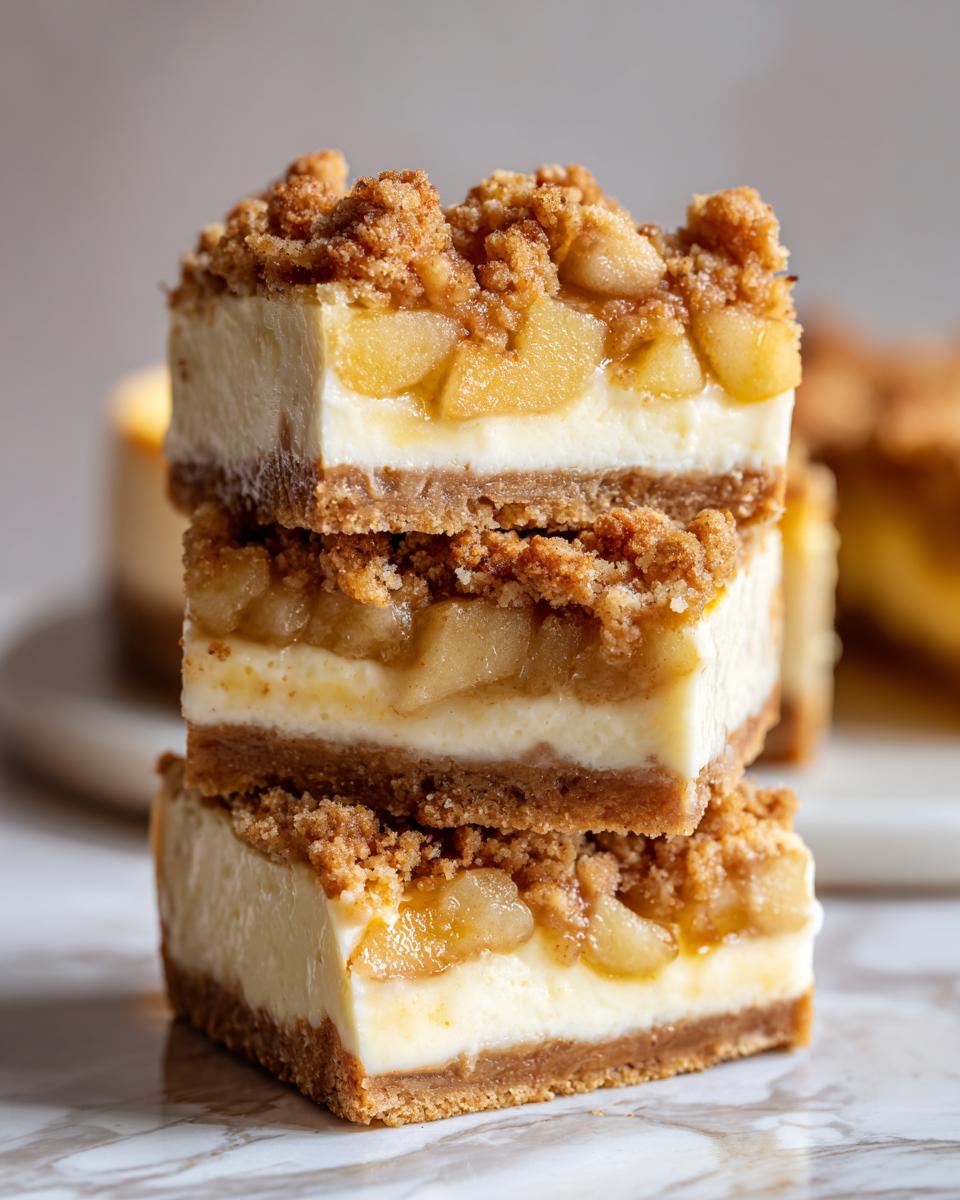
- Texture paradise: Creamy cheesecake meets that addictive crumble crunch – it’s like having your dessert cake and eating it too (pun totally intended).
- Crowd-pleaser magic: Serves 8-10 easily, but guests always go back for seconds. I usually make two because someone inevitably asks for the recipe and a takeout box.
- Foolproof and fast: Prep takes 20 minutes max – the apples cook while you mix the crust. Even my pastry-challenged niece nailed this on her first try!
Apple Crumble Cheesecake Ingredients
Alright, friends – let’s talk about what makes this dessert magic happen! I’ve broken everything down into three simple parts: the buttery crust, the creamy filling, and that glorious apple crumble on top. Measure carefully though – a little more or less of certain ingredients can totally change the texture. Trust me, I learned that the hard way after my “experimental” batch ended up more like apple soup cake!
For the Graham Cracker Crust
This is our sturdy foundation – don’t skimp here! You’ll need exactly 2 cups of graham cracker crumbs (I just whiz whole crackers in my food processor), 1/2 cup melted butter (salted is fine, but unsalted lets you control the saltiness), and 2 tablespoons granulated sugar. Pack this mixture down HARD into the pan – I use the bottom of a drinking glass to really press it in. A loose crust means a crumbly mess when you slice later, and nobody wants that!
For the Cheesecake Filling
Here’s where the creamy dreaminess comes in. Start with 16 ounces (that’s 2 standard blocks) of FULL FAT cream cheese – softened to room temp, people! Cold cream cheese equals lumpy filling, and we’re not about that life. Beat it with 1/2 cup granulated sugar and 1 teaspoon vanilla extract until smooth as silk. Then gently fold in 1 cup of heavy cream that you’ve whipped to soft peaks. Pro tip: chill your mixing bowl first to help the cream whip up faster!
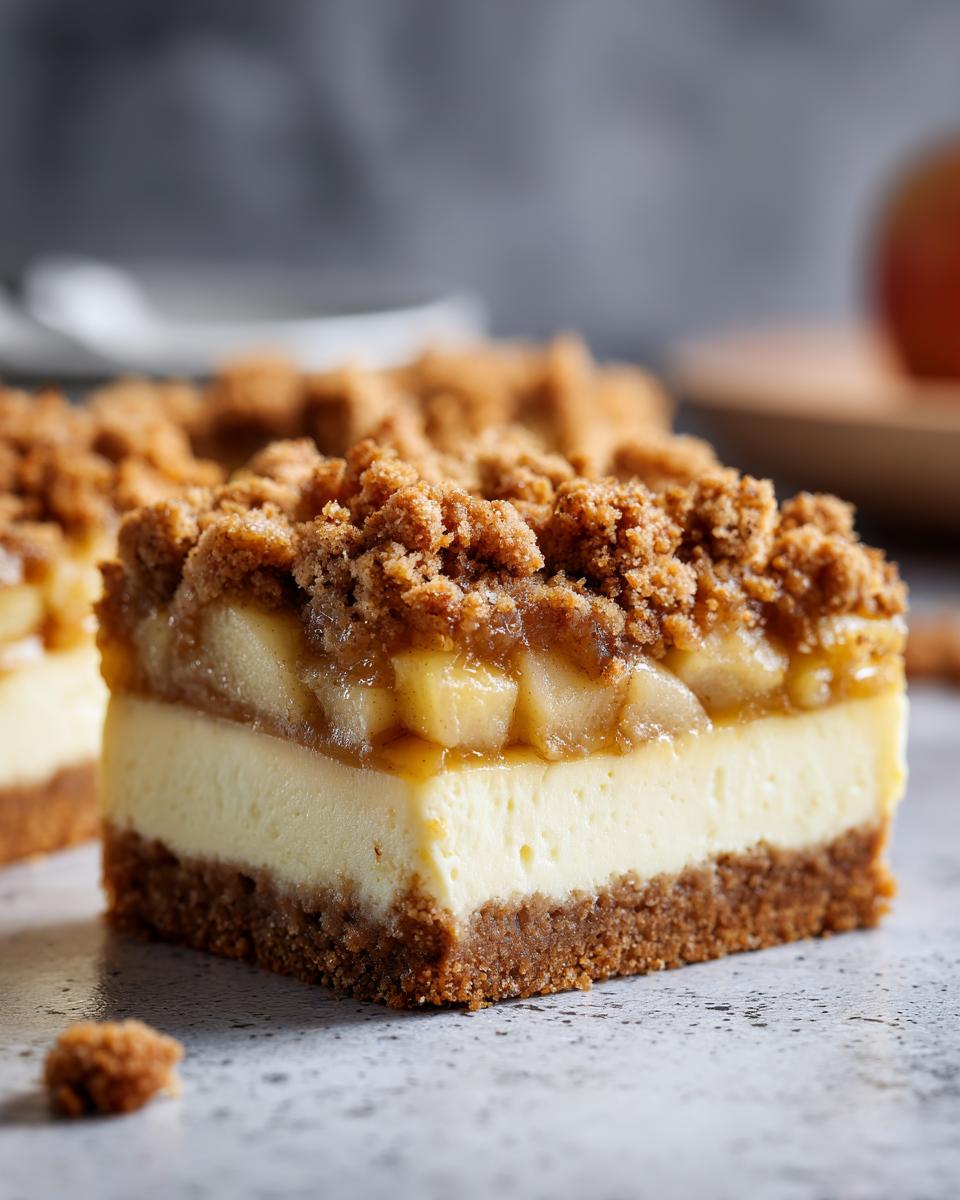
For the Apple Crumble Topping
The showstopper! You’ll need 2 cups peeled and diced apples (Granny Smiths are my go-to for that perfect tartness), 1/4 cup packed brown sugar, 1 teaspoon cinnamon (feel free to add a pinch of nutmeg too!), 1/2 cup all-purpose flour, and 1/4 cup cold butter cut into tiny cubes. The butter must be cold – we want those crispy crumbles, not a soggy mess. I sometimes mix in a handful of chopped pecans for extra crunch if I’m feeling fancy!
How to Make Apple Crumble Cheesecake
Okay, let’s get messy! I promise this no-bake wonder is easier than it looks – just follow these steps and you’ll have dessert magic in no time. Grab your trusty springform pan and let’s make some memories (and crumbs). Here’s my foolproof method:
Step 1: Prepare the Crust
First things first – that glorious graham cracker base! Mix all your crust ingredients together in a bowl until it looks like wet sand. Dump it into your pan and press down HARD with your fingers, then use the bottom of a glass to really pack it in evenly. Get it nice and compact – this is what keeps your slices from falling apart later. Pop it in the fridge for 10 minutes while you work on the next layer. Easy peasy!
Step 2: Make the Cheesecake Layer
Now for the velvety part – beat that softened cream cheese (I told you room temp matters!) with sugar and vanilla until it’s completely smooth. No lumps allowed! Whip your heavy cream separately until soft peaks form – take care not to overdo it or you’ll end up with butter (been there, cried over that). Gently fold the whipped cream into the cream cheese mixture with a rubber spatula. The key word here is GENTLY – we want airy fluffiness, not a dense brick.
Step 3: Cook the Apple Topping
While the cheesecake layer chills, let’s make that irresistible apple crumble. Toss your diced apples with brown sugar and cinnamon in a saucepan over medium heat. Stir occasionally until the apples soften – about 5 minutes. Test them with a fork; they should be tender but not mushy. In a separate bowl, work the cold butter into the flour with your fingers until crumbly. This is my favorite part – getting those perfect little buttery nuggets that’ll crisp up so nicely!

Step 4: Assemble and Chill
Time for the grand finale! Spread that luscious cheesecake filling over your chilled crust, then top with the warm apple mixture. Sprinkle your crumble topping evenly over everything. Here’s where patience comes in – it needs at least 4 hours in the fridge to set properly. I know, the wait is torture! If you’re in a pinch, 2 hours will work, but trust me, the texture is worth the extra time. Now walk away… if you can!
Tips for the Perfect Apple Crumble Cheesecake
Listen, I’ve made this apple crumble cheesecake more times than I can count—sometimes spectacularly, sometimes spectacularly messy—and here’s what I’ve learned the hard way so you don’t have to!
- Keep everything cold: Chill your mixing bowl and beaters before whipping the cream—it makes ALL the difference for getting those perfect soft peaks. The first time I skipped this? Ended up with cream soup instead of fluffy clouds!
- Crispier crumble hack: If you’ve got extra time, bake your crumble topping separately at 350°F for 10 minutes before adding it. You’ll get that heavenly crunch without risking soggy apples touching your creamy cheesecake layer.
- Patience with temperature: Take your cream cheese out at least 2 hours beforehand. Trying to soften it in the microwave? Disaster waiting to happen—you’ll get weird lumps that no amount of mixing can fix.
- Slice cleanly: Run your knife under hot water between cuts—it gives you those picture-perfect slices without dragging all the toppings everywhere. My Instagram followers thought I was suddenly a pastry chef!
- Make ahead magic: The crust and filling can chill separately overnight, then just add topping before serving. Perfect for when you want to ‘whip something up quickly’ that looks like you spent hours.
Serving and Storage
Okay, let me tell you how to show off your masterpiece—because presentation is everything! Right before serving, I love to drizzle warm caramel sauce over each slice—it pools around those apple pieces so beautifully. A dollop of fresh whipped cream? Absolutely yes! If you’re feeling extra fancy, a sprinkle of cinnamon or crushed toasted pecans adds that special touch. Trust me, your guests will snap photos before they dare take a bite!
Now, about leftovers (as if there ever are any in my house!). This apple crumble cheesecake keeps wonderfully in the fridge for up to 3 days—just cover it tightly with plastic wrap. If you need to freeze it, do just the crust and cheesecake layers without the apple topping—thaw overnight in the fridge, then add fresh apple crumble right before serving. The topping gets soggy if frozen, and nobody wants a sad, mushy crumble—learned that lesson after my last freezer experiment!
Apple Crumble Cheesecake FAQs
I get so many questions about this recipe—honestly, my friends text me dessert emergencies all the time! Here are the burning questions people ask most, along with all my hard-earned kitchen wisdom.
Can I use store-bought crust?
Sure, in a pinch! Those pre-made graham cracker crusts will work (I’ve done it when desperately short on time), but they’re thinner than ours—just know your slices might be a bit wobbly. For the best texture and flavor, though, nothing beats homemade. Takes only 5 extra minutes and makes SUCH a difference in that buttery crunch!
How do I prevent a soggy topping?
Oh honey, I learned this the hard way—make sure your apples aren’t swimming in juice when you spoon them on! Drain any excess liquid from the pan after cooking, and let them cool completely before topping. My secret weapon? A light dusting of crushed graham crackers between the cheesecake layer and apples—it acts like a moisture barrier. Genius, right?
Can I make this gluten-free?
Absolutely! Swap the graham crackers for gluten-free ones (they make great GF versions now), and use a gluten-free flour blend instead of all-purpose in the crumble. All my gluten-free friends adore this version—sometimes I can’t even tell the difference! Check out more gorgeous variations on Pinterest if you want extra inspo.
Why does my cheesecake layer taste lumpy?
Room temperature cream cheese is the golden rule, my friend! Cold cream cheese refuses to blend smoothly—trust me, I’ve ruined midnight snack cravings discovering this. If you forget to soften it early, cut it into tiny cubes and let it sit for 15 minutes—works wonders!
Can I use a different fruit?
TOTALLY! Peaches or pears shine in summer, and frozen mixed berries work great year-round—just adjust sugar amounts based on sweetness. Once I even used caramelized bananas—mind-blowing! The beauty of this recipe is how easily it adapts while keeping that dreamy creamy-crunchy vibe.
Nutrition Information
Just a quick heads up – these nutrition estimates will vary depending on your specific ingredients and brands used. No two cheesecakes are created equal (especially if you sneak extra crumble like I sometimes do!). Consider this a general guide rather than gospel truth.

Apple Crumble Cheesecake
Ingredients
Equipment
Method
- Mix graham cracker crumbs, melted butter, and sugar in a bowl. Press into the bottom of a 9-inch springform pan. Chill for 10 minutes.
- Beat cream cheese and sugar until smooth. Add vanilla and mix well. Fold in whipped cream.
- Spread the cheesecake filling over the crust. Smooth the top and refrigerate for 4 hours.
- Combine apples, brown sugar, and cinnamon in a saucepan. Cook over medium heat until apples soften, about 5 minutes. Let cool.
- Mix flour and cold butter until crumbly. Sprinkle over the cooked apples.
- Spread the apple crumble topping over the chilled cheesecake. Serve immediately or refrigerate until ready to serve.