
There’s nothing quite like gathering around a steaming mug of hot cocoa on a chilly winter day, especially when it’s topped with all your favorite treats. I still remember the first time I set up a full hot cocoa bar for my family—my niece’s eyes lit up like Christmas lights when she saw the mini marshmallow mountain, and my brother couldn’t resist adding every single topping to his cup (even the sprinkles!). That’s the magic of hot cocoa bar ideas—they turn an ordinary winter drink into a customizable experience that brings people together.
Whether you’re hosting a holiday party, warming up after sledding, or just making family movie night extra special, a hot cocoa bar is the perfect way to create cozy memories. I’ve used this setup for everything from New Year’s Eve gatherings to impromptu snow day celebrations—it’s always a hit. The best part? You probably have most of these ingredients already, like the cocoa powder and sugar I keep stocked for my famous chocolate spoons, and the milk we use for those comforting winter dinners.

Trust me, once you try this, you’ll be looking for excuses to make hot cocoa bars all winter long!
Why You’ll Love These Hot Cocoa Bar Ideas
Oh my gosh, where do I even start? This is quite literally the most fun you can have with a warm drink! Here’s why everyone from my toddlers to my 80-year-old uncle goes crazy whenever I set up a hot cocoa bar:
First, the customization is unbeatable. That friend who swears they hate chocolate? Peppermint cocoa. Your kid who insists on eating sprinkles by the spoonful? Done. My brother-in-law adds so many toppings his drink becomes practically solid—which he insists is exactly how he likes it!
Second, cleanup is a breeze compared to most party setups. No stacks of dirty dishes—just rinsed mugs and a quick wipe of the counters. You don’t even need fancy serving ware—I’ve used jam jars for toppings when hosting big groups!

Best of all? That magical moment when guests start mixing and matching toppings like mad scientists. Watching people get creative with their cocoa combinations never gets old. It’s pure wintertime joy in a mug!
Essential Ingredients for Your Hot Cocoa Bar
Okay, let’s talk ingredients! I’ve learned the hard way that skimping on quality here makes all the difference between “meh” cocoa and “oh wow!” cocoa. Here’s exactly what you’ll need – and why each one matters:
For the Hot Cocoa Base
The foundation can’t be fancy-free! My go-to is:
- 1/2 cup unsweetened cocoa powder: None of that pre-mixed stuff! Real cocoa powder gives you rich chocolate control.
- 1 cup granulated sugar: Sounds like a lot, but trust me – it balances the cocoa’s bitterness perfectly.
- 8 cups milk: Whole milk makes it extra creamy, but any kind works in a pinch.
- 1 tsp vanilla extract: The magic touch! Use the good stuff – that imitation vanilla just won’t do.
Toppings and Mix-ins
This is where the fun begins! My must-haves:
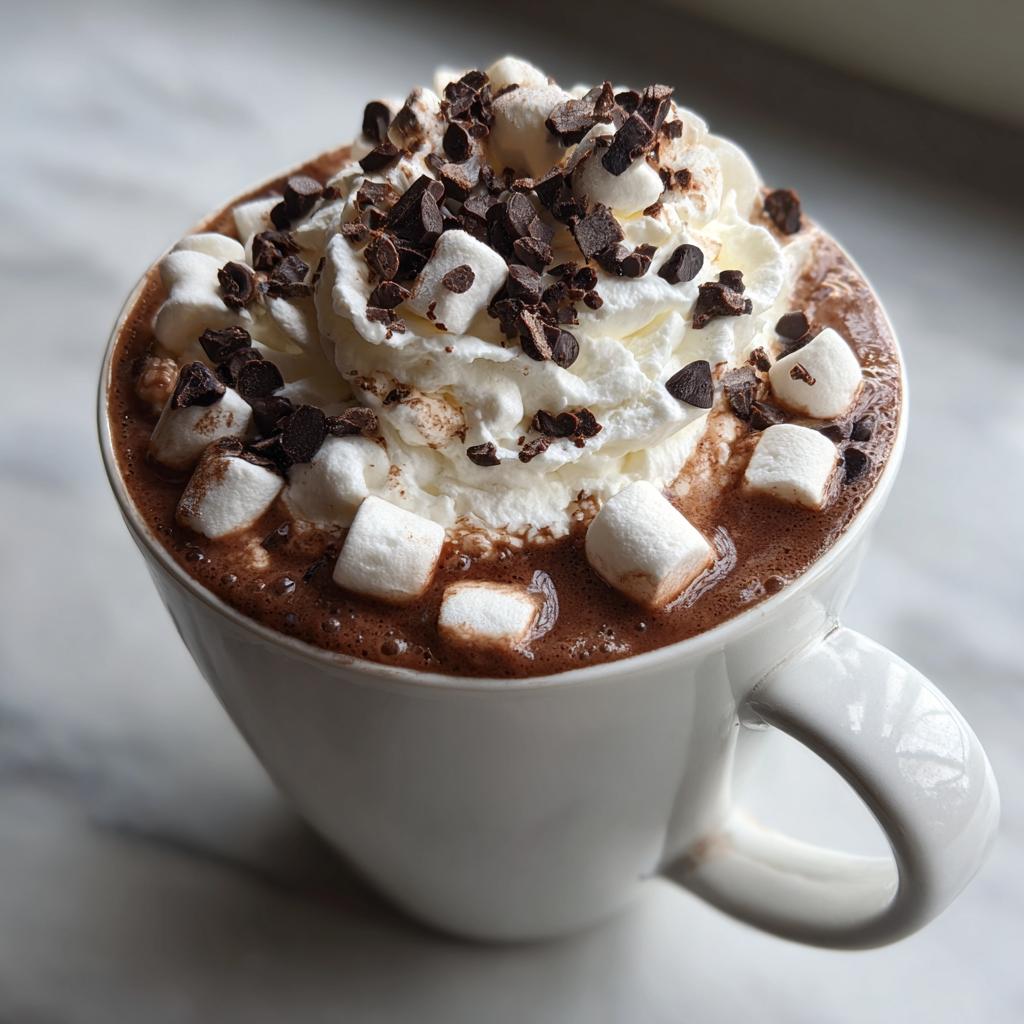
- Whipped cream: The fluffy cloud that makes every cup special.
- Mini marshmallows: No explanation needed – they’re classic for a reason!
- Chocolate chips: They melt into gooey perfection. I like mixing dark and milk.
- Peppermint sticks: Stirrers + flavor in one – perfect for holiday vibes.
- Caramel sauce: Drizzle it on top or swirl it in – hello, salted caramel cocoa!
- Cinnamon sticks: For stirring and adding that warm spicy note.
Pro tip from my many cocoa experiments: Always set out small bowls and spoons for toppings – it keeps things tidy and lets everyone get creative!
How to Set Up Your Hot Cocoa Bar
Alright, let’s get this cocoa party started! I’ve done this setup more times than I can count – from chaotic kid birthday parties to cozy couples’ nights – and I’ve learned all the tricks to make it foolproof. The secret? Getting the base right first, then making the toppings look irresistible. Trust me, when you see everyone gathered around your creation, you’ll feel like the cocoa master you are!
Preparing the Hot Cocoa Base
First things first – let’s make that silky smooth cocoa. Grab your slow cooker (my favorite lazy chef tool!) and whisk together the cocoa powder and sugar until they’re best friends. Then, and this is key, slowly drizzle in the milk while whisking like your life depends on it. You want zero lumps – we’re going for liquid velvet here! Cover and let it do its thing on low for 4-5 hours (or high for 2 if you’re impatient like me). Stir occasionally like you’re checking on a napping baby. Right before serving, that final dash of vanilla adds that “oh wow” factor. Pro tip: If you’re pairing this with holiday cookies, go ahead and double the batch – it disappears fast!
Arranging Toppings for Maximum Appeal
Now the fun part – the toppings bar! Presentation is everything, so raid your kitchen for cute containers. I use mismatched mugs for marshmallows, mini bowls for sauces, and even cleaned-out candle jars for chocolate chips. Label everything with little chalkboard signs or cute post-its (my handwriting is terrible but who cares?). Arrange them from dry to wet – marshmallows first, then sauces last – it prevents soggy topping disasters. Don’t forget the spoons and stirrers! Seeing everything laid out just makes people excited to get creative with their combos. And hey, if things get messy? That’s half the charm – my kitchen always looks like a chocolate fairy exploded after cocoa bar nights, but the laughter is worth every sticky spot!

Creative Hot Cocoa Bar Ideas for Every Occasion
One of my favorite things about hot cocoa bars? You can tweak them for any event—and I’ve tried them all! Here are my go-to themes that never fail to impress:
For holiday parties, I go full winter wonderland. Red and green sprinkles, candy cane stirrers, and those adorable little gingerbread man marshmallows make it magical. I sometimes even float edible gold glitter on top of the whipped cream—total showstopper! If you’re planning a Halloween gathering like the ones I wrote about in my spooky treats post, swap the cocoa for orange-colored white chocolate and top with gummy worms or bat-shaped chocolates.
Kid birthdays get the rainbow treatment at my house. I set up bowls of colorful sprinkles, mini M&Ms, and those crazy striped straws. Pro tip: Use chocolate milk instead of regular cocoa—it’s sweeter and makes the littles go wild. For romantic evenings, I dim the lights and add grown-up touches like espresso powder to the cocoa, amaretto whipped cream, and dark chocolate shavings. Set out some heart-shaped biscuits on the side and boom—instant date night magic!

The possibilities are endless, which is why I keep coming back to this idea year after year. What’ll you try first?
Tips for the Perfect Hot Cocoa Bar
After hosting more cocoa bars than I can count, I’ve picked up some foolproof tricks that’ll make yours unforgettable. First, keep your cocoa warm in the slow cooker on the “warm” setting—this prevents that disappointing lukewarm moment when guests go back for seconds. If dairy’s not your thing, almond or oat milk works beautifully (just add an extra teaspoon of vanilla to boost flavor).
Here’s my secret weapon against lumps: whisk the cocoa powder and sugar with just a splash of hot milk first to make a paste before adding the rest of the liquid. Game changer! And if you’re feeling fancy, warm your mugs beforehand—it keeps the cocoa hot longer and makes everything feel extra special.
Most importantly? Have fun with it! The messier the toppings get, the better the memories you’re making.
Hot Cocoa Bar FAQ
I’ve gotten so many great questions about my cocoa bars over the years—here are the ones that come up most often!
Can I make dairy-free hot cocoa?
Absolutely! My sister-in-law is lactose intolerant, so we’ve experimented with every milk alternative out there. Almond and oat milk work beautifully—just use the same measurements as regular milk. Cashew milk makes it extra creamy if you want to get fancy!
What’s the best way to store leftover cocoa?
Let it cool completely, then pop it in an airtight container in the fridge for up to 3 days. When reheating, stir gently while warming—the cocoa powder tends to settle. Pro tip: The flavors actually deepen overnight!
Can I prep toppings ahead?
Oh yes—I often do this the night before a party! Store dry toppings like marshmallows and sprinkles in ziplock bags, and sauces in squeeze bottles. Everything stays fresh, and you get bonus points for being organized!
How do I prevent lumps?
The secret? Make a paste first! Mix your cocoa powder and sugar with just a tablespoon or two of hot milk before adding the rest. Works like magic every time.
What if I don’t have a slow cooker?
No worries! You can make the cocoa base on the stove—just whisk constantly over medium-low heat until steaming. Keep it warm in a thermos before serving.
Nutritional Information
Just a quick note about numbers—these are always rough estimates because let’s be real, who actually measures their whipped cream portions? Your cocoa’s nutritional info will vary based on your milk choices and which delicious toppings you pile on (no judgment if you go heavy on the caramel sauce – I do too!).
Share Your Hot Cocoa Bar Creations
I’d absolutely love to see what cocoa masterpieces you create! Snap a photo of your hot cocoa bar setup (especially if you’ve got crazy topping combos—I live for that stuff) and tag me on Instagram. Nothing makes me happier than seeing families and friends gathered around mugs of cocoa, making memories just like we do. Who knows—your creation might just inspire my next cocoa bar adventure!
Hot Cocoa Bar
Ingredients
Equipment
Method
- In a slow cooker, whisk together cocoa powder and sugar.
- Gradually stir in milk until smooth.
- Cook on low for 4-5 hours or on high for 2 hours, stirring occasionally.
- Stir in vanilla extract before serving.
- Set up a station with mugs, spoons, and toppings for guests to customize their drinks.