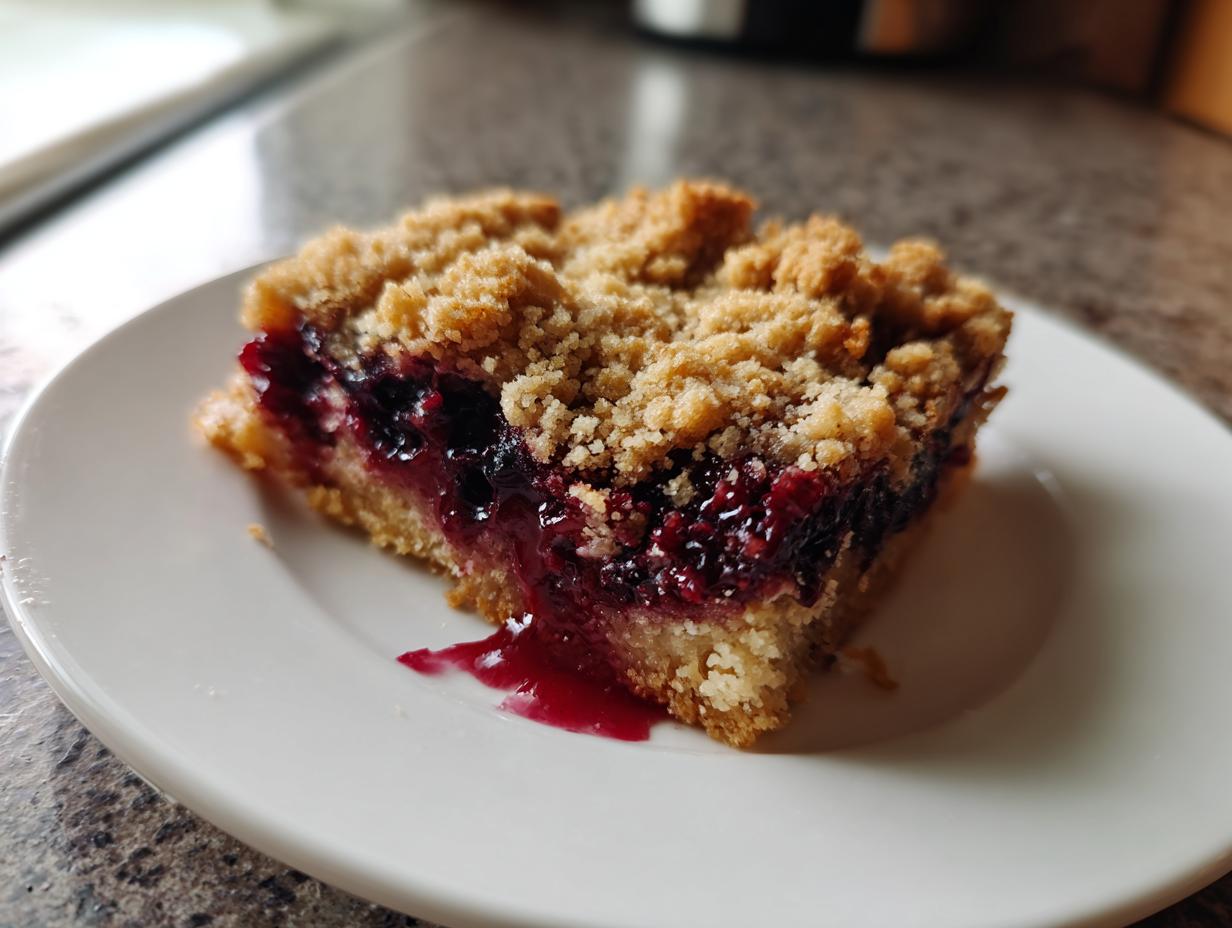
I still remember the first time I made blueberry crumble snack bars for a lakeside picnic. My friends couldn’t believe something so simple could taste so incredible! Now these bars are my go-to for busy mornings, afternoon snack attacks, and even fancy dessert plates when company comes. The best part? They take barely any effort – just mix, press, bake, and voila! These blueberry crumble snack bars work straight from the oven with morning coffee, packed in lunchboxes, or topped with vanilla ice cream for an easy crowd-pleaser. Trust me, once you try this perfect balance of sweet crumble and juicy berries, you’ll keep the ingredients stocked year-round!
Why You’ll Love These Blueberry Crumble Snack Bars
Oh my gosh, where do I even start? These blueberry crumble snack bars have become my kitchen MVP because:
- Super simple to whip up – No fancy equipment needed, just a bowl and your hands. If you can stir and press, you can make these!
- Meal prep dreams – I make a batch on Sundays and have breakfast and snacks sorted all week (if they last that long!).
- Kid-approved magic – My nieces think they’re dessert, but I love that they’re getting fruit and whole grains.
- Not-so-guilty pleasure – Way healthier than store-bought bars, but still feels indulgent with that buttery crumble topping.
- Totally your canvas – Swap the berries, add nuts, or drizzle with glaze – make it your own!
Honestly? I’ve yet to meet someone who didn’t fall for these bars after one bite. Flaky, fruity perfection in every square!
Ingredients for Blueberry Crumble Snack Bars
Okay, let’s gather the good stuff! These blueberry crumble snack bars need two main parts: the crust/crumbly topping (which is basically the same mixture—clever, right?) and the juicy blueberry filling. Don’t worry, everything’s pantry-friendly or easy to grab at the store. Here’s what you’ll need:
For the Crust and Crumble
- 1 ½ cups all-purpose flour – Spoon it into the measuring cup and level it off for accuracy. This isn’t the time to pack it down!
- 1 cup rolled oats – Not quick oats, please! The texture makes all the difference.
- ¾ cup brown sugar – Dark or light works, but I love dark for that extra molasses depth.
- ½ teaspoon baking powder – Just a little lift so the crust isn’t too dense.
- ½ teaspoon salt – Trust me, it balances the sweetness.
- ¾ cup unsalted butter, melted – Let it cool slightly so it doesn’t cook the oats. Yes, real butter—no substitutions here!
For the Blueberry Filling
- 2 cups fresh blueberries – Rinse and pat them dry. Frozen work in a pinch (no need to thaw—see more below).
- ¼ cup granulated sugar – Adjust to taste if your berries are super sweet or tart.
- 1 tablespoon lemon juice – Brightens everything up. Fresh is best, but bottled works in a hurry.
- 2 teaspoons cornstarch – This keeps the filling from turning into a berry soup.
Pro tip: If you must use frozen blueberries, toss them straight from the freezer into the filling mix—thawing them first makes things watery. And if you’re craving more fruit desserts, check out my easy fruit-based desserts for inspiration!
How to Make Blueberry Crumble Snack Bars
Alright, let’s get baking! These blueberry crumble snack bars come together in just a few simple steps. I promise, even if you’re not a baker, you’ll nail this recipe. The key is taking it one step at a time—and resisting the urge to eat all the crumble topping straight from the bowl (been there!).
Step 1: Prepare the Crust and Crumble
First things first: preheat that oven to 350°F (175°C). Grab your biggest mixing bowl and toss in the flour, oats, brown sugar, baking powder, and salt. Give it a good whisk to banish any lumps. Now pour in that glorious melted butter and stir until the mixture looks like wet sand—you want it to hold together when you pinch it between your fingers. Here’s my trick: set aside about 1 cup of this mixture for the topping. The rest? That’s going to become our buttery base!
Step 2: Make the Blueberry Filling
While your oven’s heating up, let’s make that luscious blueberry layer. In another bowl (yes, more dishes—but so worth it), gently toss the blueberries with sugar, lemon juice, and cornstarch. The cornstarch is our secret weapon against a soggy bottom—it thickens the berry juices as they bake. Be gentle though! We want plump berries, not blueberry mush. If a few get squished, no big deal, but try to keep most intact for those juicy bursts in every bite.
Now for the fun part: assembly! Press about two-thirds of your crumble mixture firmly into the bottom of your lined 8×8-inch pan. I mean really press it—this creates a solid foundation. Spread the blueberry filling evenly over the crust, then sprinkle the reserved crumble on top. Don’t pack this down—we want those lovely nooks and crannies for texture.
Pop it in the oven for 30 minutes, until the topping is golden and you see berry bubbles peeking through. Here’s how you know it’s done: the edges will pull slightly away from the pan, and the center won’t jiggle when you give it a gentle shake. Let it cool completely before cutting—I know, the wait is torture, but this prevents crumbly disasters. For more easy square desserts, check out my simple dessert squares recipe!
Tips for Perfect Blueberry Crumble Snack Bars
After making these blueberry crumble snack bars more times than I can count (okay, maybe I lost track after the 20th batch), I’ve picked up some foolproof tricks to make them absolutely perfect every single time. Listen up, because these little gems will save you from any crumbly disasters!
Fresh is best for those berries! While frozen blueberries work in a pinch, fresh ones give you that perfect pop of texture and keep the filling from getting too watery. Just give them a gentle rinse and pat dry—no need to go crazy, a little moisture is fine.
Parchment paper is your BFF. I learned this the hard way after wrestling with a stuck pan. Line your baking dish with parchment, leaving some overhang on two sides. When your bars are cooled, you can just lift them out in one beautiful slab—no scraping or swearing required!
Patience, grasshopper. I know it’s tempting to dive right in, but let those bars cool completely before cutting. I wait at least an hour—it helps the filling set so you get clean squares instead of blueberry lava. Pro tip: Pop them in the fridge for 30 minutes if you’re really impatient!
Secret weapon: Add a pinch of cinnamon to your crumble mixture. It’s not in the original recipe, but oh my gosh—that warm spice with the sweet blueberries? Absolute magic. Just a ¼ teaspoon does the trick without overpowering the fruit.
Store leftovers (ha! as if) in an airtight container at room temp for 2 days or in the fridge for up to a week. They’re actually amazing cold—the crumble gets extra firm and the flavors meld beautifully. Not that they’ll last that long in my house!
Variations for Blueberry Crumble Snack Bars
Oh, the possibilities! Once you’ve mastered the classic blueberry crumble snack bars (and trust me, you will), it’s time to play with flavors. My kitchen experiments have led to some delicious twists that I just have to share:
Berry-swap magic: Try raspberries or blackberries instead of blueberries for a tart twist. Mixed berries? Even better! Just keep the total fruit to about 2 cups so the filling doesn’t overflow. I once used a combination of strawberries and rhubarb—absolute springtime perfection that pairs wonderfully with the buttery crumble. For more seasonal ideas, peek at my spring fruit desserts!
Citrus zing upgrade: Add a tablespoon of lemon zest to your blueberry filling—it makes those berries sing! Or go wild with orange zest and a dash of cinnamon in the crumble. The citrus brightens everything up without overpowering the fruit.
Nutty goodness: Stir ¼ cup chopped pecans or almonds into the crumble mixture before baking. The extra crunch is heavenly! Just toast the nuts first for maximum flavor—350°F for 5-7 minutes does the trick. Pro tip: Let them cool completely before mixing in, or they’ll melt your butter.
The best part? You can mix and match these variations. Lemon zest with raspberries? Yes! Almond crumble with mixed berries? Absolutely! Once you get comfortable, this recipe becomes your canvas for endless fruity creations. Have fun with it—that’s what baking’s all about!
How to Store Blueberry Crumble Snack Bars
Here’s the wonderful thing about these blueberry crumble snack bars—they’re almost better the next day, so storing them properly is key! At room temperature, keep them in an airtight container for up to 3 days (if they last that long between snack attacks). The crumble stays crisp, and the berries mellow into sweet perfection.
For longer storage, pop them in the fridge where they’ll stay fresh for up to a week. I actually love how the chilled bars hold their shape when cutting—plus that cool berry center is like a little pocket of summertime! Just let them come to room temp for about 15 minutes before serving to soften the crumble slightly.
Freezing for later? You genius! Individually wrap each bar in parchment paper, then seal them in a freezer bag for up to 3 months. When the craving hits, just thaw overnight in the fridge or warm in a 300°F oven for 10 minutes until that buttery aroma fills your kitchen again. Perfect for meal prep or sneaking a taste of summer during dreary winter months!

Nutritional Information
Just a quick heads up—these nutritional values are estimates and will vary based on your specific ingredients and any substitutions you make. But for those who like to keep track, here’s the scoop per blueberry crumble snack bar:
- Calories: About 220-250 (depending on how generous you are with that crumble topping!)
- Fat: 10-12g (thank you, delicious butter)
- Carbs: 30-35g (mostly from those wholesome oats and natural fruit sugars)
- Protein: 2-3g (not bad for a sweet treat!)
Remember, these bars pack way more nutrition than your average dessert—you’re getting fiber from the oats and antioxidants from those gorgeous blueberries. So go ahead, enjoy that second bar with your afternoon tea!
Frequently Asked Questions
Can I use frozen blueberries instead of fresh?
Absolutely! Frozen blueberries work in a pinch—just toss them straight from the freezer into your filling mix (no thawing first!). The texture will be slightly softer than fresh, but the flavor is still fantastic. Pro tip: If your frozen berries are extra juicy, add an extra ½ teaspoon of cornstarch to prevent a watery filling.
How do I prevent a soggy bottom crust?
Two secrets: First, really press that base layer firmly into the pan—I mean pack it down like you’re mad at it! Second, make sure your cornstarch is evenly mixed with the berries. That magical powder thickens the juices as they bake, keeping your crust crisp. Bonus tip? Let the bars cool completely before cutting—they firm up beautifully.
Can I make these gluten-free?
You bet! Swap the all-purpose flour for a 1:1 gluten-free blend (I like ones with xanthan gum already added). Keep the oats, but make sure they’re certified gluten-free—regular oats can have cross-contamination. The texture might be slightly more crumbly, but still delicious. My gluten-free friends go nuts for these!
Why did my crumble topping sink into the filling?
Ah, the dreaded sink! Usually means your filling was too wet (over-measured berries or not enough cornstarch) or you didn’t press the base layer firmly enough. Next time, try chilling your reserved topping for 10 minutes before sprinkling—the cold butter helps it hold its shape better during baking.
Can I double this recipe?
Yes! Double everything and use a 9×13-inch pan instead. Keep an eye on baking time—it might need 5-10 extra minutes since there’s more mass to heat through. The edges should be golden and the center no longer jiggles when gently shaken. More bars = more happiness!
Blueberry Crumble Snack Bars
Ingredients
Equipment
Method
- Preheat your oven to 350°F (175°C). Line an 8×8-inch baking pan with parchment paper, leaving an overhang for easy removal.
- In a large bowl, mix the flour, oats, brown sugar, baking powder, and salt. Stir in the melted butter until the mixture is crumbly.
- Press two-thirds of the crumble mixture into the bottom of the prepared pan. Set aside the remaining mixture for the topping.
- In another bowl, combine the blueberries, granulated sugar, lemon juice, and cornstarch. Spread this mixture evenly over the crust.
- Sprinkle the reserved crumble mixture over the blueberry filling.
- Bake for 30 minutes, or until the top is golden brown. Let cool completely before cutting into bars.