
Valentine’s Day is all about showing a little extra love, right? And what better way to do that than with a decadent chocolate dessert that feels super special but is surprisingly easy to whip up? If you’re like me, sometimes you want something that looks fancy and tastes incredible without spending hours in the kitchen. That’s why I absolutely adore these Chocolate Lava Cakes. They’re the ultimate answer for those searching for the perfect valentine’s day desserts. Seriously, that moment when you cut into one and the warm, molten chocolate center oozes out? Pure magic! I’ve made these for so many special occasions, and they’re always a huge hit. I’ve tinkered with this recipe countless times, making sure that liquid lava center is just right every single time. Trust me, these are going to be your new go-to for making any day feel like a celebration.
Why These Chocolate Lava Cakes Are Perfect Valentine’s Day Desserts
So, why are these little chocolate gems my absolute favorite for Valentine’s Day? Well, for starters, they just *look* so darn elegant, don’t they? That molten center is pure drama, and it totally makes them feel like a restaurant-quality treat. But the best part? You can totally nail this impressive presentation without breaking a sweat. They come together so fast – seriously, from start to finish, you’re looking at less than 30 minutes. That means more time for, you know, actual celebrating! Plus, the flavor is just out of this world. Rich, deeply chocolatey, and that gooey middle? It’s pure bliss. Honestly, when you’re looking for those show-stopping valentine’s day desserts that are secretly super simple, these lava cakes are the answer.
Gather Your Ingredients for These Valentine’s Day Desserts
Alright, let’s get our goodies together for these amazing chocolate lava cakes! Having everything prepped makes the whole process so much smoother, especially when you’re aiming for those perfect valentine’s day desserts. You won’t believe how few things you need for such a showstopper! Here’s what you’ll need:
- Unsalted Butter: You’ll want about 1/2 cup of this, plus a little extra for greasing our little ramekins. Make sure it’s unsalted!
- Bittersweet Chocolate: Grab about 4 ounces and chop it up. The better the chocolate, the richer your lava will be, so go for something you really love the taste of!
- Large Eggs: Two whole large eggs are key for that fluffy center.
- Large Egg Yolks: Yep, two extra yolks! These are my secret weapon for making the inside extra gooey and decadent. Don’t skip ‘em!
- Granulated Sugar: Just 1/4 cup of regular granulated sugar to sweeten things up just perfectly.
- Salt: A tiny pinch of salt really makes the chocolate flavor pop!
- All-Purpose Flour: Only 2 tablespoons! We don’t want too much flour, or it’ll mess with that molten middle.
- Unsweetened Cocoa Powder: About 1/4 cup for dusting those ramekins. This adds another layer of chocolatey goodness and helps them release easily.
See? Not too much at all! When you’re picking out your chocolate, anything around 60-70% cacao works beautifully. And don’t worry if you don’t have exactly 4 ounces; a little more or less won’t totally ruin it, but try to be pretty close for that perfect lava flow.
Step-by-Step Guide to Making Your Valentine’s Day Desserts
Okay, this is where the magic really happens! Making these chocolate lava cakes is surprisingly straightforward, and honestly, it’s part of the fun. Just follow along, and you’ll have these incredible valentine’s day desserts ready in no time. It’s all about those little details that make a big difference, and getting the texture just right is key, kind of like how we aim for that perfect moisture in our moist cakes.
Preparing the Ramekins for Perfect Release
First things first, let’s get those ramekins ready. You want these cakes to slide right out like a dream! Generously grease the inside of your four 4-ounce ramekins with a little extra butter – don’t be shy here. Then, and this is my favorite tricked-out tip, dust them with unsweetened cocoa powder instead of flour. It gives the outside an extra punch of chocolate and ensures your cakes won’t stick, meaning you get that perfect, pristine lava cake shape every single time. Pop them onto a small baking sheet so they’re easy to move around later.
Melting Chocolate and Butter: The Foundation of Your Valentine’s Day Desserts
Now, for the heart of our lava cake: that luscious chocolate center! You’ve got two super easy ways to do this. My go-to is in a medium bowl set over a saucepan of barely simmering water – it’s called a double boiler, and it melts everything gently and evenly. Just stir occasionally until it’s smooth as silk. Alternatively, you can zap it in the microwave, but be careful! Use 30-second bursts, stirring in between, so you don’t scorch your beautiful chocolate. Once it’s all melted and gorgeous, take it off the heat and let it cool down just a smidge. We don’t want hot chocolate to cook our eggs, right?
Creating the Rich Chocolate Batter
In a separate, nice big bowl, let’s get our eggs ready. Whisk together those two whole eggs, the two extra yolks, the sugar, and that pinch of salt. Keep whisking until the mixture looks a little paler in color and a bit thicker, almost like a light ribbon forms when you lift the whisk. Now, slowly pour in that slightly cooled melted chocolate and butter mix. Whisk it all together until it’s just beautifully combined. Then, and this is super important for that tender texture, gently fold in the flour with your spatula. Stop mixing as soon as you don’t see any more flour streaks. Overmixing here is the enemy of molten lava!
Baking Your Valentine’s Day Desserts to Perfection
Okay, oven’s preheated to 425°F (220°C), right? Good! Carefully divide your glorious chocolate batter evenly among those prepared ramekins. You should have just enough for four perfect little cakes. Place that baking sheet with the ramekins right into the hot oven. Now, listen closely: you’re only baking these for about 10 to 12 minutes. The edges should look set and slightly puffed, but the very center should still be soft and jiggly. This is crucial for that ooey-gooey lava flow we’re dreaming of!
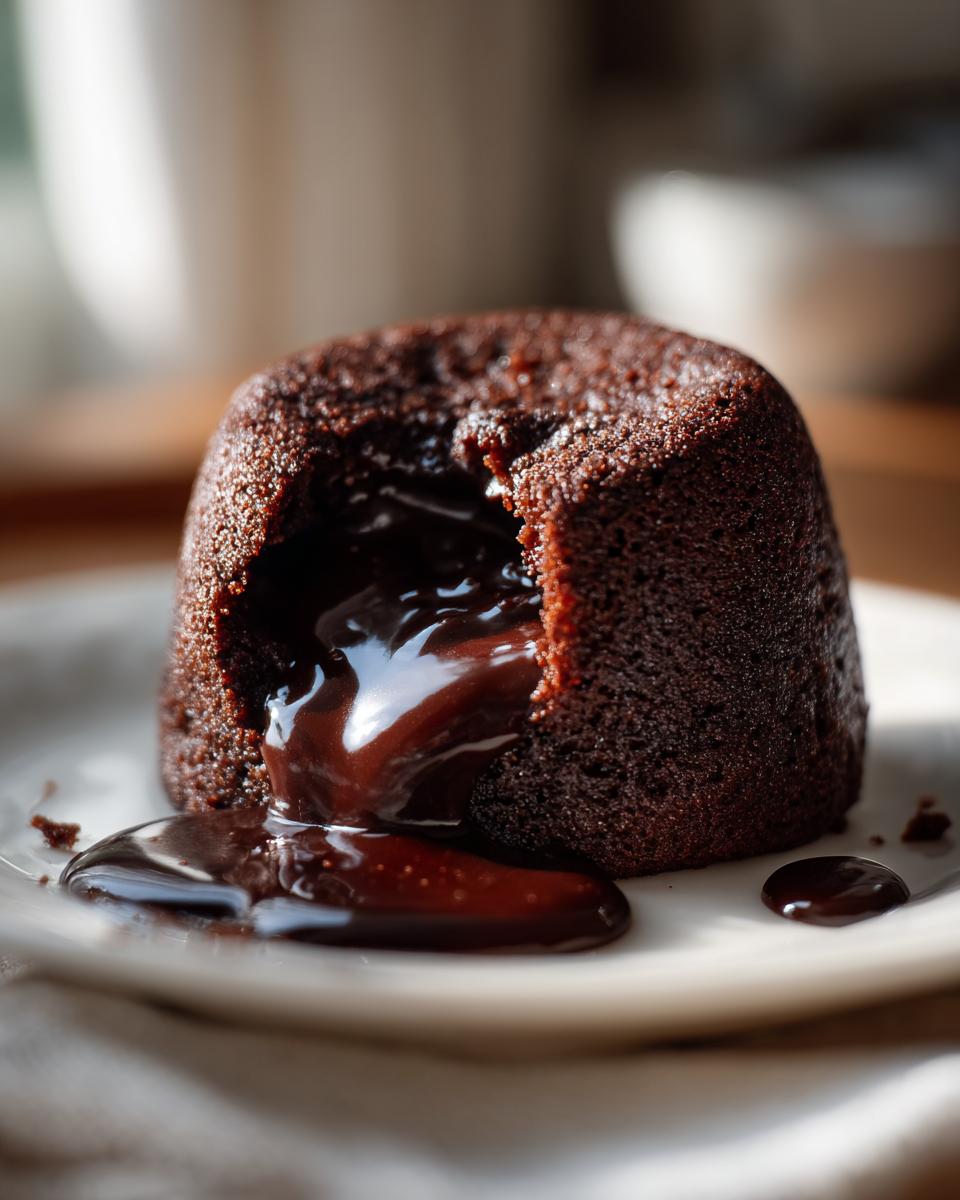
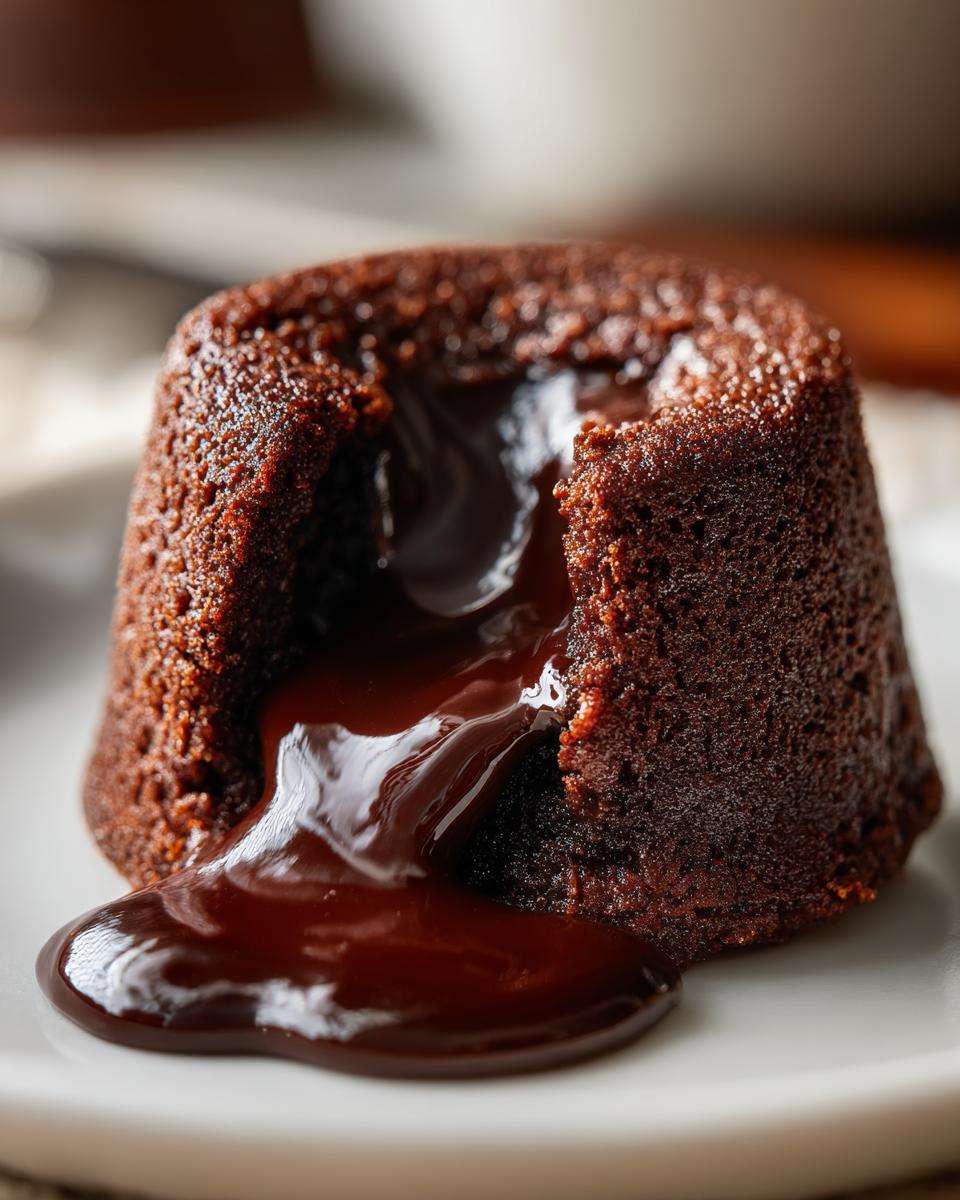
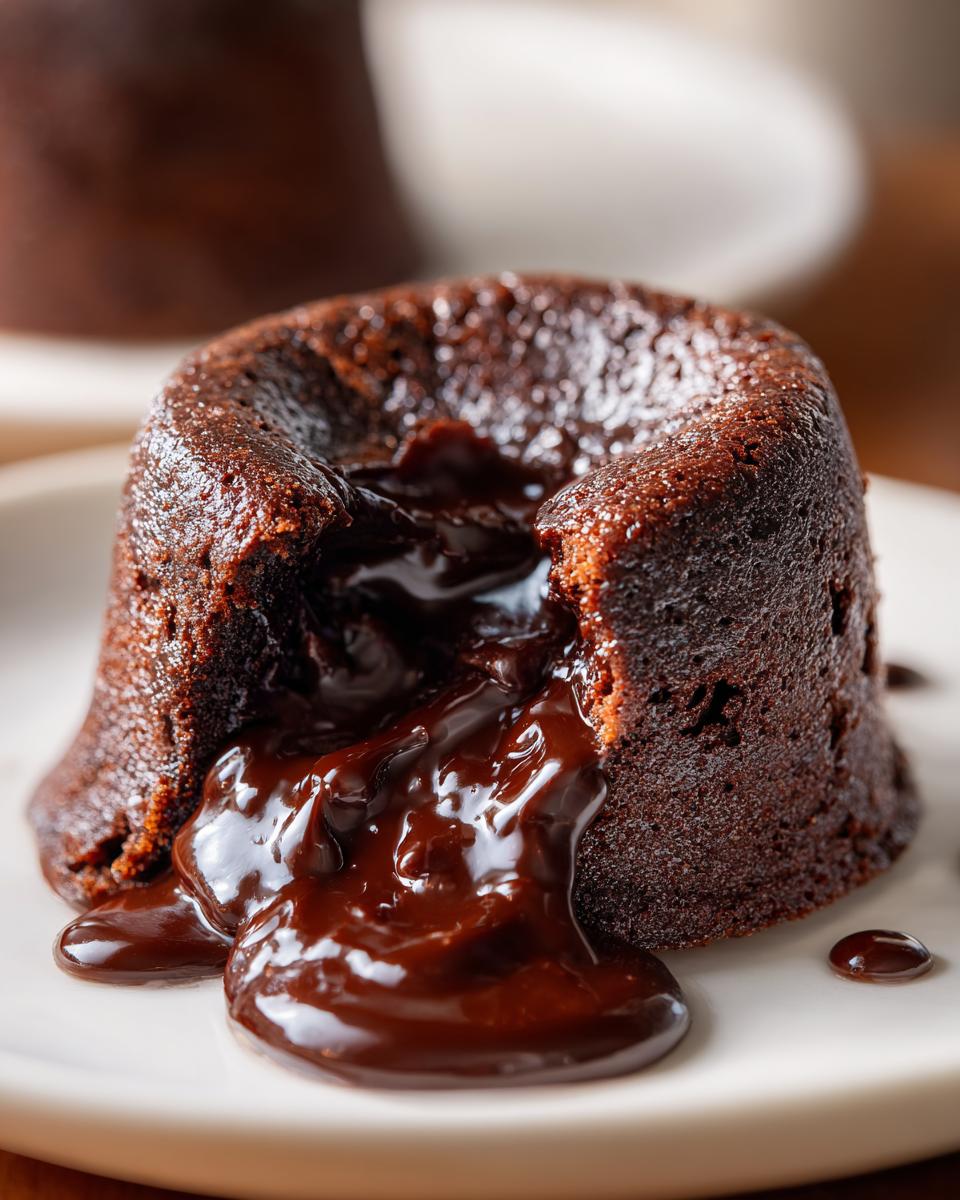
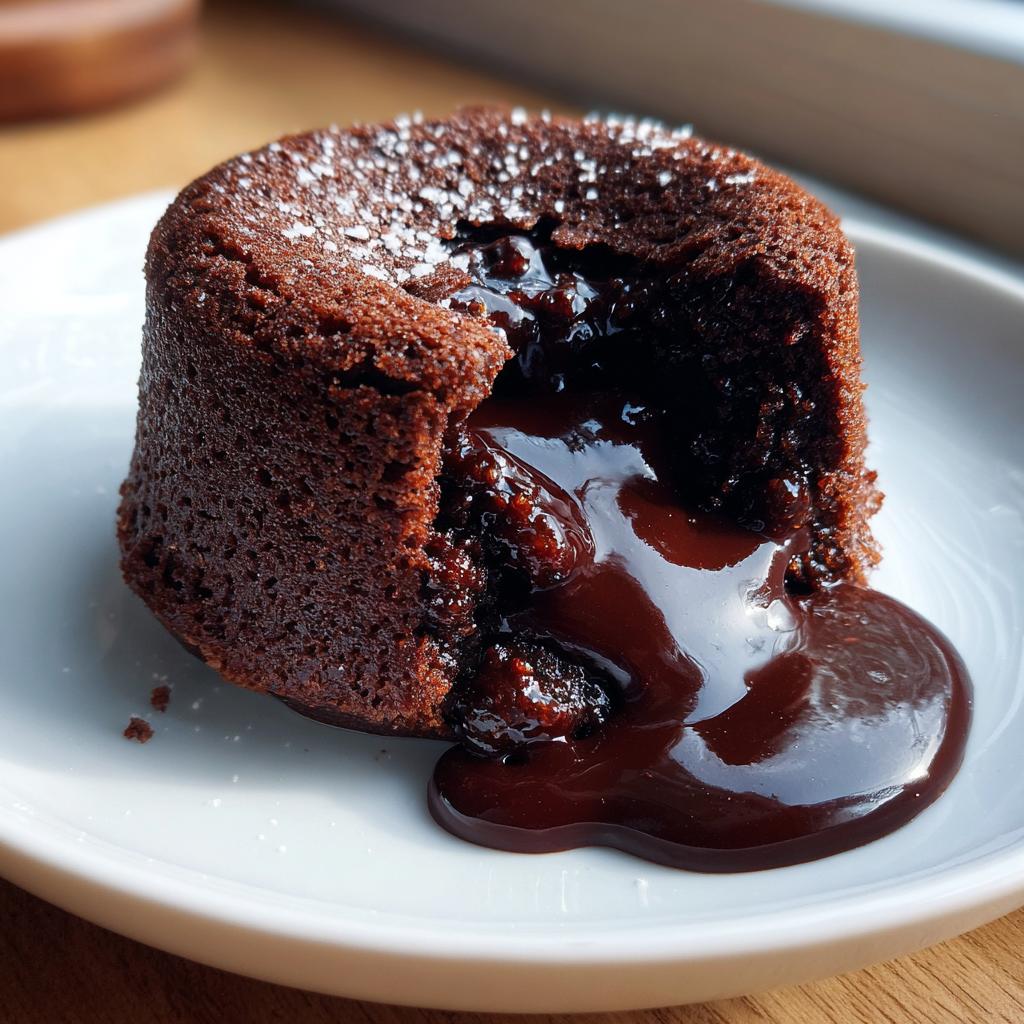
Unmolding and Serving Your Chocolate Lava Cakes
Once they’re out of the oven, let them sit in those ramekins for just one minute. This tiny pause helps them firm up just enough to unmold cleanly. Take a serving plate, place it upside down over a ramekin, and then carefully, but with confidence, flip the whole thing over. Lift off the ramekin, and voilà! You’ve got a perfect chocolate lava cake. Do this for all of them, and serve them up immediately. The warmth is key to that incredible molten center. A little dusting of powdered sugar or some fresh berries makes them even more stunning!

Tips for Success with Your Valentine’s Day Desserts
Okay, so you’ve got all the ingredients and you’re ready to go, but sometimes, even with the best recipes, things can go a little sideways, right? Especially when we’re aiming for that perfect ‘lava’ flow! Don’t you worry, I’ve got a few little tricks up my sleeve that make these chocolate lava cakes foolproof. It’s all about a few key details, kind of like making sure our brownies have that deep, fudgy texture we all love thanks to a few simple secrets.
First off, the chocolate is *huge*. Seriously, use the best quality bittersweet chocolate you can find. It makes such a difference in the richness and the flavor. Also, remember how I said not to overmix the batter? That’s probably the MOST important tip. If you mix too much flour in, you’ll end up with a more cake-like center, and we definitely want that gooey lava! Lastly, ovens can be wildcards, can’t they? Keep an eye on those cakes during baking; they can go from perfectamente molten to just cooked *really* fast.
Ingredient Notes and Substitutions
You know, sometimes a recipe calls for something super specific, and you’re staring into your pantry thinking, “what if I don’t have *exactly* that?” I totally get it! For these fantastic valentine’s day desserts, the biggest question mark is usually the chocolate. I really, really love using bittersweet chocolate because its slight bitterness balances the sweetness perfectly and gives you that deep chocolate flavor. But hey, if you only have semi-sweet chocolate on hand, go for it! They’ll still be delicious, just a touch sweeter.
Now, if you’re dairy-free or need to avoid butter for any reason, you can totally swap in a good quality dairy-free butter alternative. Just make sure it’s one that bakes up well, you know? And while we’re talking about ingredients, have you ever wondered about flour alternatives? It’s not super common for these lava cakes since we only use a tiny bit, but if you’re curious about baking swaps for other things, definitely peek at my tips for flour substitutes!
Frequently Asked Questions About Valentine’s Day Desserts
You might have a few burning questions about these incredible lava cakes, and that’s totally normal! They’re pretty magical, so it’s good to know the little secrets. I’ve tried to cover the most common things people ask me about these valentine’s day desserts.
Can I make these ahead of time?
Oh, this is a popular one! You can totally prep the batter a few hours ahead of time. Just cover the ramekins tightly with plastic wrap and pop them in the fridge. When you’re ready to bake, you might need to add an extra minute or two to the baking time since the batter will be colder. They’re best served right after baking for that signature lava flow, but a little prep makes timing easier!
What if my lava cakes don’t have a molten center?
Don’t panic! The number one reason for this is usually overbaking. Ovens vary so much, so start checking them right around the 10-minute mark. You want the edges to look set and firm, but the very center should still be soft and definitely not firm. If they come out fully baked, they’ll just be delicious little chocolate cakes, which is still a win in my book!
Can I use different types of chocolate?
Absolutely! While bittersweet chocolate (around 60-70% cacao) gives you that perfect rich, not-too-sweet flavor, you can totally use good quality semi-sweet chocolate. If you use milk chocolate, just be aware it has more sugar and less cocoa, so the cakes might bake a little faster and be sweeter. For the best results, stick to good baking chocolate!
Nutritional Information
Just a little heads-up, the nutritional info for these gooey delights can vary a bit depending on the specific brands of chocolate and butter you use, but here’s a good estimate per serving (which in this case is one amazing lava cake!): You’re looking at roughly 450 calories, about 30g of fat (with around 18g of that being saturated – totally worth it!), 8g of protein, 40g of carbohydrates, and about 30g of sugar. It’s not exactly a diet food, but for a show-stopping valentine’s day dessert, it’s a decadent splurge!
Share Your Valentine’s Day Dessert Creations
I would absolutely LOVE to hear how your chocolate lava cakes turned out for your special someone! Did you try any fun variations, or keep it classic? Please share your experience, maybe even snap a pic and tag me, or drop a comment below! Also, if you loved these valentine’s day desserts, a quick rating would mean the world to me. If you have any questions or want to share your baking journey, feel free to reach out via my contact page. Thanks for baking with me!
Chocolate Lava Cakes
Ingredients
Equipment
Method
- Preheat your oven to 425°F (220°C). Generously grease and flour four 4-ounce ramekins. You can also dust them with cocoa powder for an extra chocolatey finish.
- In a medium bowl set over a saucepan of simmering water (or in the microwave in 30-second intervals), melt the butter and chopped bittersweet chocolate together. Stir until smooth. Remove from heat and let cool slightly.
- In a separate large bowl, whisk together the eggs, egg yolks, granulated sugar, and salt until pale and slightly thickened.
- Gradually whisk the slightly cooled chocolate mixture into the egg mixture until well combined.
- Gently fold in the flour until just combined. Do not overmix.
- Divide the batter evenly among the prepared ramekins.
- Place the ramekins on a baking sheet and bake for 10-12 minutes, or until the edges are set but the center is still soft and gooey.
- Let the cakes cool in the ramekins for 1 minute. Carefully invert each ramekin onto a serving plate. Serve immediately.