Oh my gosh, you wouldn’t believe how excited I get when Halloween rolls around – it’s my absolute favorite time to get creative in the kitchen! Monster Deviled Eggs are my go-to spooky appetizer, the perfect way to creep out your guests (in the best way possible) while keeping them coming back for more. I’ll never forget the first time I made these colorful little monsters for my niece’s Halloween party – the kids went absolutely wild for them!
These hilarious creepy-crawly eggs are such a fun twist on classic deviled eggs. With just a few natural dyes from ingredients like beets and spinach, plus some clever olive spider decorating, you’ll transform ordinary eggs into extraordinary Halloween treats. They’re always the star of my Halloween food spread, disappearing faster than ghosts at sunrise!
What I love most is how these eggs let us play with our food – I mean, when else can you serve “monsters” that are actually delicious? The shocked faces when guests realize those purple eggs aren’t food coloring always crack me up. Trust me, once you try Monster Deviled Eggs, they’ll become your Halloween tradition too!
Why You’ll Love These Monster Deviled Eggs
Seriously, what’s not to love about these creepy little guys? Let me count the ways:
- They’re ridiculously fun to make! I mean, who doesn’t want to create olive spiders crawling on purple eggs? It feels like edible Halloween art.
- The natural dyes are totally cool. Watching ordinary eggs transform into vivid colors using just beets and spinach still gives me childlike wonder.
- So easy even non-cooks can do it. If you can boil eggs and mash yolks, you’re basically set – the decorating is just playful experimenting!
- Instant party hit every time. These disappear faster than candy corn at my house – kids AND adults can’t resist snapping pics before devouring them.
Ingredients for Monster Deviled Eggs
Okay, let’s gather our monster-making supplies! I’ve learned through trial and error that having everything prepped makes the decorating part way more fun. Here’s exactly what you’ll need, broken down so you can shop and prep efficiently:
For the Eggs
- 6 large eggs – Trust me, get the good ones! Cheaper eggs can be harder to peel cleanly.
- 1 cup water + 1 tbsp vinegar – For boiling (the vinegar helps prevent cracks)
- 1 small beet, grated – This will give us that gorgeous purple monster hue
- 1 handful fresh spinach – About 1/2 cup packed for the green dye
For the Filling
- 1/4 cup mayonnaise – The creamy base for our monster “innards”
- 1 tsp mustard – I like yellow for color, but Dijon works too
- Salt and pepper – Just a pinch of each to taste
For Decorations
- 12 black olives – Get the small pitted ones – we’ll turn these into spiders!
- Paprika – For creating creepy bloodshot swirls
Pro tip from my messy experiences: have extra eggs on hand just in case. Sometimes a few break during peeling, and you’ll want backup monsters! Also, the beet and spinach amounts are flexible – more means more vibrant colors, but don’t stress about being exact.
How to Make Monster Deviled Eggs
Ready to bring these little monsters to life? It’s way easier than it looks – I promise! Follow these simple steps, and you’ll have a spooky platter of Monster Deviled Eggs ready to frighten your guests in no time. The key is taking it one fun step at a time. Don’t rush the dyeing process – good monsters take patience! These always disappear fast at my Halloween gatherings, so I usually make a double batch.
Step 1: Prepare and Dye the Eggs
First, let’s make some colorful monster eggs! Hard boil your eggs by boiling them gently for 10 minutes, then straight into ice water to stop cooking. Now the fun part – peeling! I’ve learned running them under cool water helps shells come off cleaner. For vibrant colors, place peeled eggs in dye baths: beet juice turns them purple (leave overnight for deep color), and blended spinach makes eerie green (2-3 hours does the trick). Pro tip: rotate eggs occasionally for even coloring!
Step 2: Create the Monster Deviled Egg Filling
Slice those beauties lengthwise and pop out the yolks into a bowl. Mash yolks smooth with mayo, mustard, salt and pepper – get rid of all lumps! Divide filling into three bowls: leave one plain, mix beet juice into another for purple, and spinach juice into third for green. The more dye you add, the brighter your monsters will be! I always taste test here – a pinch more salt can really make flavors pop.
Step 3: Assemble Your Monster Deviled Eggs
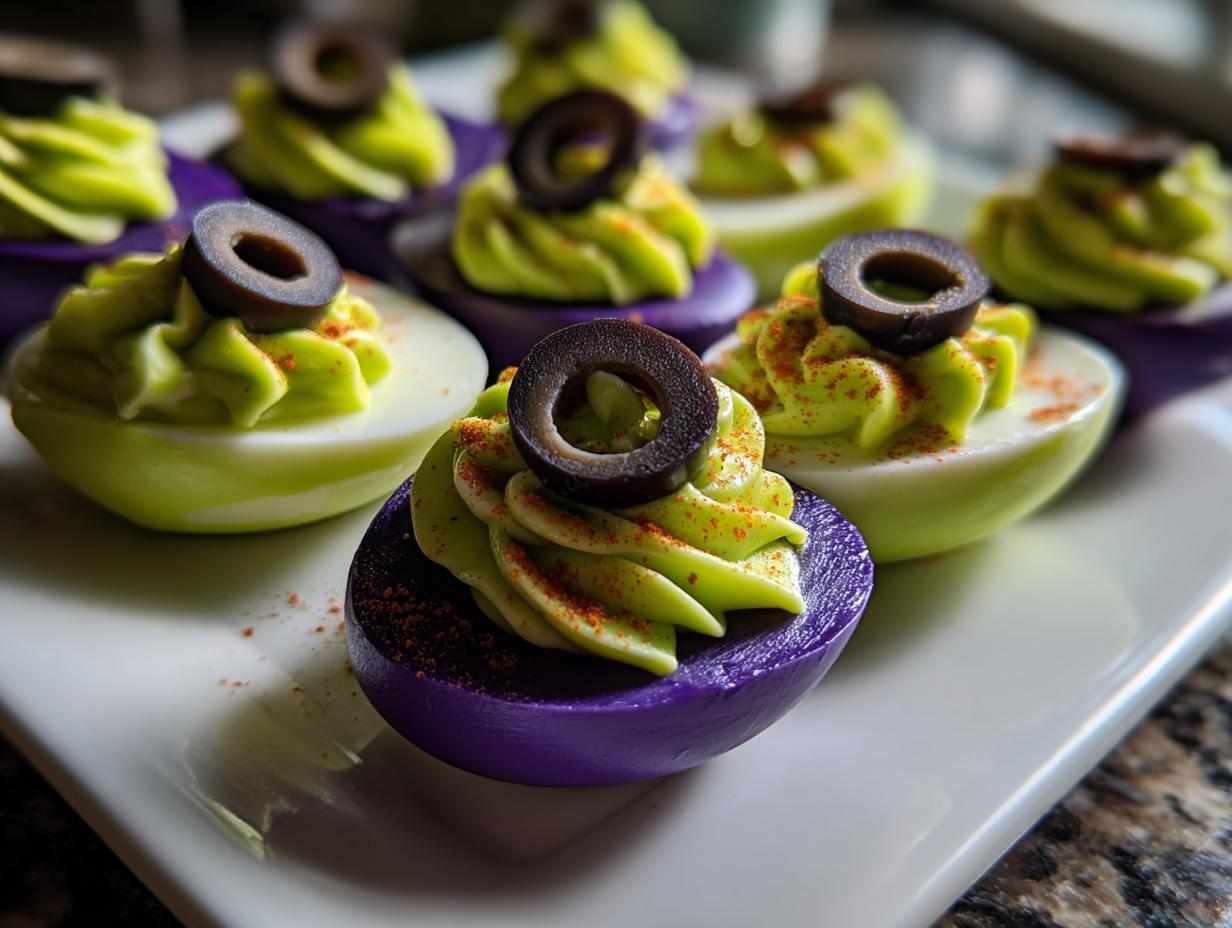
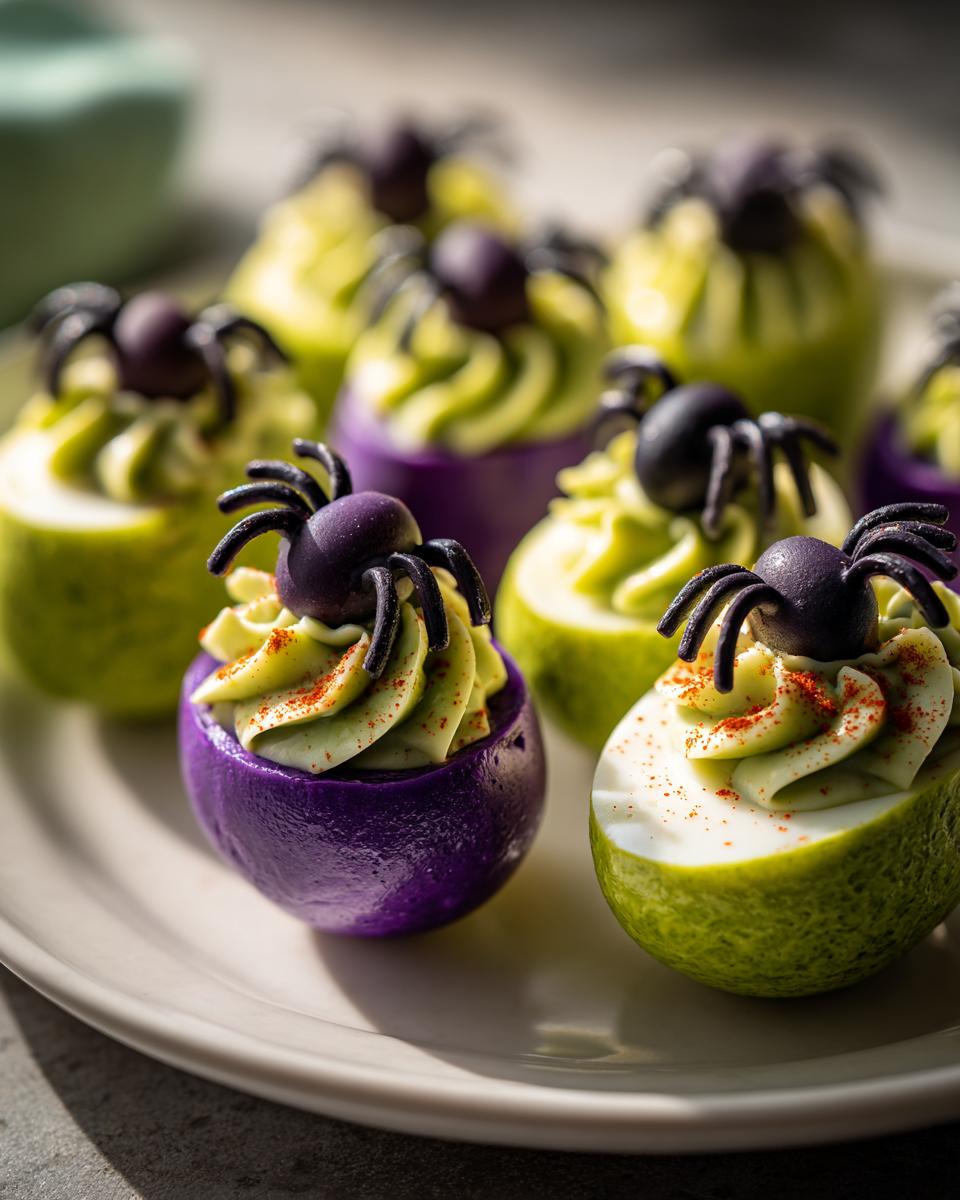
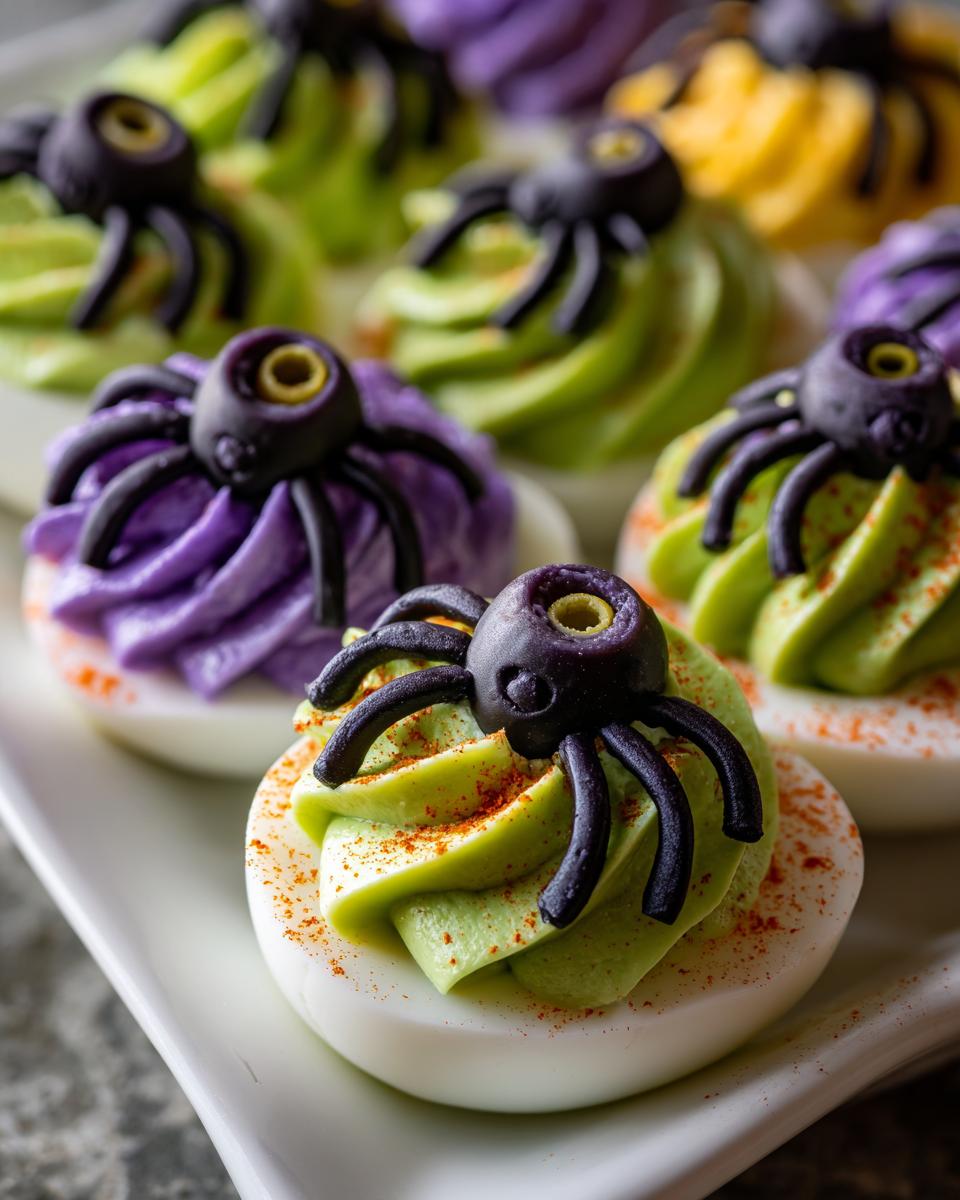
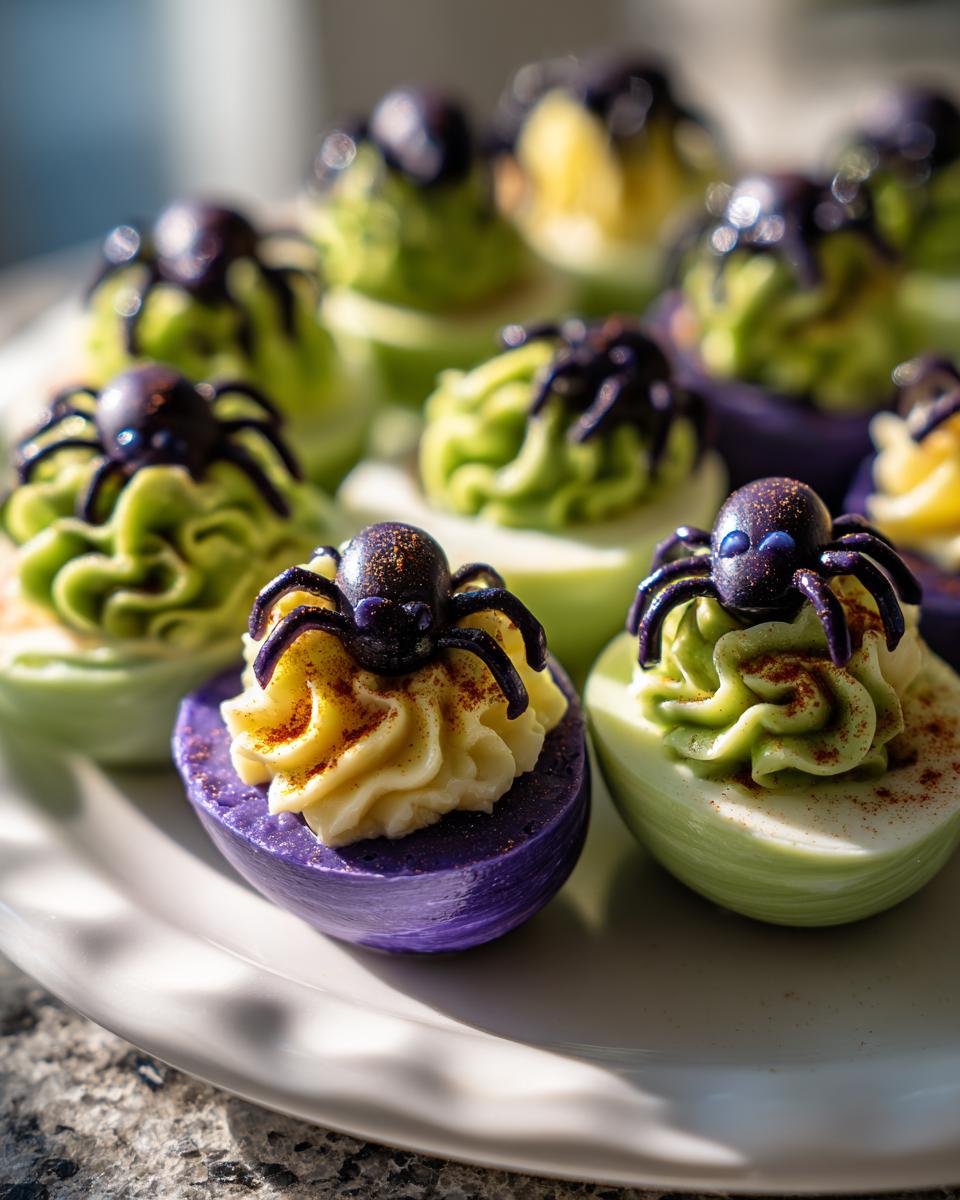
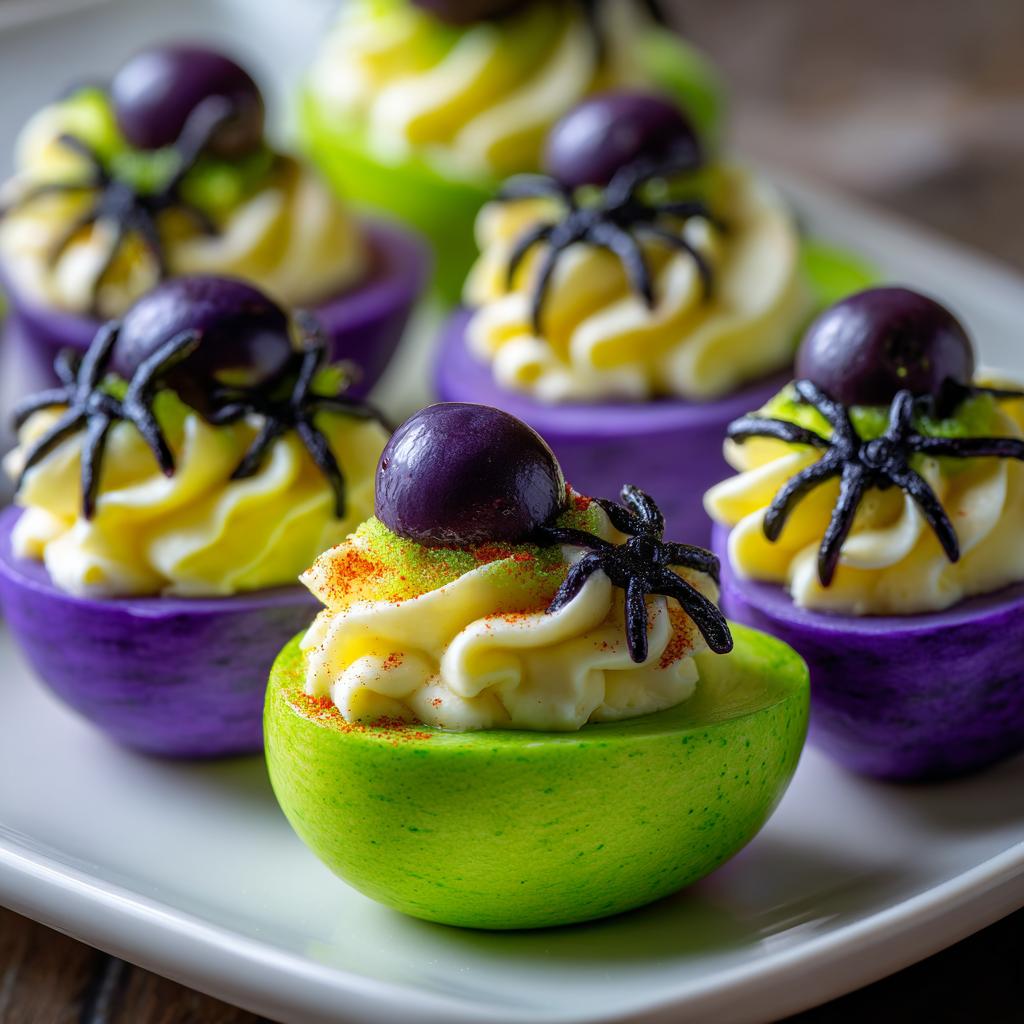
Now the artistry begins! Pipe fillings back into egg whites using a bag or spoon. For olive spiders: slice olives into thin strips for legs, use bigger pieces for bodies. Paprika swirls? Drag a toothpick through sprinkles for creepy veins. Arrange spiders crawling up some eggs, make others look bloodshot with paprika spirals – go wild! Chill until serving (up to 24 hours keeps colors vibrant). Watch faces light up when these creepy critters hit the table!
Tips for Perfect Monster Deviled Eggs
Okay, let me share the little tricks I’ve picked up after making way too many batches of these creepy eggs (not that I’m complaining!). First – the color secret: if you want those deep, eerie purple tones from the beets, let your eggs soak overnight in the fridge. The longer they bathe, the more monster-worthy the hue becomes! And for piping that filling? Forget fancy tools – a simple ziplock bag with the corner snipped off works like a dream for neat monster “guts.” Oh! And here’s my biggest lesson learned the hard way: keep these babies chilled right up until showtime. Warm deviled eggs are just sad, but ice-cold ones hold their shape perfectly when people start snapping pictures of your edible artwork. One last pro move – if you’re making olive spiders, use kitchen scissors to snip the “legs” – way easier than trying to slice them with a knife!
Monster Deviled Eggs Variations
Oh, the fun part – getting creative with your monster eggs! Once you’ve mastered the basics, try these wacky twists I’ve experimented with over the years. For a creamy green filling, mash avocado into the yolk mixture instead of spinach – it gives the most delicious monster guts! Edible googly eyes (find them at craft stores) take the creepy factor up a notch when perched on paprika-swirled eggs. Want something spookier? A drizzle of sriracha makes perfect “blood” dripping down your Monster Deviled Eggs. The possibilities are endless – just let your Halloween imagination run wild!

Serving Your Monster Deviled Eggs
Presentation is everything with these little monsters! I love arranging mine on a dark platter with chopped parsley ‘grass’ – it makes the colorful eggs pop like creatures emerging from the undergrowth. For extra spooky vibes, add some carved radish ‘eyeballs’ or a cheesecloth ‘spiderweb’ underneath. These eggs pair perfectly with other creepy bites from my favorite appetizer collection – think mummy dogs, witch finger cookies, and spiderweb dips. Trust me, a themed platter makes the whole spread seriously Instagram-worthy!
FAQ About Monster Deviled Eggs
I get so many fun questions about these creepy little eggs! Here are the ones that pop up most often at my Halloween parties:
Can I use food coloring instead of natural dyes?
Absolutely! While I love the earthy magic of beet and spinach dyes, food coloring works great in a pinch. Gel colors give the most vibrant shades for your Monster Deviled Eggs. Just add drops gradually until you get the perfect eerie purple or slime green!
How far in advance can I make these?
Here’s my party-pro tip: dye the whole eggs up to 2 days ahead (they keep color beautifully chilled), but wait to fill and decorate until the day of your event. The paprika swirls and olive spiders stay freshest this way!
What if my eggs are hard to peel?
Ugh, we’ve all been there! Older eggs actually peel easier than fresh ones. Adding vinegar to the boiling water helps prevent sticking too. If you’re really struggling, peeling them underwater often saves the day – and your monster decorations!
Can kids help decorate these?
Oh my gosh, yes! The olive spider legs and paprika swirls are perfect beginner kitchen projects. Let them pipe filling with a plastic bag (supervised, of course) – kids create the best wacky monster faces!
Nutritional Information
Just a quick heads up – nutrition info can vary based on your specific ingredients and brands. I don’t have exact numbers for these Monster Deviled Eggs, but they’re definitely a lighter Halloween treat compared to all that candy! The eggs pack protein, and those natural dyes add extra nutrients from the beets and spinach.
Share Your Monster Deviled Eggs Creations
I’d absolutely love to see what spooky masterpieces you create! Snap a pic of your Monster Deviled Eggs before they get devoured (if you can resist them that long) and tag me – I’ll be cheering you on from my kitchen. Nothing makes me happier than seeing all the creative twists you come up with. Maybe your olive spiders will have extra legs, or your paprika swirls will look extra creepy? Show me your edible monsters!
Monster Deviled Eggs
Ingredients
Equipment
Method
- Hard boil the eggs. Cool, peel, and slice in half lengthwise.
- Remove yolks and place in a mixing bowl. Mash yolks with mayonnaise, mustard, salt, and pepper.
- Divide filling into three portions. Leave one plain, dye one purple with beet juice, and dye one green with spinach juice.
- Pipe fillings back into egg whites. Create olive spiders on some eggs, paprika swirls on others.
- Chill until ready to serve.