Oh my goodness, have you ever seen anything more adorable than mini tart shells filled with deliciousness? I still remember the first time I made them for my niece’s birthday party – those little golden cups filled with lemon curd and topped with fresh berries disappeared faster than I could say “seconds please!” That’s the magic of mini tart shell dessert ideas – they’re like edible jewelry for your dessert table. Whether you’re hosting a fancy dinner party or just want to treat yourself, these bite-sized wonders are perfect. The best part? You can fill them with practically anything – from rich chocolate ganache to tangy fruit jams. Trust me, once you start experimenting with mini tart shell dessert ideas, you’ll be hooked!
I’ll never forget how my grandmother used to make these for our family reunions. She’d line them up on her vintage cake stand, each one a tiny masterpiece. “Big desserts are overrated,” she’d say with a wink as she handed me the bowl of leftover filling to lick clean. Now I understand why she loved them so much – they’re endlessly customizable, portion-controlled perfection. You can go classic with pastry cream and fruit, or get creative with unexpected combinations. Last Christmas, I did a batch with peppermint whipped cream and crushed candy canes that had everyone begging for the recipe.
What makes mini tart shell desserts so special is how they balance elegance and simplicity. The shells themselves are just flour, butter, and a few other pantry staples, but when you fill them? Magic happens. They’re the perfect canvas for seasonal ingredients too – think pumpkin spice fillings in fall or fresh peaches in summer. And don’t even get me started on how perfect they are for parties! No plates needed, no messy slicing – just grab and enjoy. Whether you’re a baking novice or a pastry pro, these little treats will make you feel like a kitchen rockstar.
Why You’ll Love These Mini Tart Shell Dessert Ideas
Let me tell you why these little beauties have become my go-to dessert – they’re absolute game changers! First off, they’re ridiculously quick to whip up. I’ve made them in under 30 minutes when surprise guests show up (we’ve all been there, right?). The dough comes together faster than you can say “dessert emergency.”
Here’s what makes them so special:
- Customizable like crazy – Sweet or savory, fruity or chocolatey, the options are endless. My kids love decorating their own with different toppings.
- Perfect portion control – No more fighting over who got the bigger slice. Each person gets their own perfect little treat.
- Party superstars – They look so fancy but are actually easy to make in big batches. I always get compliments when I bring them to gatherings.
- Make-ahead magic – The shells stay crisp for days in an airtight container, so you can bake them when you have time and fill them later.
Honestly, once you try these, you’ll wonder how you ever lived without them in your recipe rotation. They’re that good!
Essential Equipment for Mini Tart Shell Dessert Ideas
Let me share the tools that make creating these tiny tart wonders a breeze. You probably have most of them already lurking in your kitchen! I remember using ice cube trays as makeshift tart pans when I first started – bless my beginner baker heart. Now I know better, and these are the real heroes:
- Muffin tin – This is your tart shell mold! The cups give perfect shape and consistent sizing. Pro tip: Get a non-stick one or use baking spray unless you enjoy chiseling out tart shells (learned that the hard way).
- Mixing bowl – Where the tart shell magic begins. I prefer glass because I can see when the butter and flour are perfectly combined. That crumbly texture is everything!
- Rolling pin – Essential for getting that perfect thin crust. Mine’s actually an empty wine bottle – don’t judge, it works beautifully and hey, extra motivation to finish the wine first!
That’s really all you need to get started! Simple, right? The beauty of mini tart shell dessert ideas is they don’t require fancy equipment. Half the fun is improvising with what you’ve got – I’ve seen creative folks use shot glasses to shape shells in a pinch!
Ingredients for Mini Tart Shell Dessert Ideas
Okay, let’s talk ingredients – the building blocks of these adorable little tarts! I’ve learned through many (many) batches that quality matters here. My grandma always said, “You can’t make silk purses from sow’s ears,” and she was right about tart shells too. Here’s exactly what you’ll need, broken down so you can’t go wrong:
For the Tart Shells
- 1 cup all-purpose flour – This is your foundation. I like to fluff it before measuring for lighter shells.
- 1/4 cup powdered sugar – The secret to that delicate sweetness without graininess.
- 1/2 cup unsalted butter – Cold and cubed! This isn’t the time for soft butter – those cold bits create flaky layers.
- 1 egg yolk – Just the yolk, please. It binds everything together beautifully.
For the Fillings (Options)
Now the fun part! These are my go-to fillings, but feel free to get creative:
- 1 cup pastry cream – Classic vanilla is my favorite, but chocolate works too!
- 1/2 cup fruit jam – Raspberry is divine, but use whatever makes your taste buds happy.
- 1 cup whipped cream – Freshly whipped, please! The canned stuff just doesn’t do it justice.
- 1/2 cup chocolate ganache – Because sometimes you just need that rich chocolate hit.
See? Simple ingredients, but when combined with love (and maybe a little elbow grease), they transform into something magical. The best part is you probably have most of this in your pantry already!
How to Make Mini Tart Shell Dessert Ideas
Alright, let’s get baking! I promise this is easier than it looks – my first attempt was a bit messy (let’s just say some shells looked more like abstract art than perfect circles), but now I’ve got the process down to a science. Here’s exactly how I make these little beauties:
Preparing the Tart Shells
First things first – preheat that oven to 350°F (175°C). While it’s heating up, let’s make the dough. In your mixing bowl, combine the flour and powdered sugar. Now here’s my secret – add the cold cubed butter and use your fingers to work it in until it looks like coarse crumbs. Don’t overmix! You want those little butter bits to stay intact – that’s what gives the shells their flaky texture.
Add the egg yolk and gently mix until the dough just comes together. Roll it out to about 1/8 inch thick – I like to do this between two sheets of parchment paper to prevent sticking. Cut circles slightly larger than your muffin tin cups (a drinking glass works perfectly!). Press them gently into the greased tin, prick the bottoms with a fork (this prevents puffing), and bake for 12-15 minutes until golden. Let them cool completely before filling – patience is key here!
Filling and Decorating Your Mini Tart Shell Dessert Ideas
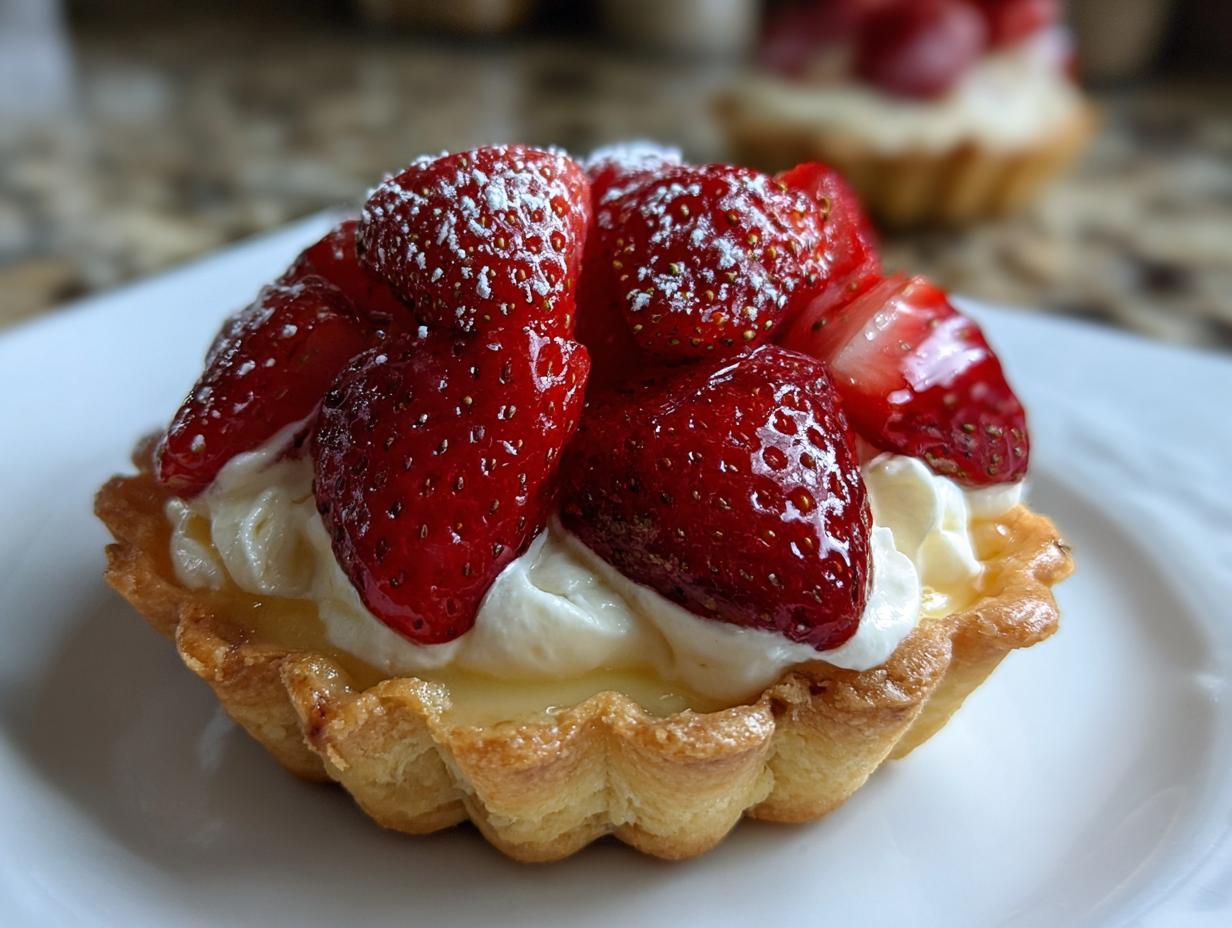
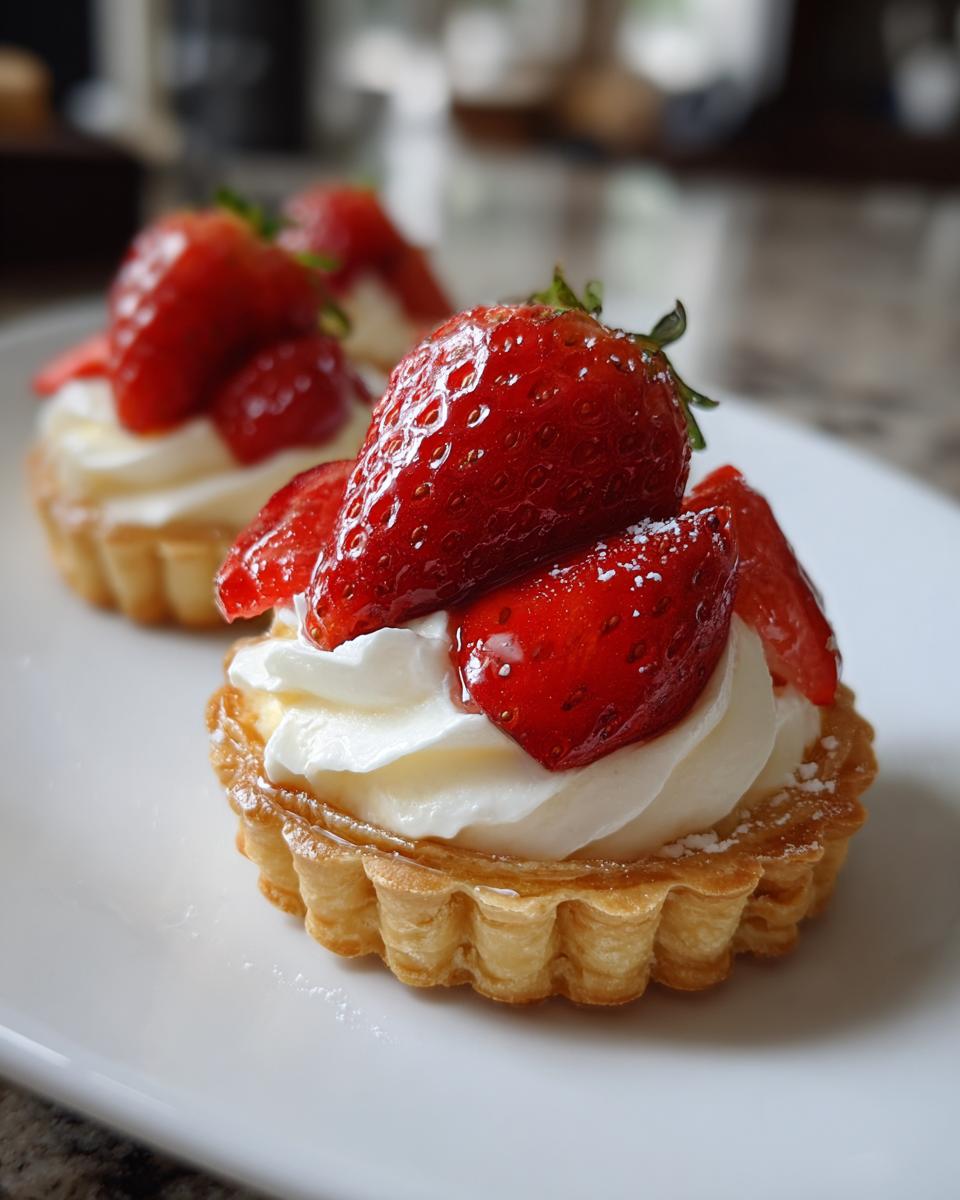
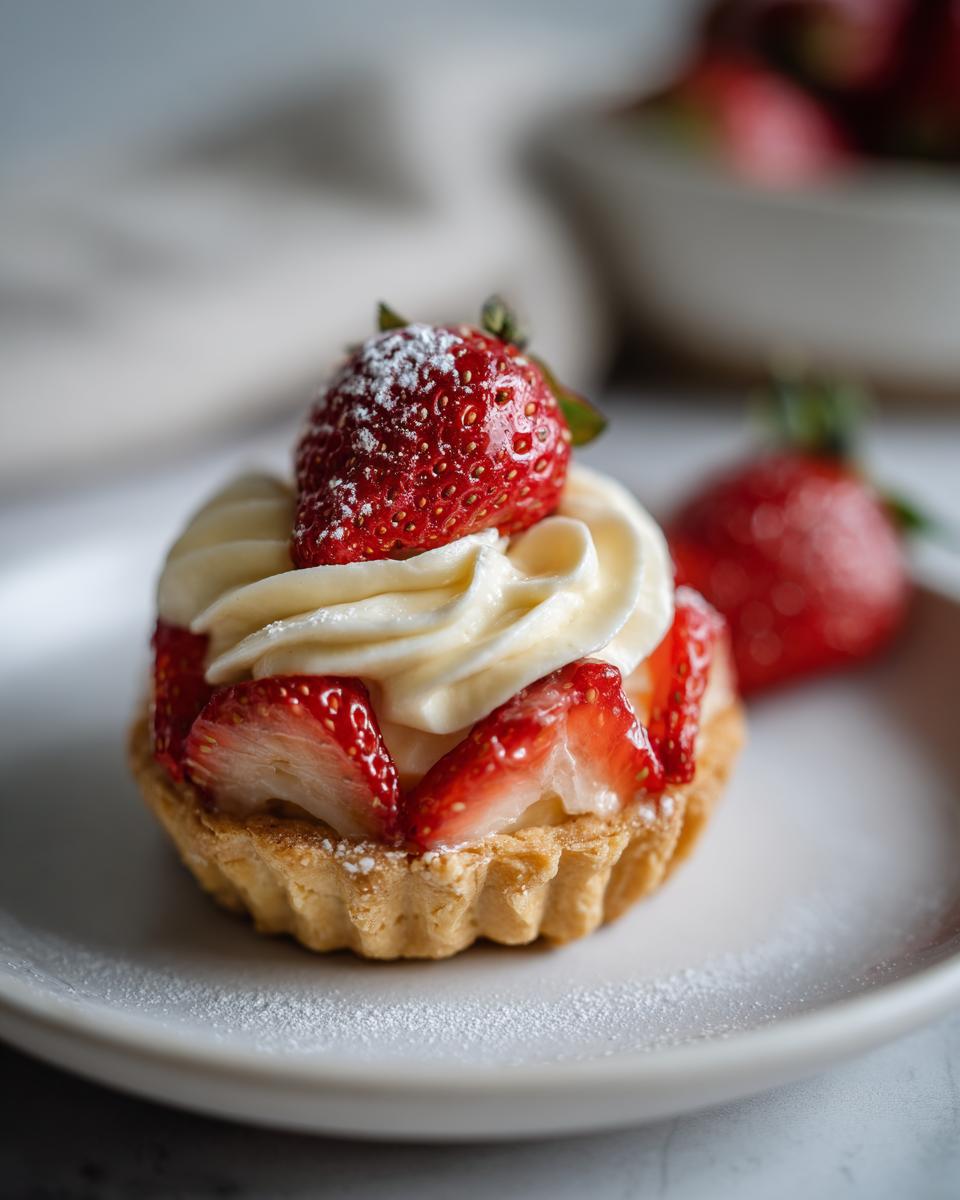
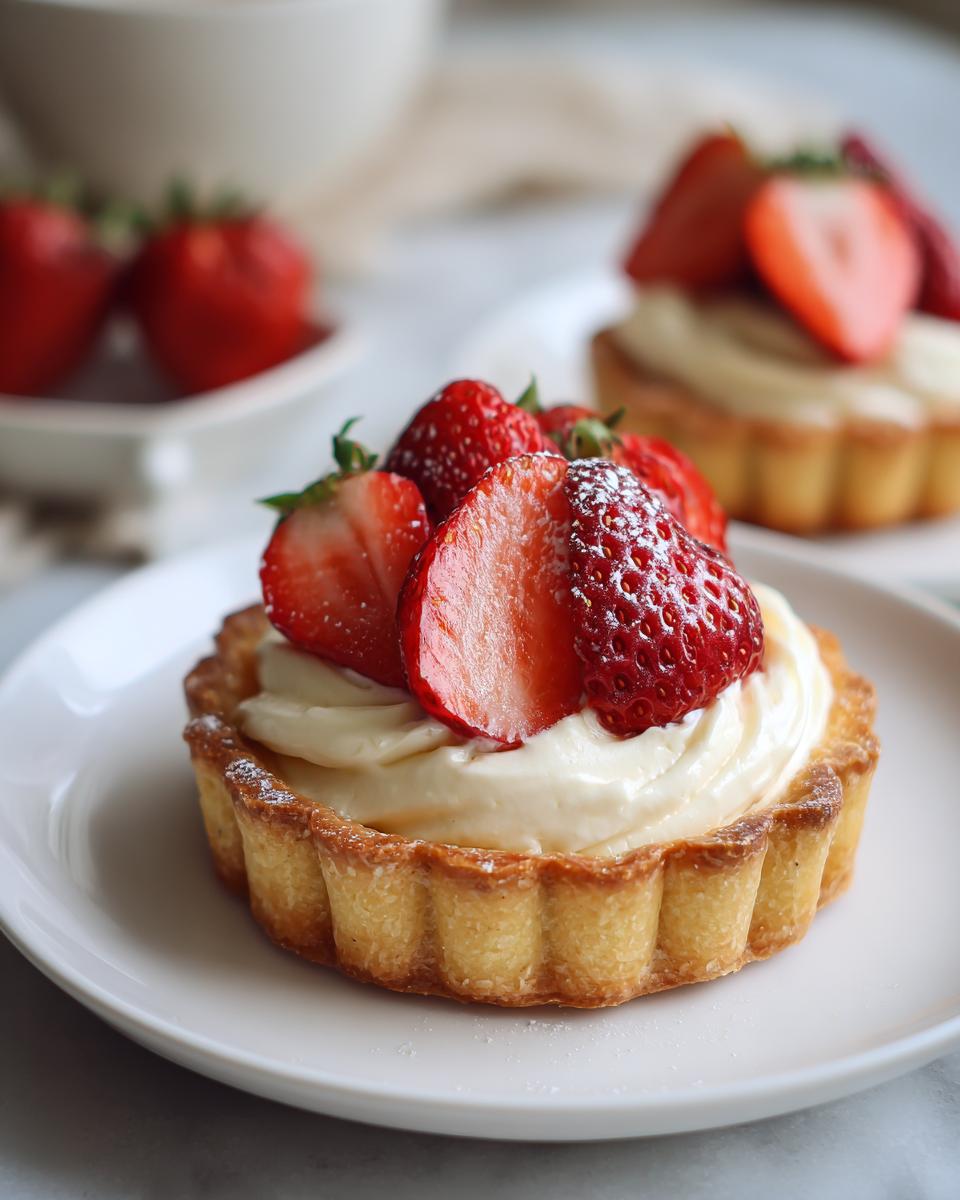
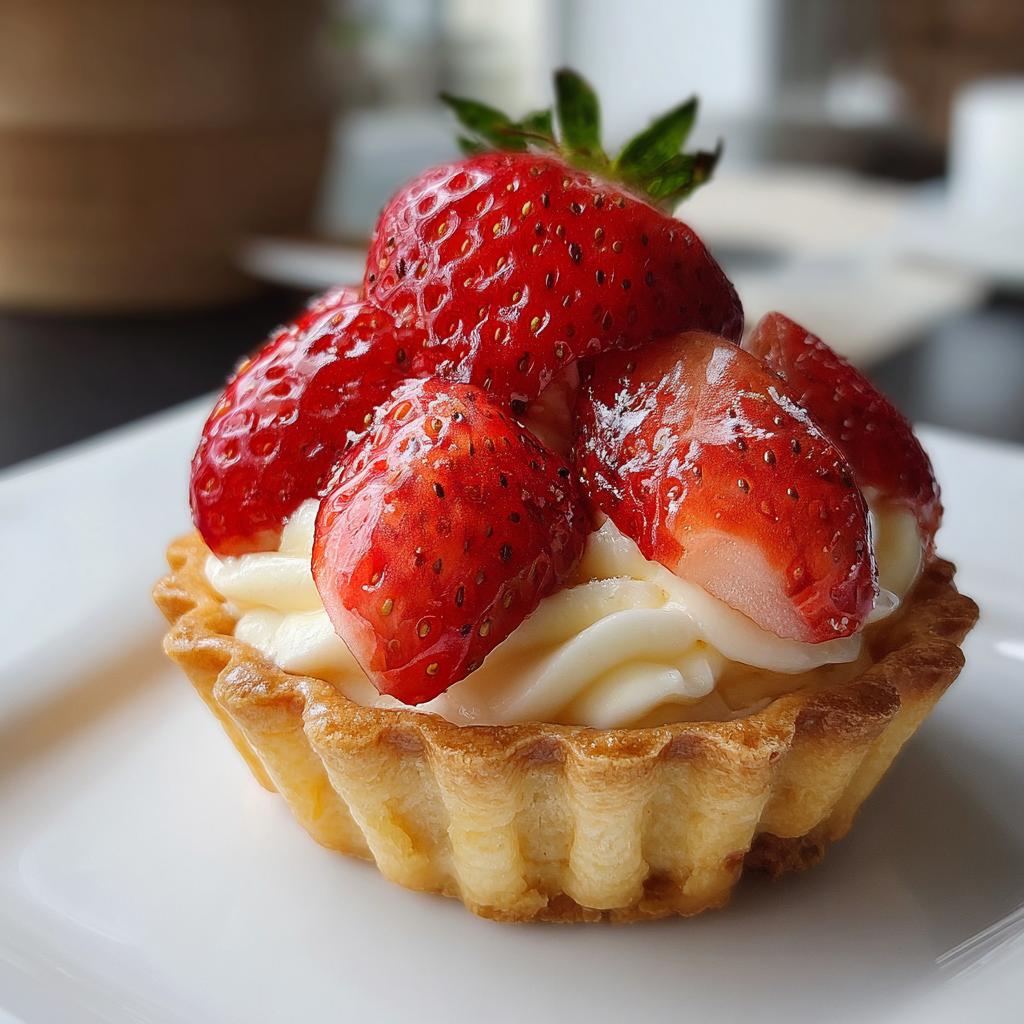
Now the fun part! Once your shells are cool, it’s time to get creative with fillings. My absolute favorite is pastry cream topped with fresh berries – it’s classic and always a crowd-pleaser. But don’t stop there! Try spreading a thin layer of fruit jam before adding whipped cream, or fill them with rich chocolate ganache and sprinkle with sea salt.

For toppings, think texture and color contrast: toasted nuts, citrus zest, chocolate shavings, or edible flowers. My rule of thumb? Fill them no more than an hour before serving to keep the shells crisp. If you must make them ahead, store filled tarts in the fridge, but let them come to room temperature for about 10 minutes before serving for the best texture.
Tips for Perfect Mini Tart Shell Dessert Ideas
After making more mini tart shells than I can count (and learning from all my mistakes!), here are my can’t-live-without tips for perfect results every time:
First – chill that dough! I know it’s tempting to rush, but 30 minutes in the fridge makes rolling so much easier. The butter firms up, preventing sticky messes and ensuring flaky layers. Trust me, it’s worth the wait!
Parchment paper is your best friend for rolling. No flour mess, no sticking – just perfect, even dough every time. And when pressing into the muffin tin? Lightly flour your fingers to prevent the dough from clinging to you instead of the pan.
Here’s my golden rule: fill shells right before serving. The crisp texture is everything! If you must prep ahead, store baked shells airtight at room temp and fillings separately in the fridge. Assemble when you’re ready to impress.
One last pro tip: bake shells on the middle rack and rotate halfway through for even browning. Those golden edges make all the difference between “nice” and “wow!”
Variations for Mini Tart Shell Dessert Ideas
Oh, where do I even begin with the endless possibilities for these little tart shells? Once you’ve mastered the basic recipe, that’s when the real fun starts! I’ll never forget the time I made a batch with lemon curd and fresh blueberries – my husband actually hid a few in the back of the fridge so he could have them all to himself. Here are some of my favorite twists to spark your creativity:
For a citrusy kick, try filling the shells with tangy lemon curd and topping with raspberries. If you’re feeling fancy, drizzle with strawberry coulis – it makes them look like they came from a pastry shop! Chocolate lovers (and really, who isn’t one?) will go nuts for shells filled with salted caramel and dark chocolate ganache – sprinkle some flaky sea salt on top for that perfect sweet-salty balance.
Seasonal fruits are always a winner – think spiced apple filling in fall or fresh peaches with honey in summer. My latest obsession? Mascarpone cheese mixed with a bit of vanilla and honey, topped with roasted figs. Honestly, once you start playing around, you’ll come up with your own signature combinations. The only limit is your imagination (and maybe how many tart shells you can eat in one sitting – not that I’m speaking from experience or anything)!
Serving and Storing Mini Tart Shell Dessert Ideas
Oh, presentation is everything with these little beauties! I learned this the hard way when I served my first batch straight from the muffin tin – let’s just say it wasn’t my most elegant hosting moment. Now I always arrange them on a beautiful platter with fresh mint leaves between each one. The contrast makes the colors pop, and guests can’t resist grabbing one (or three).
For storage, here’s what I’ve found works best:
- Unfilled shells stay crisp in an airtight container for up to 3 days. I like to layer them between parchment paper – no sticking!
- Filled tarts should be refrigerated and eaten within 24 hours. The moisture from fillings makes shells soggy if left too long.
- Freezing? Absolutely! Bake and freeze unfilled shells for up to a month. Just thaw at room temperature when ready to use.
Pro tip: If you’re transporting these to a party, pack shells and fillings separately. Assemble on-site for that perfect crisp texture that’ll have everyone asking for your secret!
Nutritional Information
Just between us, I don’t count calories when it comes to these adorable mini tarts – life’s too short! But seriously, nutritional values can vary widely depending on your fillings and ingredients. A fruit-filled tart will differ from a chocolate ganache version, so enjoy in moderation (or not – I won’t tell!).
Frequently Asked Questions About Mini Tart Shell Dessert Ideas
I get so many questions about these little tart shells – seems everyone wants to make them perfectly! Here are the answers to the ones I hear most often:
Can I freeze mini tart shells?
Absolutely! In fact, I always keep a batch in my freezer for dessert emergencies. Just bake them completely, let cool, then store in an airtight container with parchment between layers. They’ll keep beautifully for up to 3 months. Thaw at room temperature when ready to use – no need to reheat unless you want them extra crisp.
How long do filled mini tarts stay fresh?
This depends on your filling. Pastry cream-filled tarts should be eaten within 24 hours (keep refrigerated). Whipped cream versions are best served immediately. The shells alone stay crisp for 3-4 days in an airtight container – that’s why I recommend filling them right before serving!
What are good vegan filling options?
Oh, there are so many delicious choices! Coconut whipped cream is my favorite – just chill a can of full-fat coconut milk overnight and whip it up with powdered sugar. Chocolate avocado mousse works wonderfully too – blend ripe avocados with cocoa powder and maple syrup. For fruit fillings, chia seed jam is fantastic and super easy to make.
Can I make gluten-free tart shells?
You bet! I’ve had great success using a 1:1 gluten-free flour blend. The texture comes out slightly more crumbly, but still delicious. Just be sure to handle the dough gently when pressing into the muffin tin. Another option is using almond flour for a nuttier flavor – though you’ll need to adjust the butter slightly as it absorbs moisture differently.
Got more questions? Just ask! I could talk about mini tart shell dessert ideas all day – they’re my happy place in the kitchen.
Mini Tart Shell Dessert Ideas
Ingredients
Equipment
Method
- Preheat your oven to 350°F (175°C). Lightly grease a muffin tin.
- In a mixing bowl, combine flour and powdered sugar. Add cold cubed butter and mix until crumbly.
- Add the egg yolk and mix until the dough comes together. Roll out the dough and cut into circles to fit the muffin tin.
- Press the dough circles into the muffin tin. Prick the bottoms with a fork and bake for 12-15 minutes until golden. Let cool.
- Fill the cooled tart shells with your choice of filling: pastry cream, jam, whipped cream, or chocolate ganache.
- Top with fresh fruit, nuts, or chocolate shavings if desired. Serve immediately or refrigerate until ready to serve.