Table of Contents
I still remember the first time I hosted a Halloween party – I was so focused on decorations that I completely forgot about the Halloween food and drink! My guests arrived to find nothing but store-bought candy and regular soda. That night taught me something important: the right Halloween treats can transform an ordinary gathering into an unforgettable spooky celebration. Over the years, I’ve perfected a collection of Halloween food and drink recipes that never fail to impress, from eerie appetizers to bone-chilling beverages.
Halloween food and drink preparation has become one of my favorite culinary adventures. There’s something magical about transforming everyday ingredients into ghoulish delights that make both kids and adults squeal with delight. Whether you’re planning an intimate family dinner or a full-blown monster bash, these recipes will help you create the perfect spooky atmosphere while satisfying every craving.
Halloween Recipe Expert
Ingredients
Tried this recipe?
Let us know how it was!Essential Ingredients for Spooky Halloween Food and Drink Creations
Key Ingredients That Make Halloween Magic Happen
When crafting memorable Halloween food and drink, certain ingredients become your secret weapons for creating that perfect spooky aesthetic. Food coloring is absolutely essential – I always keep gel food coloring in orange, black, red, and green on hand because it provides more vibrant colors without thinning your mixtures. Black cocoa powder creates naturally dark, almost black treats without artificial coloring, while activated charcoal powder (food grade) gives drinks an otherworldly black appearance.
For texture and visual impact, unflavored gelatin becomes your best friend. It’s the backbone of jiggly “brain” molds, wobbly “worm” desserts, and crystal-clear spooky ice cubes. I’ve discovered that agar powder works wonderfully as a vegetarian alternative and actually sets firmer than regular gelatin. Dry ice creates that haunting fog effect in punch bowls, though always handle it with tongs and never consume it directly.
Candy eyes, plastic spiders (food-safe), and edible glitter transform ordinary dishes into Halloween masterpieces. I purchase these specialty items in bulk online because they’re often cheaper than buying small packages from grocery stores. Pumpkin puree, of course, is a Halloween staple, but don’t overlook ingredients like pomegranate juice for “blood” effects or matcha powder for creating sickly green hues.
Selecting the Highest Quality Ingredients for Your Halloween Treats
Quality ingredients make the difference between amateur Halloween food and drink creations and professional-looking masterpieces. When selecting pumpkins for fresh puree, choose sugar pumpkins (also called pie pumpkins) rather than carving pumpkins – they’re smaller, sweeter, and have better texture. Fresh pumpkin puree has a cleaner taste and smoother consistency than canned, though canned works perfectly fine for most recipes.
For chocolate-based Halloween treats, invest in good quality cocoa powder and chocolate chips. Dutch-processed cocoa creates richer, darker colors perfect for “dirt” desserts and chocolate “blood.” When buying food coloring, gel varieties provide more intense colors and won’t water down your recipes like liquid versions often do.
Fresh herbs like rosemary and thyme add sophisticated flavors to Halloween cocktails while creating natural “branch” garnishes. Choose firm, bright green herbs without wilted leaves. For spices, whole cinnamon sticks, star anise, and cardamom pods create more complex flavors in mulled drinks than pre-ground versions.
When purchasing dairy products for Halloween food and drink recipes, opt for full-fat versions when possible. Heavy cream whips better and creates richer textures, while whole milk provides better consistency in custards and puddings. Greek yogurt works wonderfully for creating thick, creamy “potions” and can be colored easily without becoming watery.
Creative Substitutions and Dietary-Friendly Alternatives
Creating inclusive Halloween food and drink means having great substitutions ready for guests with dietary restrictions. For gluten-free Halloween treats, almond flour creates wonderfully moist textures in cookies and cakes, while coconut flour works well in smaller quantities for binding. I’ve found that adding xanthan gum (about 1/4 teaspoon per cup of gluten-free flour) helps recreate the elasticity that gluten normally provides.
Dairy-free Halloween creations can be just as creamy and delicious as traditional versions. Coconut cream (the thick part from refrigerated canned coconut milk) whips beautifully for “ghostly” toppings, while cashew cream creates smooth, rich textures in puddings and mousses. For colored “potions,” oat milk takes food coloring better than most plant-based alternatives.
Sugar-free Halloween treats present unique challenges, but natural alternatives work wonderfully. Dates can be pureed into a paste that adds sweetness and helps bind ingredients together. Stevia works well in drinks but can create bitter aftertastes in baked goods, while monk fruit sweetener behaves more like sugar in recipes. For “blood” effects without corn syrup, I use reduced pomegranate juice sweetened with a touch of maple syrup.
Egg substitutions vary depending on the recipe’s needs. For binding in cookies, ground flaxseed mixed with water works excellently. For leavening in cakes, apple cider vinegar mixed with baking soda creates great lift. Aquafaba (chickpea liquid) amazingly whips into peaks for meringue-based Halloween treats, though it takes longer than traditional egg whites.

Step-by-Step Preparation for Spine-Tingling Halloween Food and Drink
Initial Preparation and Organization Tips
Successful Halloween food and drink preparation starts with smart organization. I always begin by creating a timeline working backward from serving time. Frozen treats like “witches’ hat” ice cream cones need several hours to set, while drinks with dry ice should be prepared just before serving for maximum fog effect.
Mise en place becomes even more critical for Halloween recipes because many involve multiple steps and specialty ingredients. I recommend preparing all your colored elements first – dye frosting, tint cream cheese, mix colored batters – then store them in separate containers. Label everything clearly because orange and red food coloring can look surprisingly similar under kitchen lighting.
Temperature control matters enormously for Halloween food and drink success. Chocolate decorations need cool, dry conditions to set properly, while gelatin molds require consistent refrigeration. I clear out space in my refrigerator before starting and organize shelves by recipe needs. Room temperature ingredients blend more easily, so remove dairy products about an hour before use.
Food safety becomes extra important when working with specialty ingredients like dry ice or when making treats that will sit out during parties. Keep hot foods hot and cold foods cold, and never leave dairy-based Halloween treats at room temperature for more than two hours. If your party runs long, rotate fresh platters from the refrigerator rather than letting everything sit out all evening.
Detailed Cooking Instructions with Professional Secrets
Creating professional-looking Halloween food and drink requires mastering a few key techniques. For perfectly smooth chocolate ganache (essential for glossy “blood” drizzles), heat cream to just before boiling, then pour it over chopped chocolate in three additions, whisking from the center outward each time. This prevents the mixture from breaking and creates silky smoothness.
When working with gelatin for jiggly Halloween treats, always bloom it in cold liquid first. Sprinkle powdered gelatin over cold liquid and let it absorb for 5 minutes before heating. For clearer results, heat the mixture gently – boiling can make gelatin cloudy. For layered “potion” drinks, each layer must be completely set before adding the next, and slight temperature differences help layers adhere without mixing.
Food coloring techniques make or break Halloween presentations. Add gel coloring gradually – you can always add more but can’t easily remove it. For marbled effects in frosting or cake batters, add drops of different colors and swirl just once or twice with a toothpick. Over-mixing creates muddy colors instead of distinct marbling.
Temperature shocking creates interesting textures in Halloween treats. Dipping room-temperature chocolate decorations in cold chocolate creates a glossy finish, while drizzling warm caramel over cold ice cream creates instant hardening for dramatic effect. For “glass” sugar decorations, work quickly once the sugar reaches hard crack stage (300°F), and have all your molds ready before starting.
Common Mistakes and How to Avoid Them
Even experienced cooks make mistakes with Halloween food and drink, but knowing common pitfalls helps you avoid them. The biggest mistake I see is over-coloring ingredients, which can create bitter flavors and unnatural appearances. Start with tiny amounts of food coloring and build gradually – you’re aiming for spooky, not radioactive.
Timing issues plague many Halloween preparations. Dry ice loses its effect within 10-15 minutes, so add it to punch bowls just before guests arrive. Conversely, flavors in mulled drinks and marinades need time to develop, so start these early. I make a detailed timeline for each recipe and work backward from serving time.
Gelatin problems frustrate many home cooks. If gelatin doesn’t set, it’s usually because the mixture was too hot when the gelatin was added (above 180°F kills gelatin’s setting power) or because acidic ingredients like fresh pineapple were used (their enzymes break down gelatin). Always use canned pineapple for gelatin recipes, and let hot mixtures cool to lukewarm before adding bloomed gelatin.
Consistency issues in frosting and glazes often result from temperature problems. Butter that’s too warm creates runny frosting, while butter that’s too cold creates lumpy textures. Ideal butter temperature feels like room temperature – it should give slightly when pressed but not leave fingerprints. For glazes, the right pouring consistency coats the back of a spoon but drips off smoothly.
Serving, Presentation, and Storage for Your Halloween Creations
Creative Presentation Ideas That Wow Your Guests
Presentation transforms good Halloween food and drink into unforgettable experiences. Lighting sets the mood more than any other single element – dim your regular lights and use orange and purple LED candles around your food displays. Battery-operated candles are safer around food than real flames and create consistent lighting throughout your party.
Layering creates visual interest and draws guests to your Halloween spread. Use cake stands, overturned bowls, and wooden boxes to create different heights across your table. Drape everything with cheesecloth or black fabric, then arrange your Halloween food and drink at various levels. This technique makes even simple treats look professionally styled.
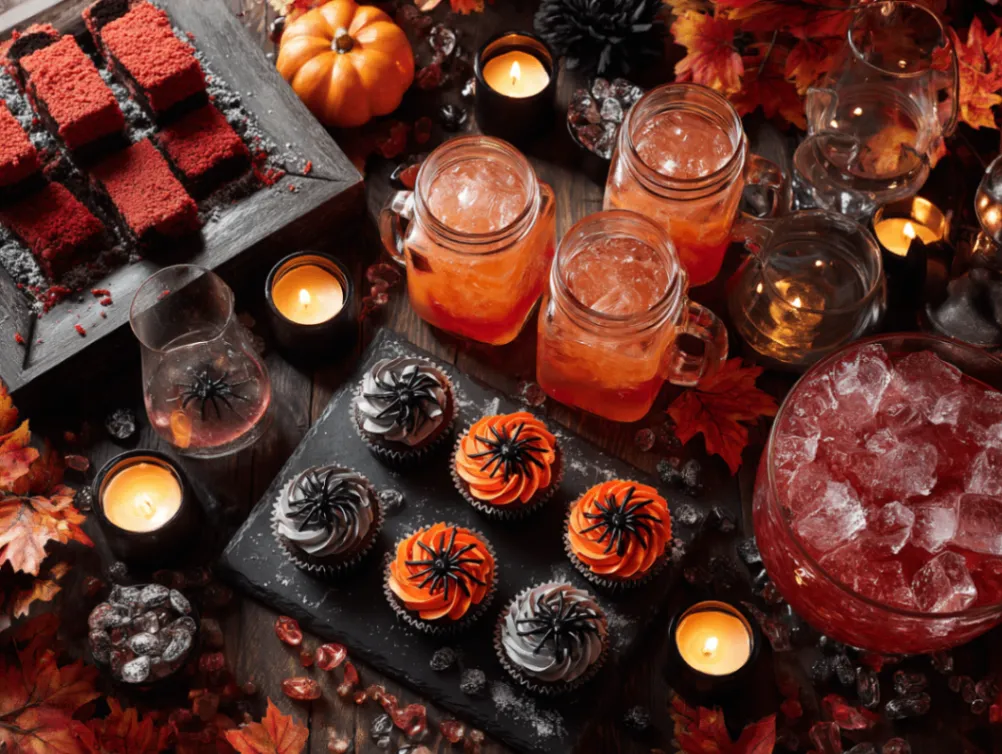
Themed serving dishes amplify your Halloween food presentation. Black plates make orange and red foods pop dramatically, while clear glass shows off layered drinks beautifully. I collect vintage silver platters from thrift stores – they create gothic elegance perfect for Halloween entertaining. Mason jars with chalkboard labels work wonderfully for individual drink servings.
Interactive elements engage guests and create memorable moments. Set up a “potion station” where guests can add their own dry ice to drinks, or create a DIY garnish bar with candy eyes, plastic spiders, and edible glitter. These stations become conversation starters and help guests feel involved in the Halloween food and drink experience.
Perfect Pairings and Complementary Dishes
Balancing flavors becomes extra important with Halloween food and drink because many recipes emphasize visual impact over taste complexity. Rich, chocolate-heavy desserts need acidic counterpoints – serve “bloody” berry compotes or tart apple cider alongside dense brownies and cookies. The acidity cuts through sweetness and cleanses the palate.
Temperature contrasts create exciting dining experiences. Pair cold, creamy “ghost” mousse with warm, spiced cider, or serve hot “witches’ brew” soup with cold, crunchy “bone” breadsticks. These contrasts keep guests interested and prevent palate fatigue during long Halloween parties.
Texture variety prevents monotony in Halloween food spreads. If most of your treats are soft and creamy, add crunchy elements like candied nuts, toasted pumpkin seeds, or crispy chocolate decorations. Conversely, if you’re serving mostly crunchy snacks, include smooth dips and creamy drinks to balance the meal.
Consider dietary balance even during Halloween indulgence. Include protein-rich options like deviled eggs decorated as “eyeballs” or cheese platters arranged with Halloween-themed crackers. These substantial options help guests pace themselves with sweeter treats and prevent sugar crashes that can end parties early.
Storage Tips and Reheating Guidelines
Proper storage extends the life of your Halloween food and drink creations and maintains their visual appeal. Most frosted treats should be stored in airtight containers in single layers with parchment paper between levels. Avoid refrigerating chocolate decorations unless absolutely necessary – condensation can cause them to “bloom” and lose their glossy appearance.
Gelatin-based Halloween treats require consistent refrigeration but can become rubbery if stored too long. Plan to serve these within 24-48 hours of making them for best texture. Cover them tightly with plastic wrap pressed directly onto the surface to prevent skin formation.
Beverages with fresh fruit or herbs should be consumed within 24 hours for food safety, but the flavors actually improve after a few hours as ingredients meld together. Store these in the refrigerator in glass containers rather than plastic, which can absorb flavors and odors.
Reheating Halloween food requires gentle approaches to maintain appearance. Warm soups and hot drinks over low heat, stirring frequently to prevent scorching. Never reheat drinks containing dairy in the microwave – they can curdle quickly. For cookies and baked goods, brief warming in a low oven (200°F for 5-10 minutes) refreshes textures without compromising decorations.


Frequently Asked Questions About Halloween Food and Drink
Q: How far in advance can I prepare Halloween treats without losing quality? A: Most Halloween cookies and candies can be made 3-5 days ahead if stored properly in airtight containers. Frosted items should be made no more than 2 days in advance. Gelatin-based treats are best made 1-2 days ahead, while drinks with fresh ingredients should be prepared the day of serving. For best results, I recommend making non-perishable decorations up to a week ahead and assembling everything the day before your party.
Q: What’s the safest way to use dry ice in Halloween drinks? A: Always purchase food-grade dry ice from reputable suppliers and handle it with tongs – never with bare hands. Add small pieces directly to punch bowls just before serving, never to individual glasses where guests might accidentally consume it. The fog effect lasts 10-15 minutes, so time it carefully. Ensure good ventilation in your party area, and never store dry ice in airtight containers as pressure buildup can be dangerous.
Q: How can I make Halloween treats less scary for young children while keeping them fun? A: Focus on “cute spooky” rather than genuinely frightening presentations. Use orange and purple color schemes instead of black and red, create smiling jack-o’-lantern faces instead of scary ones, and call treats by fun names like “pumpkin smiles” instead of “monster teeth.” Involve children in decorating their own treats – they’re less likely to be scared of something they helped create.
Q: What are the best natural alternatives to artificial food coloring for Halloween recipes? A: Beet juice creates beautiful reds and pinks, while turmeric provides natural orange and yellow hues. Spirulina powder gives green colors, and activated charcoal creates dramatic blacks. For purple, use butterfly pea flower tea or purple sweet potato powder. Keep in mind that natural colorings often provide more muted tones than artificial versions, but they create beautiful, earthy Halloween food and drink presentations.
Q: How do I prevent my Halloween chocolate decorations from melting during parties? A: Temperature control is crucial for chocolate success. Keep your party space below 70°F if possible, and store chocolate decorations in the refrigerator until the last possible moment. Use chocolate with higher cocoa butter content as it’s more stable, and consider chocolate modeling paste which holds up better than pure chocolate. For outdoor parties, create chocolate decorations early in the morning when temperatures are cooler, or switch to sugar-based decorations which are more heat-stable.
Conclusion: Embrace the Magic of Halloween Food and Drink
Creating memorable Halloween food and drink isn’t just about following recipes – it’s about embracing creativity, experimenting with flavors, and sharing joy with the people you care about. Every Halloween party I’ve hosted has taught me something new, whether it’s a technique for perfectly spooky presentations or a flavor combination that surprised everyone.
The beauty of Halloween cooking lies in its forgiving nature. If your “ghost” cookies look more like abstract art, they’ll still taste delicious. If your “blood” drizzle doesn’t flow quite right, it adds character to your creation. Halloween food and drink is about fun first, perfection second.
I encourage you to start with one or two recipes that excite you most, then build your Halloween repertoire over time. Take photos of your creations, note what worked well and what you’d change, and most importantly, enjoy the process. The memories you create while preparing these treats often become as treasured as the party itself.
Don’t forget to share your Halloween food and drink adventures! Tag us on social media with your creations – I love seeing how different cooks interpret these recipes and add their own creative twists. The Halloween cooking community is incredibly supportive and full of inspiring ideas.
This Halloween, let your kitchen become a laboratory for culinary magic. Whether you’re creating simple treats for trick-or-treaters or elaborate spreads for adult parties, remember that the most important ingredient is the love and creativity you put into every dish. Happy Halloween, and may your treats be as memorable as your celebrations!