You know those nights when you’re staring at the clock, the kids are hangry, and takeout feels like the only option? That’s exactly why I fell in love with freezer friendly dinner recipes—especially these chicken enchiladas. I remember that first chaotic week of school pickup, soccer practice, and my work deadlines piling up. That’s when I stashed a batch of these in the freezer, and let me tell you, the relief of pulling them out on a Wednesday night was pure magic. These enchiladas are not just a time-saver—they’re packed with flavor, they reheat like a dream, and most importantly, they taste like you’ve been cooking all afternoon (when really, you just popped them in the oven). If you’ve ever doubted the power of a well-stocked freezer, this recipe will change your mind.
Why You’ll Love These Freezer Friendly Chicken Enchiladas
Let me count the ways these enchiladas will become your new best friend in the kitchen:
- Weeknight superhero: They go from freezer to table in under 30 minutes – faster than pizza delivery!
- Flavor bomb: That creamy chicken filling with just the right kick from green chiles? Absolute perfection.
- Meal prep magic: Make a double batch on Sunday and you’ve got dinners sorted for weeks.
- No soggy tortillas: Unlike most freezer meals, these stay perfectly textured when reheated.
- Crowd pleaser: My picky kids and foodie husband both clean their plates – that’s saying something!
Trust me, once you try these, you’ll be freezing them in bulk like I do!
Ingredients for Freezer Friendly Chicken Enchiladas
Okay, let’s dive into what makes these enchiladas so darn good – and freezer-friendly! I’ve grouped everything so you can shop and prep without any confusion. Pro tip: I always double the filling ingredients because it makes the easiest nachos topping later in the week!
For the Filling
- 2 cups shredded cooked chicken: Leftover rotisserie chicken works beautifully here, or use poached breasts. Just don’t skip the shredding – big chunks won’t roll nicely!
- 1 cup shredded cheese: My family loves sharp cheddar, but Monterey Jack melts like a dream if you prefer something milder.
- ½ cup sour cream: This is the secret to keeping the filling moist after freezing.nder.
- 1 can diced green chiles (4 oz): Don’t drain these! The liquid adds so much flavor. If you’re feeling adventurous, roasted poblanos are amazing too.
For Assembly
- 6 flour tortillas (8-inch): The perfect size for rolling without falling apart. Corn tortillas work too, but they’ll need quick frying first so they don’t crack.
- 1 can enchilada sauce (10 oz): I use mild red sauce, but green would be delicious. Homemade? Even better!
- ½ cup shredded cheese (for topping): Because we all know the cheesier, the better!
See? Nothing疫情太复杂 – just simple, staple ingredients that come together for the ultimate freezer meal. Now let’s get rolling!
How to Make Freezer Friendly Chicken Enchiladas
Alright, let’s get rolling—literally! Making these enchiladas is easier than you think, and I’ll walk you through each step so they come out perfect every time. The best part? You’ll be freezing leftovers before you know it!
Preheat and Prep
First things first—preheat that oven to 375°F (190°C). While it’s heating up, lightly grease your 9×13-inch baking dish. I use butter for extra flavor, but cooking spray works too. Now grab that bowl of filling you mixed earlier—you know, the one with the chicken, cheese, sour cream, and green chiles? Give it one last stir to make sure everything’s evenly combined.
Roll Like a Pro
Here’s my trick for perfect enchiladas every time: warm your tortillas for 10 seconds in the microwave first. This makes them super pliable and prevents cracking. Spoon about ⅓ cup of filling onto each tortilla, spreading it slightly off-center. Roll them up snugly (but not too tight—the filling needs room to breathe!) and place them seam-side down in your prepared dish. Crowd them together slightly—they’ll hold each other up during baking.
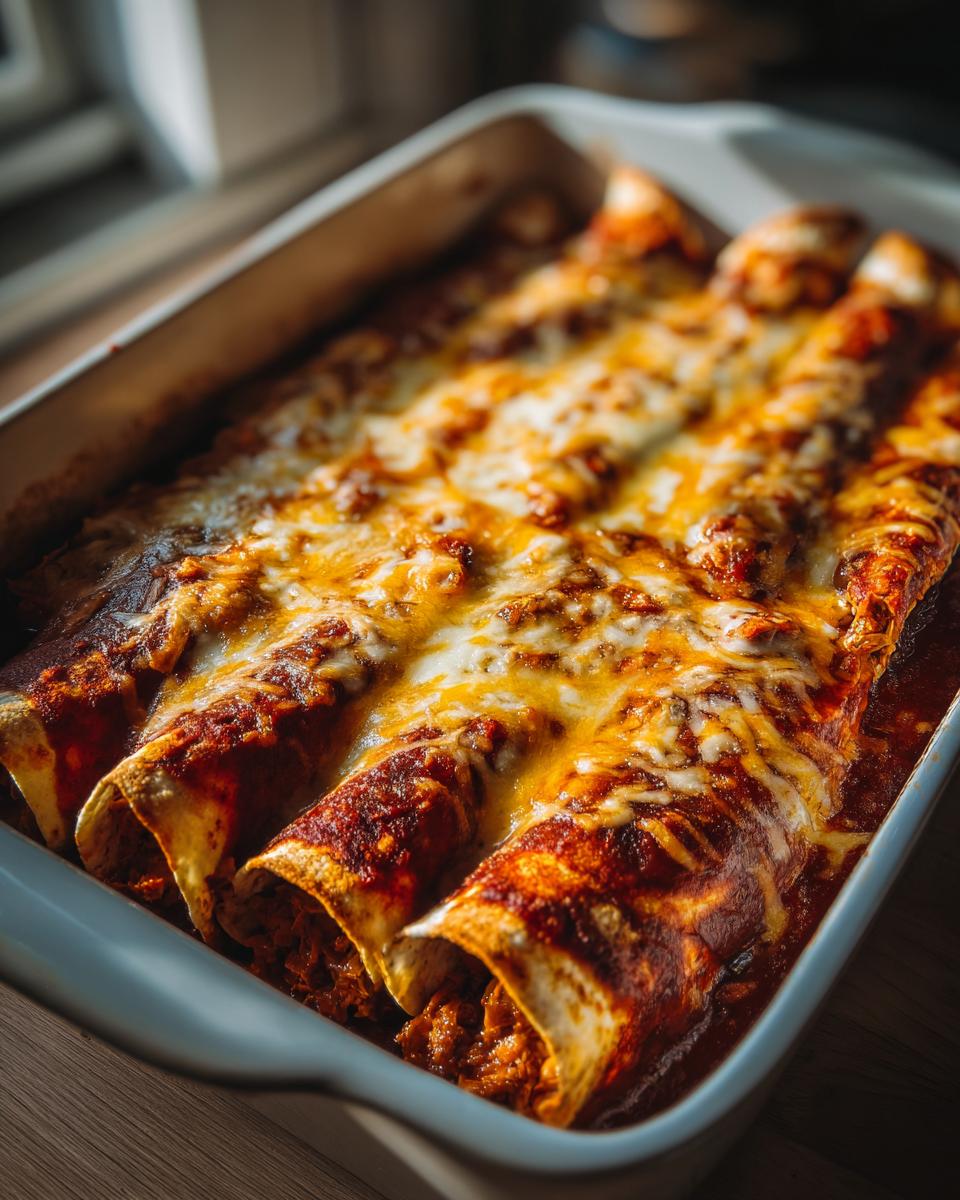
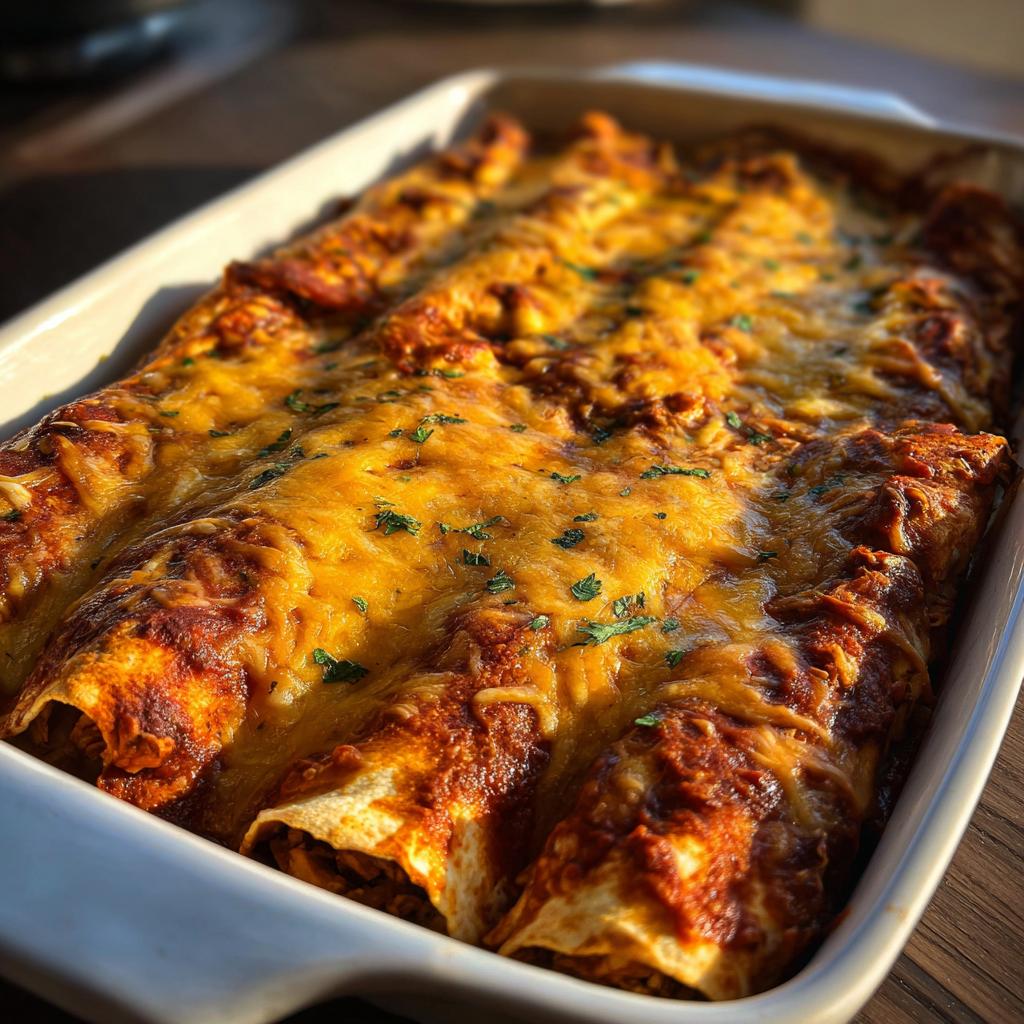
Sauce and Bake
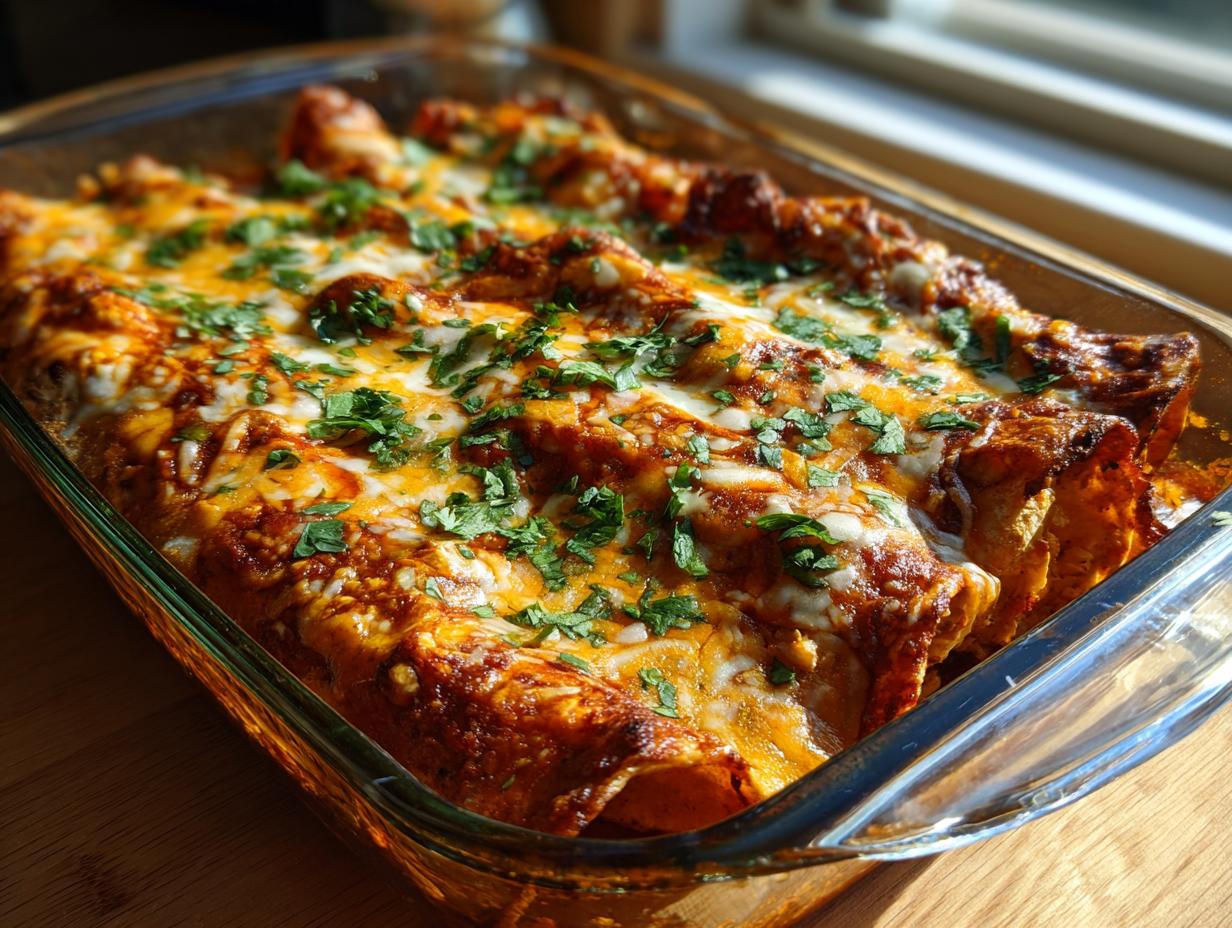
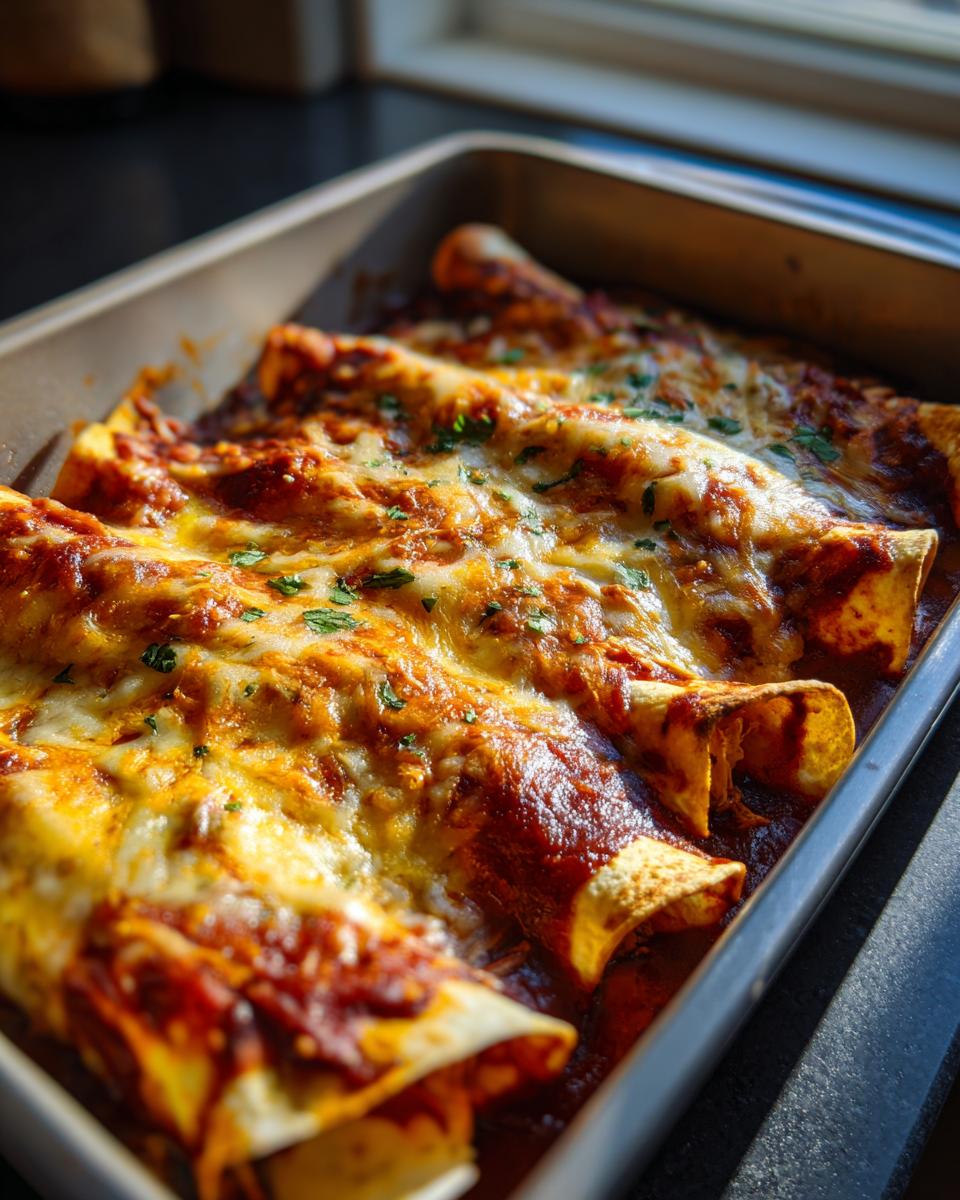
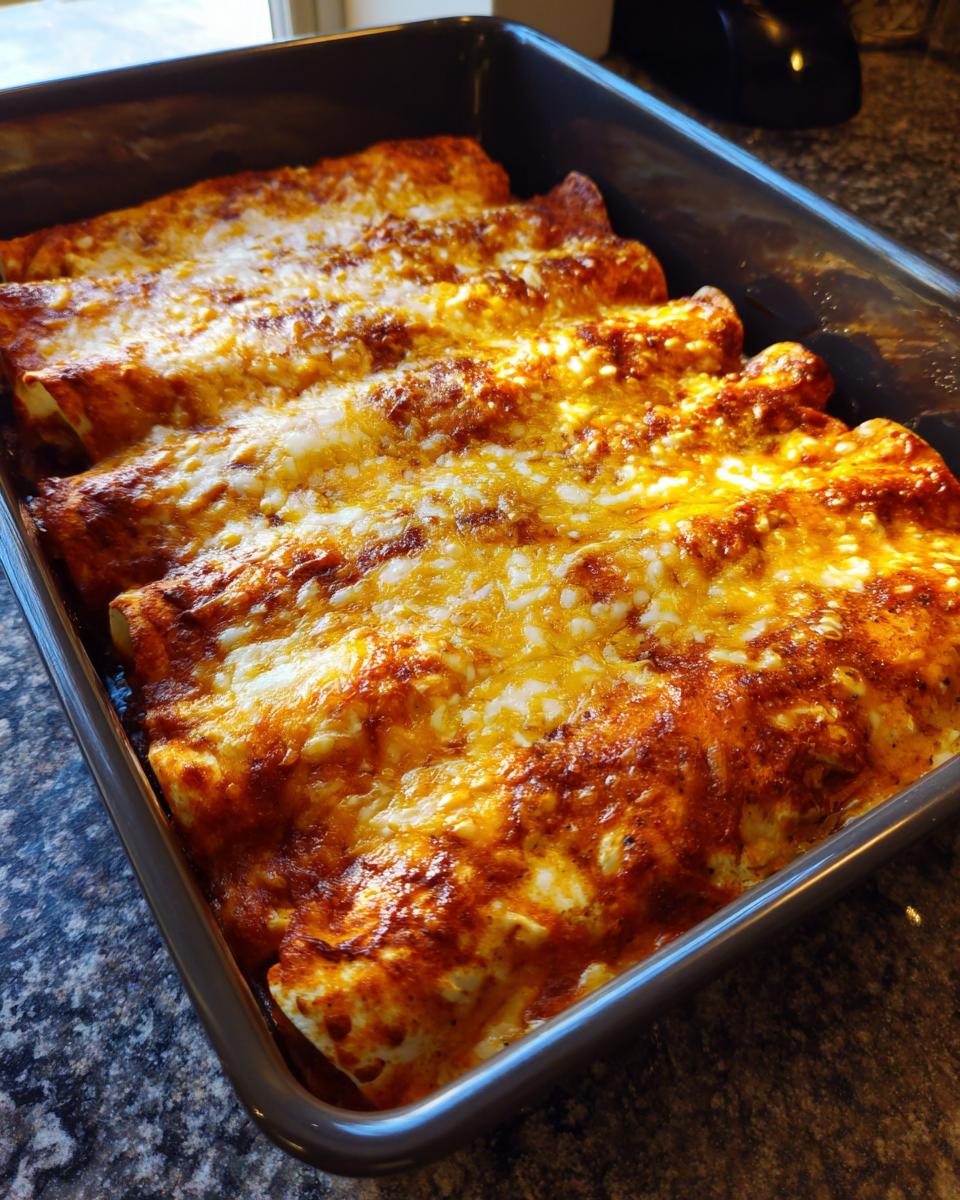
Now for the fun part—drench those beauties in enchilada sauce! Pour it slowly over the top, making sure every inch gets covered. Sprinkle that remaining ½ cup of cheese evenly across the top—I like to get a little extra on the edges where it gets nice and crispy. Pop them in the oven for 20-25 minutes until the cheese is bubbly and golden. Your kitchen will smell amazing!
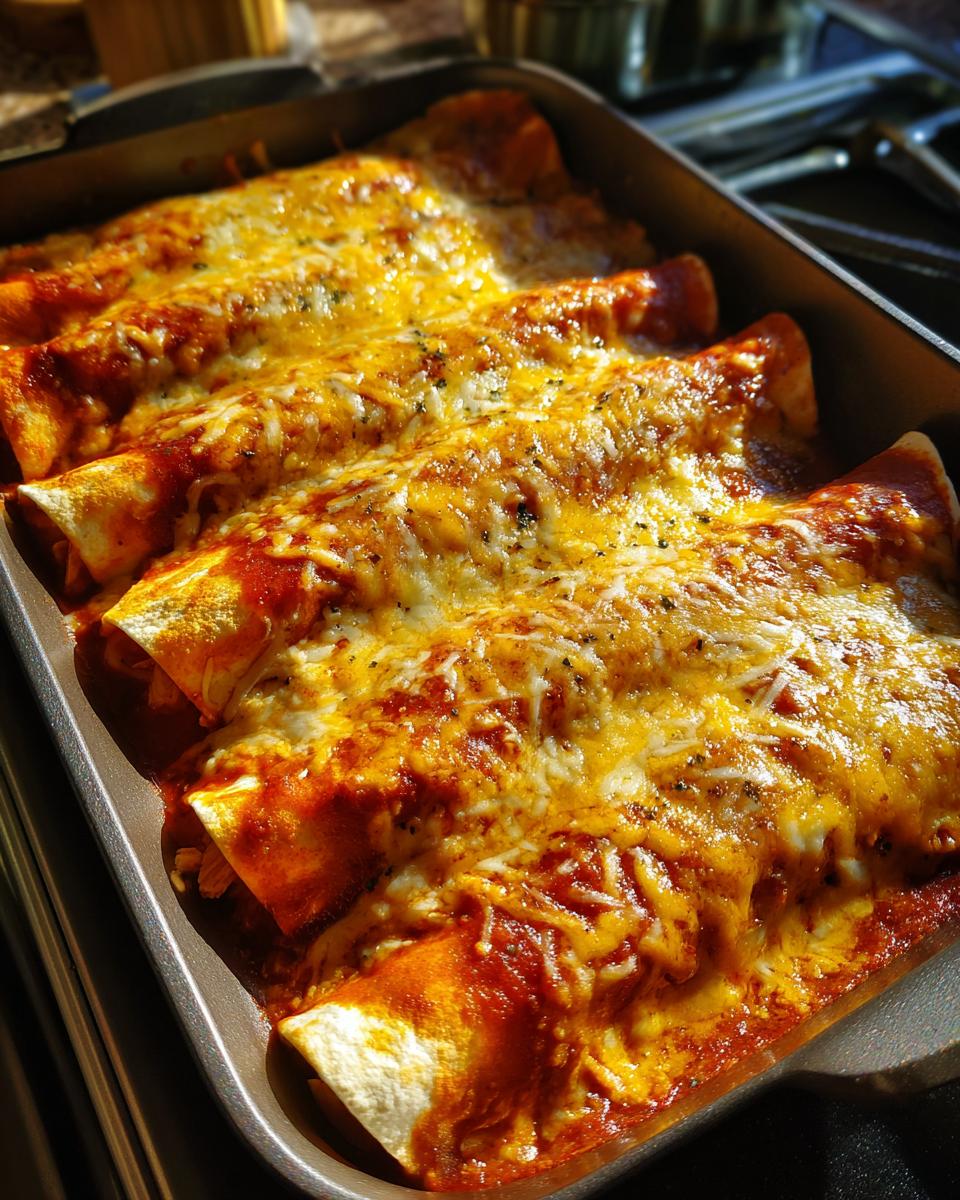
Pro tip: If you’re freezing these, let them cool completely first—about 30 minutes. This prevents condensation that can make them soggy. Want to pair these with another easy meal? Try my easy chicken and rice recipe for meal prep variety!
Freezing and Reheating Tips
Let’s talk freezer strategy—because what’s the point of making these enchiladas if they don’t come out tasting fresh later, right? After they’ve cooled completely (seriously, don’t skip this or you’ll get ice crystals!), I wrap the whole baking dish tightly in two layers of foil. Not just a lazy single sheet—double coverage is key! If you’re fancy like my sister, slide them into a labeled freezer bag instead. They’ll keep beautifully for up to 3 months, but let’s be real—ours never last that long!
When it’s time to reheat, here’s my no-fail method: Thaw overnight in the fridge (patience, my friend!), then bake covered at 350°F for about 20 minutes. Remove the foil, add a fresh sprinkle of cheese if you’re feeling extra, and bake another 5-10 minutes until everything’s piping hot. Pro tip? Place a sheet of parchment paper directly on top of the enchiladas before wrapping in foil—it keeps the cheese from sticking and prevents dreaded freezer burn. Now you’ve got a stress-free dinner that tastes like you just made it!
Nutritional Information
Now, I’m no nutritionist, but here’s the scoop on what’s in these tasty enchiladas! Keep in mind these numbers are just estimates—your exact counts might change depending on whether you use full-fat sour cream or low-fat cheese, or if you sneak extra cheese on top like I always do (no judgment!). The beauty of freezer meals is they’re homemade, so you control what goes in. Just know you’re getting a good balance of protein from the chicken and calcium from all that melty cheese goodness!
FAQ About Freezer Friendly Dinner Recipes
I get asked so many questions about these freezer-friendly enchiladas—let me answer the most common ones before you start rolling!
Can I use corn tortillas instead of flour?
Absolutely! Corn tortillas give that authentic Mexican flavor—just give them a quick fry in oil first to make them pliable. About 10 seconds per side does the trick. Stack them between paper towels while you work to keep them soft. Bonus: corn tortillas actually freeze better than flour ones if you’re super serious about meal prep!
How long do these enchiladas last in the freezer?
They stay delicious for up to 3 months if wrapped properly—but let’s be honest, they never last that long in my house! For best quality, I try to eat them within 6 weeks. Label your container with the date (trust me, future you will thank you). Want another freezer winner? Try my easy chicken casserole recipe for variety!
Can I freeze them before baking?
Yes! This is my favorite trick—assemble everything but hold the sauce. Freeze the rolled enchiladas naked (just wrap really well), then thaw overnight before adding sauce and baking. They come out with the most perfect texture this way!
What’s the best way to reheat single portions?
Microwave works in a pinch (about 2 minutes with a damp paper towel on top), but oven is better. Put individual portions in an oven-safe dish with a splash of water or extra sauce to keep them moist. Cover with foil and bake at 350°F for 15 minutes until heated through. That melty cheese will make your kitchen smell amazing all over again!
Can I make these vegetarian?
Of course! Swap the chicken for black beans or sautéed mushrooms—just be sure to squeeze out any extra moisture first. I’ve even done a mix of roasted sweet potatoes and chickpeas that was divine. The freezer-friendly magic works no matter what filling you choose!
Serving Suggestions
Oh, let me tell you how I love to dress up these enchiladas for a complete meal! A big dollop of cool sour cream right on top balances the spice perfectly—my kids go crazy for it. Don’t forget the fresh toppings! Chopped avocado, a sprinkle of cilantro, and lime wedges for squeezing make everything pop. For sides, I usually go with Mexican rice or a simple black bean salad—just toss canned beans with corn, diced tomatoes, and lime juice. And if you’re feeling fancy? A crisp green salad with a tangy vinaigrette cuts through the richness beautifully. Now that’s what I call a freezer meal that doesn’t taste like one!
Variations for Freezer Friendly Chicken Enchiladas
One of my favorite things about this recipe? You can tweak it a million ways to suit your mood or what’s in your pantry! Here are some of my go-to variations that freeze just as beautifully as the original:
Protein swaps: Leftover turkey after Thanksgiving? Perfect! Shredded pork works wonders too. For my vegetarian friends, black beans or pinto beans make a hearty substitute—just drain them well so your filling isn’t soggy.
Veggie boost: I love sneaking in sautéed spinach or roasted zucchini when the kids aren’t looking. Mushrooms add amazing umami flavor if you brown them first. Just remember to squeeze out any extra moisture before mixing with the other ingredients.
Cheese lovers unite: Try pepper jack for a spicy kick or crumbled queso fresco for authentic flavor. My dairy-free sister uses mashed avocado in the filling—it sounds weird but tastes incredible!
Sauce adventures: Green enchilada sauce gives a totally different vibe, or mix in some chipotle peppers for smokiness. Last week I used salsa verde and it was a game-changer!
The beauty of freezer friendly dinner recipes is making them your own. Whatever version you create, just be sure to label it clearly—future you will appreciate knowing whether that’s chicken or black beans inside!
Share Your Experience
I’d love to hear how these freezer friendly chicken enchiladas worked for you! Did your family gobble them up like mine does? Maybe you added your own twist with extra veggies or a secret spice? Drop a comment below – your tips might just become someone else’s new favorite trick! And if you loved this recipe as much as we do, a star rating helps others discover it too. Happy freezing!
Freezer-Friendly Chicken Enchiladas
Ingredients
Equipment
Method
- Preheat oven to 375°F (190°C). Lightly grease a 9×13-inch baking dish.
- In a bowl, mix shredded chicken, 1 cup cheese, sour cream, and green chiles.
- Spoon filling onto tortillas, roll up, and place seam-side down in the baking dish.
- Pour enchilada sauce over the top and sprinkle with remaining cheese.
- Bake for 20-25 minutes until bubbly. Let cool before freezing.