You know that last-minute panic when you realize Halloween is tomorrow and you promised to bring treats? Yeah, me too. That’s exactly how I discovered these ridiculously easy Halloween desserts! Picture this: my niece showed up at my door dressed as a witch, screaming “Trick or treat!” a full 24 hours early while I stood there holding nothing but a sad-looking pumpkin. Ten minutes later, we were rolling cookie dough balls together, laughing at our lopsided spider webs drawn with frosting. These simple, spooky sweets saved my reputation as the “fun aunt” – and they’re so easy you’ll swear they’re magic!
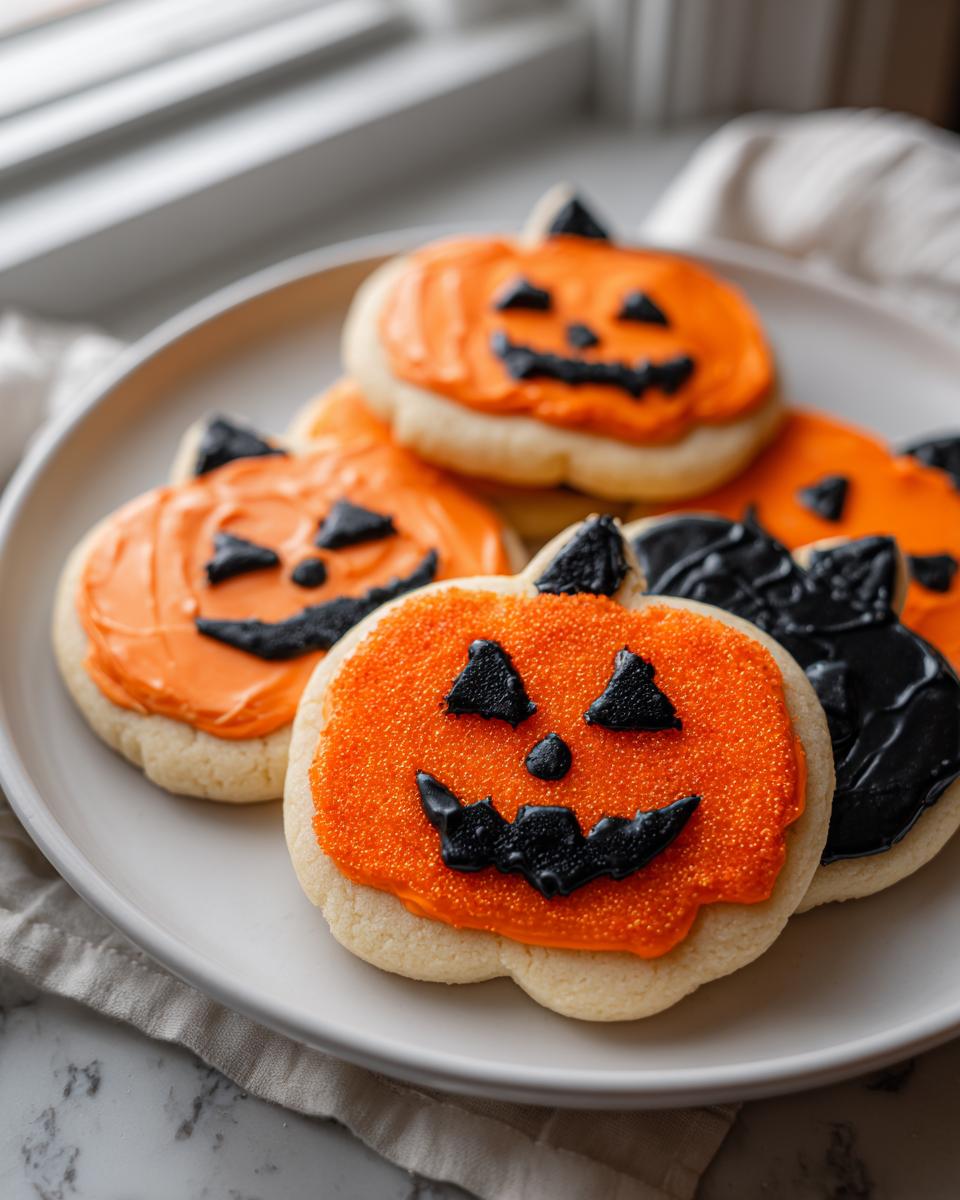
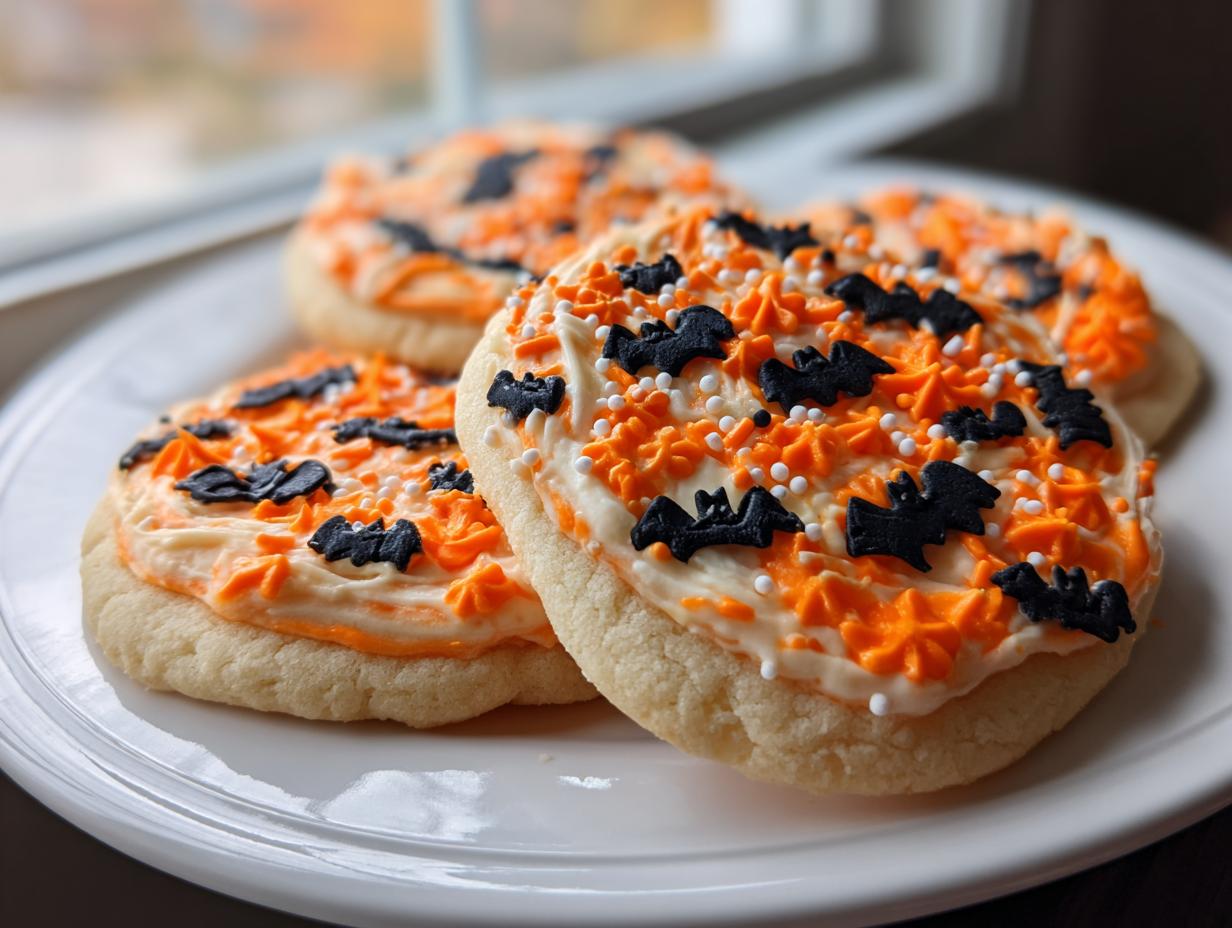
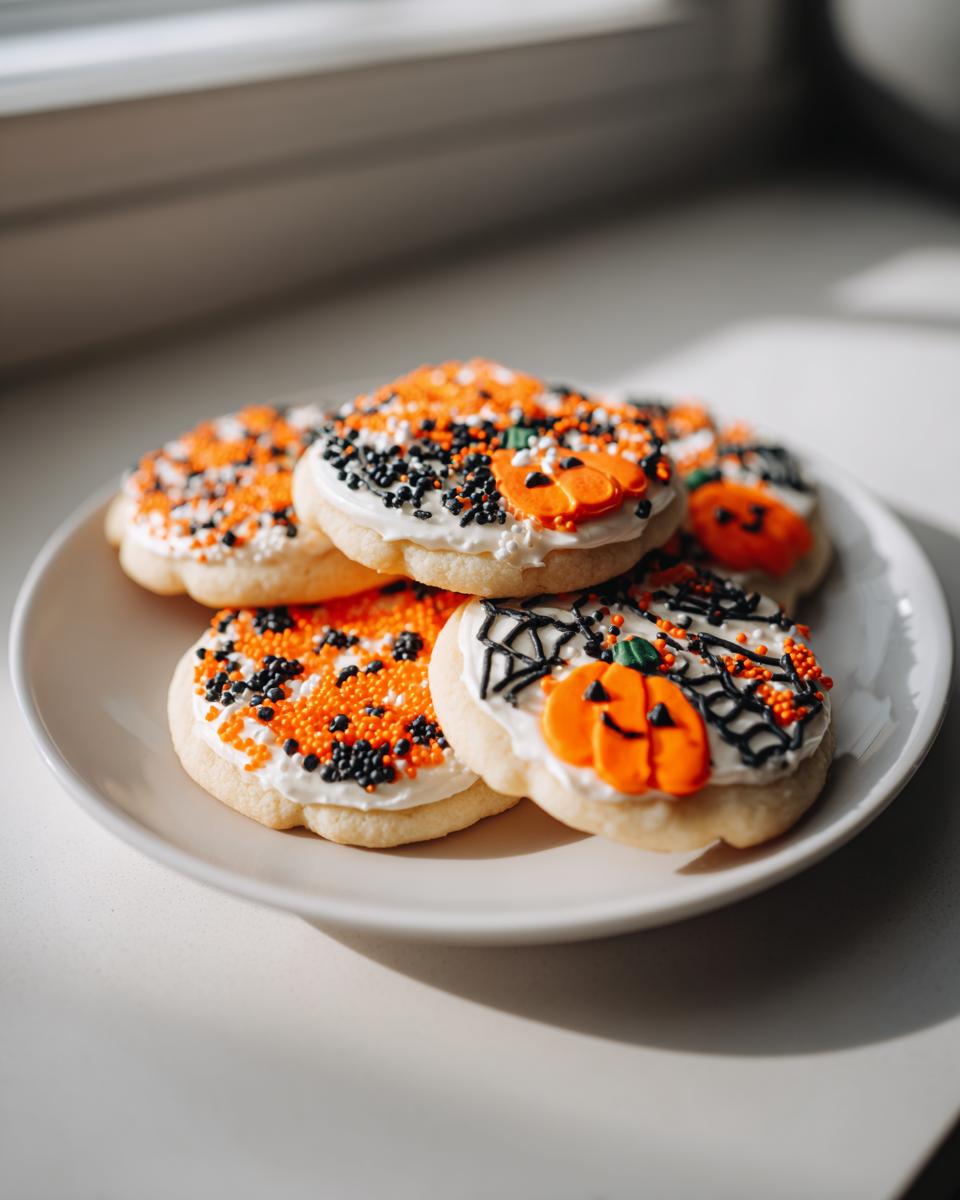
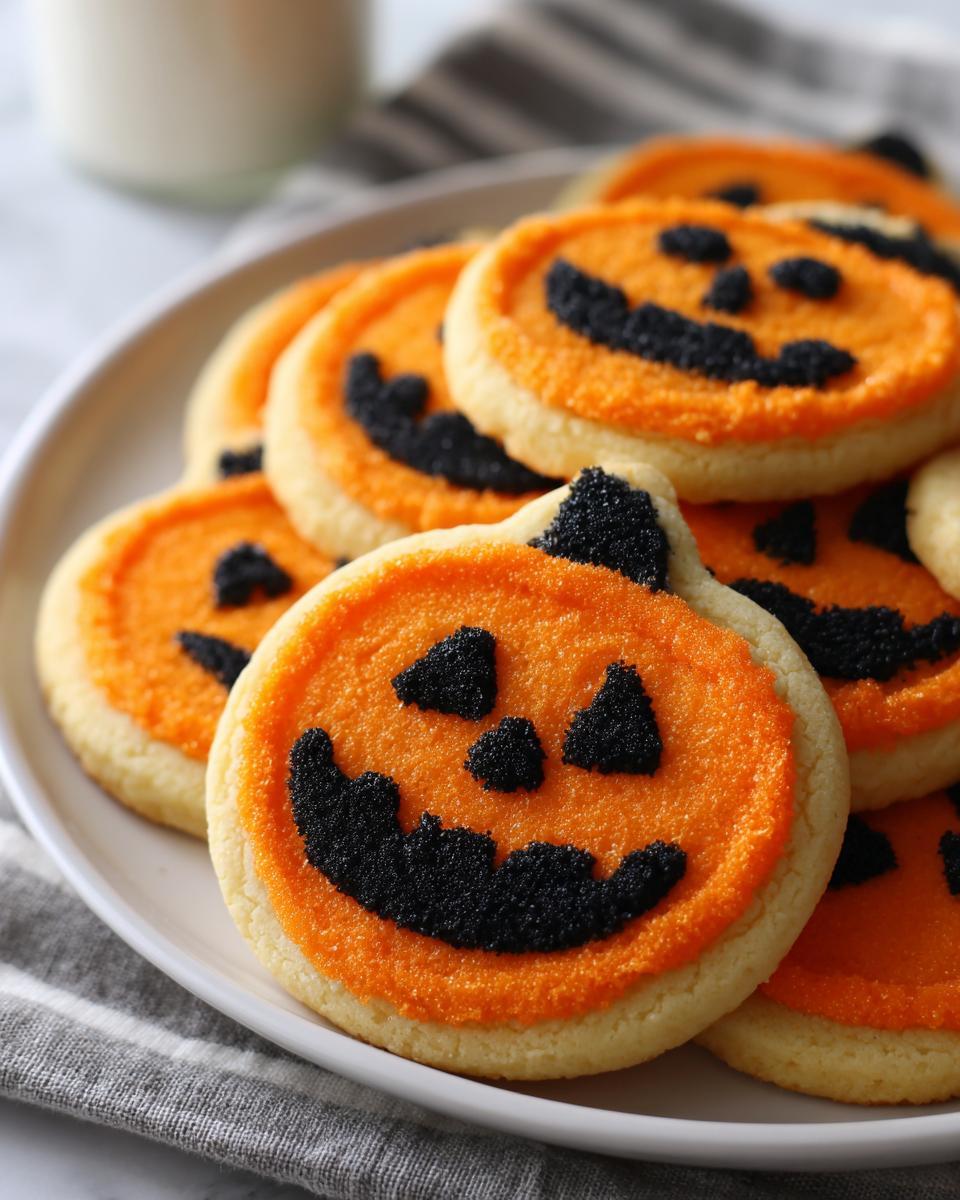
What I love most about these easy Halloween desserts is how they turn basic pantry ingredients into something delightfully creepy. The orange and black frosting transforms plain cookies into grinning jack-o’-lanterns or spooky ghosts with just a few squiggles. Last year, my neighbor’s kids begged me to teach them how to make these – and when six-year-olds can masterfully decorate them (while covered in frosting, I might add), you know it’s foolproof!
Why You’ll Love These Easy Halloween Desserts
Listen, I’m all for fancy baking projects…when I have time. But Halloween is about fun, not frustration! That’s why I’m obsessed with these treats:
- Speed demon approved: You can go from zero to spooky in under 30 minutes – perfect for when you forgot it’s class party day (again).
- Pantry magic: Flour, butter, sugar – that’s basically it. No hunting for obscure ingredients at 8pm on October 30th!
- Kid chaos-friendly: The decorating is so simple my 4-year-old nephew can do it (and trust me, he once frosted the dog).
- Totally you: Make pumpkins, ghosts, or abstract “scary blobs” – no wrong answers here! Check out our other Halloween food ideas for more inspiration.
Last year, my “scary” cookies that looked like melted snowmen were a hit – and that’s saying something!
Ingredients for Easy Halloween Desserts
One of my favorite things about these treats? You probably have everything in your kitchen right now! Here’s the short list of simple ingredients that magically turn into something spook-tacular:
For the Cookies
- 1 cup all-purpose flour – Just your regular flour, nothing fancy needed
- 1/2 cup sugar – I use white granulated, but brown sugar adds a nice caramel flavor if you’re feeling wild
- 1/2 cup butter, softened – Pro tip: leave it on the counter for 30 minutes before starting (or cheat by microwaving for 10 seconds if you’re impatient like me!)
For the Decoration
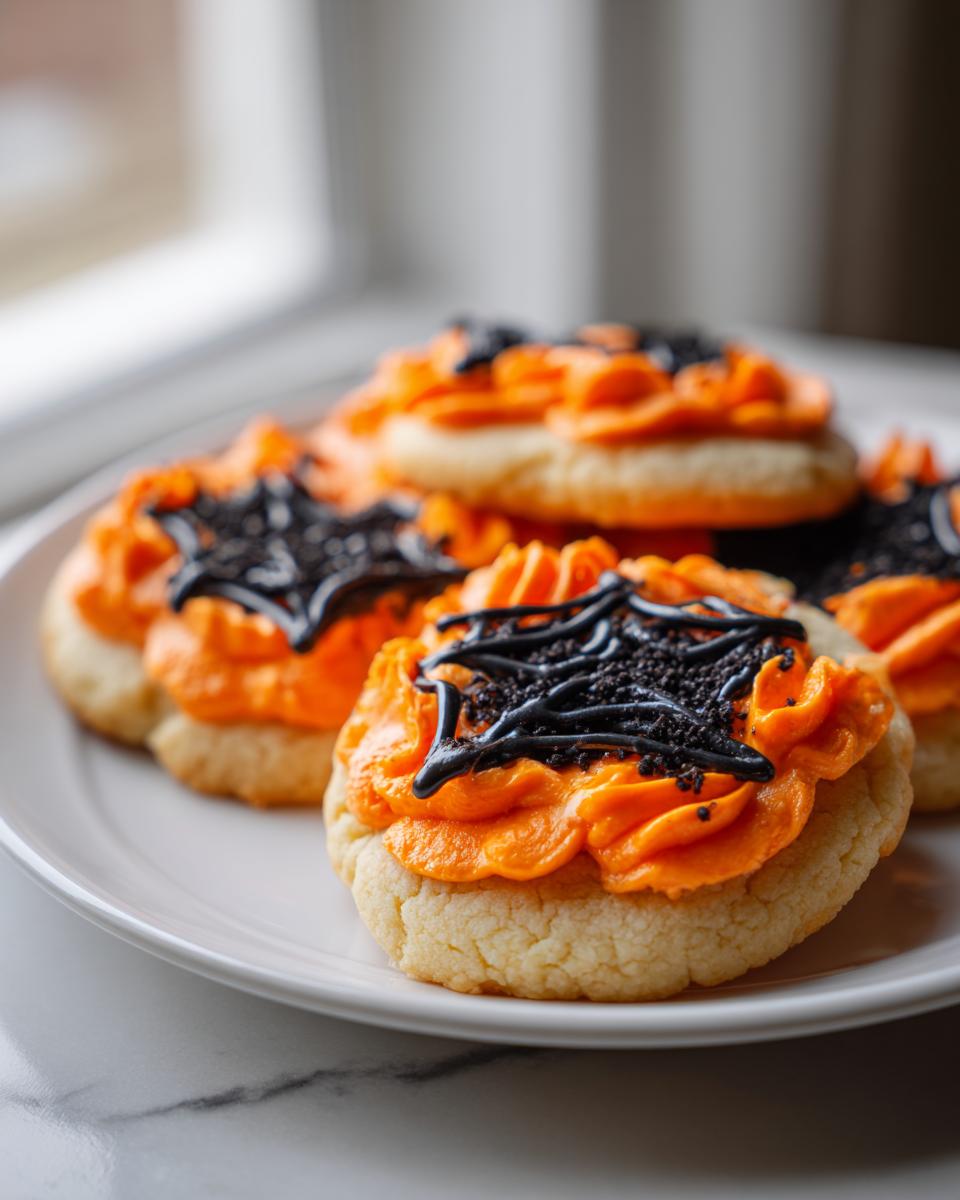
- 1/4 cup orange frosting – Store-bought or homemade, both work great. I keep those little tubes in my emergency baking drawer for occasions just like this
- 1/4 cup black frosting – Warning: this one stains everything! But that’s part of the Halloween fun, right?
See? Told you it was simple! The first time I made these, I couldn’t believe how such basic stuff could create such cute little Halloween treats. Now I always keep extra frosting on hand for those “Oh no, I need treats TOMORROW?!” moments.
How to Make Easy Halloween Desserts
Okay, let’s get spooky! I’ll walk you through how I make these easy Halloween desserts – it’s so simple you’ll be decorating creepy cookies before you can say “Boo!” Here’s my foolproof method that even works when you’re multitasking (like when I accidentally set off the smoke alarm while helping with last-minute costumes…a story for another time).
Crafting the Cookie Base
First, grab that butter you set out to soften (or nuked for 10 seconds like I usually do – no judgment here). Toss it in a bowl with the sugar and mix until it looks like fluffy clouds. Don’t overthink it – just beat until it’s well combined. Then gently stir in your flour until a soft dough forms.
Here’s my secret weapon: roll the dough between your palms to make walnut-sized balls, then gently press them down with your fingers. Not too flat – they’ll spread a bit while baking. Pop them in the oven at 350°F for exactly 10 minutes. I set my phone timer because inevitably, my neighbor will start telling me about their Halloween party plans right when I should be checking the oven!
Decorating Like a Pro (Sort Of)
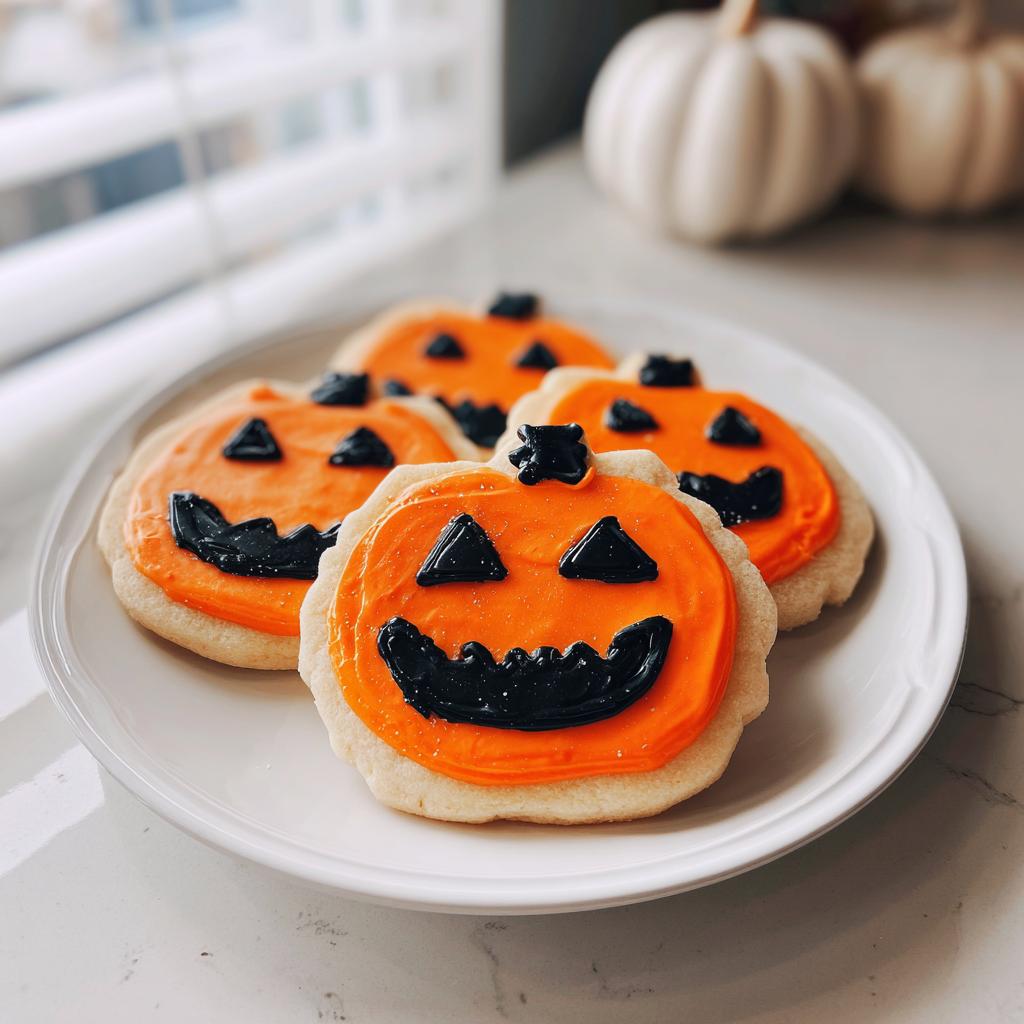
Once your cookies cool (this is crucial – hot cookies make melty frosting ghosts!), get your frosting ready. I like to put my colored frostings in sandwich bags and snip the corners for instant piping bags – way easier than breaking out fancy tools when you’re covered in glitter from DIY decorations!
For jack-o’-lanterns, I make a quick circle with orange frosting, then use the black for triangle eyes and a goofy grin. My trick? Start with dots for eyes before connecting them – much easier than trying to pipe a perfect triangle in one go. If you mess up (like my famous “zombie cookie” from last year), just smear it and call it abstract Halloween art!
Want another ultra-easy idea? Try these Halloween dirt cups we made last week – same playful spirit, even less effort. But honestly, these cookies disappear so fast at parties, I usually make a double batch while blasting the Monster Mash. Happy baking, you terrifying chef, you!
Tips for Perfect Easy Halloween Desserts
After making these cookies more times than I can count (usually while half-dressed in a last-minute costume), I’ve picked up some foolproof tricks. First, store your decorated treats between layers of parchment paper in an airtight container – they’ll stay fresh for up to 5 days this way. If you’re in a real pinch, grab refrigerated sugar cookie dough and just focus on the fun decorating part!
My favorite frosting hack? Add a tiny drop of corn syrup to store-bought frosting to make it extra smooth for piping. And if your black frosting starts looking gray (it happens to the best of us), stir in a bit more black gel food coloring until it’s properly spooky-dark. Trust me, these little tricks make all the difference between “homemade with love” and “oh no, what happened?”
Variations for Easy Halloween Desserts
Oh, the possibilities with these little spooky sweets! I love how you can change them up based on whatever Halloween madness you’re feeling. Last year, I got carried away watching zombie movies and ended up making “bloody” versions with red gel frosting – totally gross but the kids went wild for them!
Here are some of my favorite ways to mix it up:
- Spooky shapes: Skip the balls and roll the dough flat to cut out bats, ghosts, or witch hats. A cookie cutter set is great, but I’ve used a knife to make jagged “monster teeth” that looked awesomely creepy!
- Glow-in-the-dark: Look for edible glow dust (safety first!) at baking supply stores – my niece’s witch cookies actually glowed at her party!
- Candy explosion: Press mini M&Ms or chopped up candy bars into the dough before baking for a surprise inside. Or sprinkle crushed Oreos on the frosting for “dirt” effect.
- Monster mash: Try these monster rice krispie treats I made last week – same playful spooky vibes but with that classic crispy texture everyone loves.
Honestly? The only limit is your imagination (and how much frosting ends up on your face instead of the cookies). I once made an entire batch with just purple frosting and called them “alien cookies” when my spaceship cookies…didn’t look like spaceships. Halloween baking is supposed to be fun, not perfect – so get creative with it!
FAQs About Easy Halloween Desserts
Can I freeze these Halloween cookies?
Absolutely! I always freeze a batch after Halloween – partly because I make too many, and partly because December-me loves discovering spooky treats in the freezer. Just wrap cooled, undecorated cookies tightly in plastic wrap, then seal in a freezer bag. Frost after thawing – frozen frosting gets weirdly grainy (trust me, I learned the hard way). They’ll keep for up to 3 months, though mine never last that long!
How long do decorated Halloween cookies last?
Decorated cookies stay fresh in an airtight container for about 5 days at room temperature – if they last that long! The butter in the dough means they soften over time, but that actually makes them deliciously tender. Pro tip from my many frosting disasters: layer them with parchment paper so your ghost faces don’t smudge!
Can I use gluten-free flour for these treats?
You sure can! I’ve successfully made them with 1-to-1 gluten-free flour blends when my niece with celiac came trick-or-treating. The texture might be slightly more crumbly, so handle gently. My secret? Add 1/2 teaspoon xanthan gum if your blend doesn’t include it – helps everything stick together better. The decorating part works exactly the same, gluten-free or not!
Nutritional Information
Now, I’m not a nutritionist – I’m just a home cook who gets way too excited about Halloween treats! These numbers are rough estimates based on my ingredient choices, but yours might vary depending on your specific brands or any fun tweaks you make to the recipe. That said, each cookie generally contains about 150 calories, with most coming from that delicious butter and sugar combo that makes them so irresistible. Remember, Halloween is about fun, not fractions – so enjoy your spooky creations (maybe just don’t eat the whole batch in one sitting like I may or may not have done last year)!
More Halloween Treat Ideas
If these cookies got your Halloween creativity flowing, I’ve got more tricks (and treats!) up my sleeve! Last year, my sister dared me to make spooky mummy hot dogs for her party – turns out wrapping crescent roll dough around hot dogs is not only easy, but hilarious when the “bandages” come out lopsided. They were such a hit I now make them every year – check out my mummy hot dogs recipe for this ridiculously easy crowd-pleaser.
When I’m not covered in frosting or unraveling mummy dogs, I love making “witches’ fingers” cookies (just shape the dough skinny and add almond nails) or monster rice krispie treats dyed neon green. The beauty of Halloween treats? The more ridiculous they look, the better! What spooky creation will you try next?
Easy Halloween Desserts
Ingredients
Equipment
Method
- Preheat the oven to 350°F (175°C). Line a baking sheet with parchment paper.
- In a mixing bowl, combine flour, sugar, and butter. Mix until a dough forms.
- Roll the dough into small balls and place them on the baking sheet. Flatten slightly with your hand.
- Bake for 10 minutes or until the edges are lightly golden. Let cool completely.
- Decorate the cookies with orange and black frosting to create Halloween designs.